
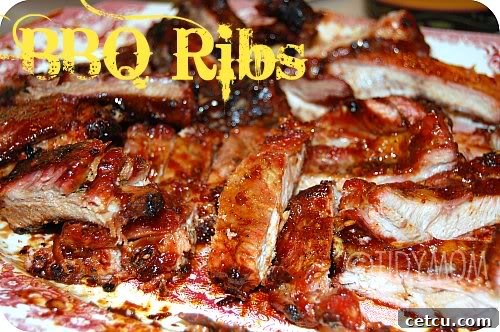
What truly embodies the spirit of summer more profoundly than the irresistible aroma and succulent taste of perfectly cooked BBQ Ribs?
For many home cooks, the thought of preparing BBQ ribs can seem daunting, conjuring images of complex techniques and endless hours tending to a hot grill. However, the truth is, crafting fall-off-the-bone ribs that burst with flavor is incredibly straightforward, especially when you’re armed with the right knowledge and a simple, yet revolutionary, “secret tool.” Join us as we demystify the art of grilling perfect ribs, transforming you into a confident backyard BBQ master!
Mastering Melt-in-Your-Mouth, Finger-Licking BBQ Ribs: The Ultimate Guide
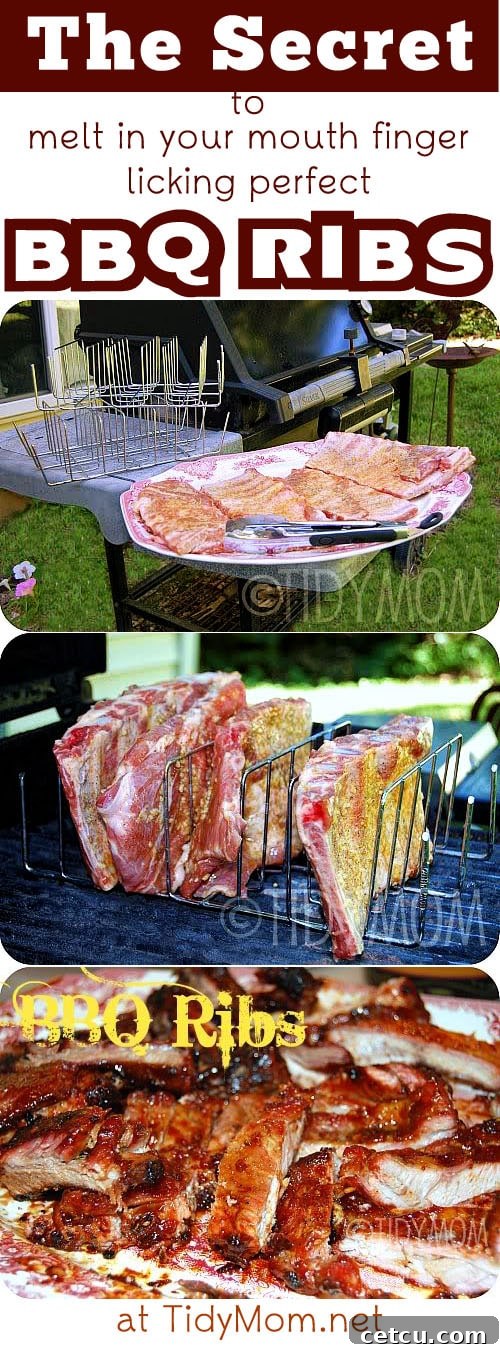
Why BBQ Ribs Are the Undisputed King of Summer Cuisine
There’s an undeniable allure to perfectly cooked BBQ ribs. That rich, smoky aroma wafting through the air, the succulent meat practically dissolving in your mouth, and the delightful mess of sticky fingers – it’s an experience synonymous with warm weather, outdoor gatherings, and pure culinary bliss. While many believe achieving this level of perfection requires years of pitmaster experience, we’re here to tell you that it’s an attainable goal for any home cook. Forget the guesswork and common pitfalls; with a few insider tips and our special tool, you’ll be serving up ribs that are the envy of every backyard barbecue, leaving your guests utterly impressed.
The beauty of homemade BBQ ribs lies not just in their incredible taste, but also in the satisfaction of creating something truly special for your loved ones. It’s a dish that brings people together, fostering conversations and creating lasting memories around the grill. Get ready to elevate your grilling game and become renowned for your irresistible ribs!
Choosing Your Canvas: Understanding Different Rib Cuts
Before diving into the cooking process, it’s essential to understand the different types of pork ribs available, as each offers a unique texture and flavor profile. While baby back ribs are popular for their leaner meat and quicker cooking time, many barbecue aficionados swear by the robust flavor and generous meatiness of spare ribs, and more specifically, their refined cousin:
St. Louis Style Ribs: The Pitmaster’s Preferred Choice
St. Louis style ribs are essentially spare ribs that have been expertly trimmed and squared off into a more uniform, rectangular shape. This trimming process involves removing the cartilaginous sternum bone and the tough flap of meat (often called the skirt meat or rib tips), resulting in a cleaner, flatter slab of meat. This specific cut makes them not only visually appealing but also ideal for even cooking and easier slicing once they’re off the grill.
What truly sets St. Louis style ribs apart is their exceptional marbling and deeper, more intense flavor compared to leaner baby back ribs. They offer a more satisfying, meatier bite that truly captures the essence of classic American barbecue. They are often preferred by competitive pitmasters and home chefs alike for their perfect balance of meatiness and fat, which renders down beautifully during the low-and-slow cooking process, contributing to unparalleled tenderness, juiciness, and a rich, savory taste.
Gathering Your Arsenal: Essential Ingredients for Flavorful Ribs
Beyond your chosen rack of premium St. Louis style ribs, a few simple yet powerful ingredients are all you need to build a foundation of incredible flavor. Starting with quality ingredients, even in their simplicity, makes a significant difference in the final taste and texture of your ribs:
- Olive Oil: A light coating of olive oil acts as a perfect binder for your seasonings, ensuring they adhere beautifully to the meat. It also contributes a subtle richness and helps to keep the ribs moist during the initial cooking phase, preventing them from drying out.
- Minced Garlic: Freshly minced garlic is a fundamental aromatic that infuses the meat with a pungent, savory flavor. It forms the perfect base for your rub and eventually complements the sweetness of the BBQ sauce, creating layers of taste.
- Seasoned Salt and Freshly Ground Black Pepper: These fundamental seasonings are crucial for enhancing the natural flavors of the pork. Don’t be shy; a generous and even application creates a delicious, savory crust that locks in moisture and adds depth to every bite.
- Your Favorite BBQ Sauce: While there are countless excellent sauces available, we particularly recommend Sweet Baby Ray’s for its classic, well-balanced profile of sweet, smoky, and tangy notes. Feel free to experiment with your preferred brand or even a homemade sauce that reflects your personal taste.
- Aluminum Foil Pan: This disposable pan serves a dual purpose that is vital for perfect ribs. Firstly, it collects all the delicious drippings, making cleanup incredibly easy. More importantly, when filled with liquid, it creates a steamy environment within your grill, ensuring your ribs remain incredibly tender and moist throughout the long cooking process.
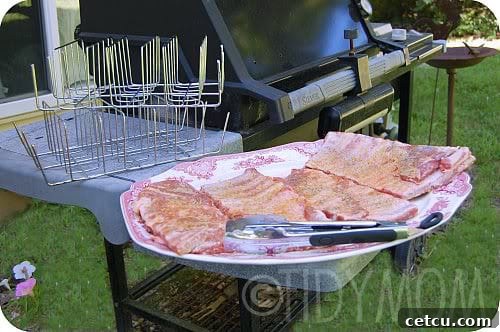
The “Secret Tool” Revealed: The Game-Changing Magic of Rib Racks
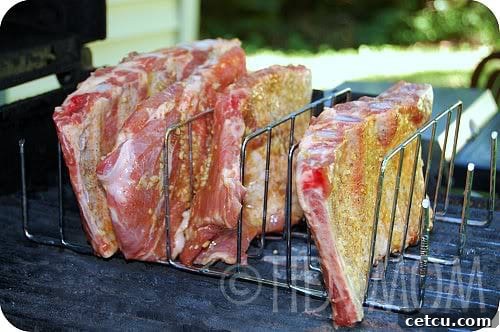
Many home grillers attempt to cook ribs flat on the grill grates, often leading to uneven cooking, cramped grill space, and frustratingly burnt spots. This is where our “secret tool” comes into play – the humble yet incredibly effective Rib Rack! Once you try cooking with a rib rack, you’ll wonder how you ever managed without one. These ingenious devices completely transform the grilling experience, making it easier than ever to achieve restaurant-quality results in your own backyard.
This post may contain affiliate links. Please read my disclosure policy here.
Key Benefits of Using a Rib Rack for Superior Grilling:
- Maximizes Grill Space: Rib racks allow you to stand multiple slabs of ribs vertically, instantly freeing up significant space on your grill grates. This means you can cook more ribs at once, perfect for feeding a crowd, or leave ample room for other delicious accompaniments like corn on the cob or grilled vegetables.
- Promotes Even Cooking: By holding the ribs upright and separated, rib racks ensure that heat circulates evenly around each slab. This eliminates common hot spots and cold spots, resulting in consistently cooked, tender meat from end to end, with no undercooked or overcooked sections.
- Prevents Burning and Charring: Direct contact with scorching hot grill grates can lead to charring or burning, especially during the longer cooking times required for ribs. Rib racks lift the ribs slightly, providing a crucial buffer and significantly reducing the risk of undesirable scorching, while still allowing for that delicious smoky flavor to penetrate the meat.
- Facilitates Easier Handling: Moving full, slippery slabs of ribs around a hot grill can be cumbersome and messy. Rib racks make it simple to place, turn, and remove the ribs safely and efficiently, minimizing the risk of drops or burns.
Our preferred rib racks comfortably fit three rib halves, but with a bit of clever positioning, you can often squeeze in up to five. For a standard pack of four rib halves, one rack is usually sufficient, making it an incredibly convenient and space-saving solution for any grilling enthusiast.
The Journey to Perfection: A Step-by-Step Grilling Guide
Step 1: Prepare Your Ribs for Optimal Tenderness
The first critical step, often overlooked by novice grillers, is removing the thin, silvery membrane on the back of the ribs. This tough connective tissue can become unpleasantly chewy when cooked, hindering the melt-in-your-mouth tenderness of your final product. To remove it efficiently:
- Locate a corner of the membrane on the underside (bone side) of the rib rack.
- Gently pry it up with the tip of a butter knife or a spoon, working your way under until you can grasp it.
- Once you have a small section lifted, grip it firmly with a paper towel (this provides much better traction) and pull it slowly but steadily across the entire rack. It should come off in one single, satisfying piece.
After the membrane removal, cut your full slabs of ribs in half. This makes them much easier to handle, fit perfectly into the rib rack, and later, to serve. Now, generously rub all sides of the ribs with olive oil, ensuring every surface is coated. Follow this with the freshly minced garlic, spreading it evenly. Finally, season liberally with your seasoned salt and freshly ground black pepper. Don’t be shy with the seasoning – this is where much of your foundational flavor will come from, building a delicious crust and permeating the meat.
Step 2: Set Up Your Grill for Perfect Indirect Heat
Indirect heat is paramount for achieving tender, juicy ribs without burning them. This “low and slow” method allows the connective tissues to break down gradually. Here’s how to set it up:
- For Gas Grills (like our Weber): Arrange your burners so that one side is on low/medium heat (or off), and the other side (where the ribs will sit) is completely off. The heat from the lit burners will circulate, creating an oven-like environment.
- For Charcoal Grills: Bank your hot coals to one side of the grill, leaving an empty space on the opposite side for the ribs.
Next, place an aluminum foil pan directly below where your ribs will cook (on top of the flavorizer bars for a gas grill, or directly on the grates over the unlit side for charcoal). Fill this pan with about an inch of liquid – water, beer, apple juice, or even a mix of water and apple cider vinegar. This liquid will evaporate during cooking, creating a moist, steamy environment that helps tenderize the ribs and keeps them from drying out, while also conveniently catching any drippings for easier cleanup.
Preheat your grill to maintain a consistent temperature between 225°F and 250°F (107°C to 121°C). Use an accurate grill thermometer, as maintaining this steady, low temperature is the key to achieving that coveted fall-off-the-bone texture.
Step 3: The Initial Slow Cook for Unparalleled Tenderness
Once your grill is at the target temperature, carefully place your seasoned rib halves into the rib racks. Arrange the racks over the indirect heat zone of your grill, ensuring they are not directly over an active flame. Close the lid and cook for approximately one hour and 15 minutes. During this phase, resist the urge to constantly lift the lid, as this releases valuable heat and moisture, extending the cooking time and potentially drying out your ribs. Let the grill do its work in peace!
Step 4: The Saucing & Finishing Touches for a Perfect Glaze
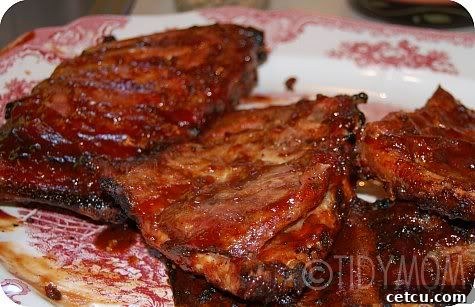
After the initial cooking period, carefully remove the rib racks from the grill. Transfer the ribs to a platter. Now, it’s time to generously slather all sides of each rib half with your favorite BBQ sauce. Don’t be timid! An even, thick coating will create that beautiful, caramelized glaze that is synonymous with exceptional BBQ ribs. Use a basting brush to ensure full coverage.
Once thoroughly sauced, gently return the ribs to the rack and place them back on the grill over indirect heat. Continue to cook for another 30 minutes, or until the meat has pulled back about a quarter-inch from the end of the bones. This gap indicates they are exquisitely tender and ready. The sauce should be nicely caramelized and slightly sticky, but not burnt. Keep a close eye on them during this final stage to prevent scorching.
The Grand Finale: Resting, Slicing, and Savoring Every Bite
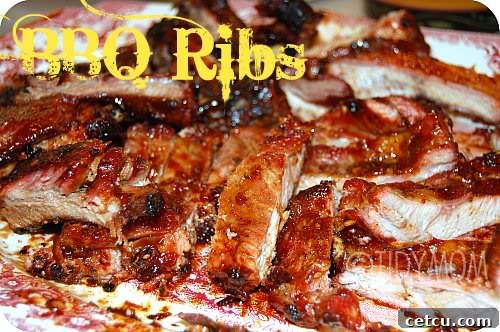
Once your ribs have reached their peak tenderness and saucy perfection, carefully remove them from the racks and transfer them to a clean platter. This next step is crucial for juicy results: allow the ribs to rest for 10-15 minutes, lightly tented with foil. This resting period allows the juices within the meat to redistribute throughout the fibers, ensuring every bite is incredibly succulent and bursting with flavor. Skipping this step often results in drier ribs.
After resting, use a sharp, sturdy knife to cut the individual rib portions. Arrange them artfully on a large serving platter, perhaps with an extra side of warm BBQ sauce for dipping. Now, gather your loved ones, roll up your sleeves, and ENJOY the delicious fruits of your labor – perfectly tender, smoky, and utterly delicious BBQ ribs that will be the highlight of your summer meal!
Cleaning Up Your Grilling Gear with Ease
Don’t dread the post-BBQ cleanup! One of the many advantages of using high-quality rib racks is their exceptional ease of maintenance. Most rib racks are designed for simple cleaning; a quick scrub with warm, soapy water and a brush is usually sufficient to remove any residue. Even better, many models are completely dishwasher safe, making post-grilling cleanup an absolute breeze. Always ensure your rib racks are thoroughly dry before storing to prevent any rust or corrosion, ensuring they’ll be ready for your next barbecue adventure.
Elevate Your BBQ Experience: Perfect Serving Suggestions
No rack of perfectly grilled ribs is truly complete without a selection of classic BBQ side dishes. To create a well-rounded and unforgettable summer meal, consider pairing your tender, smoky ribs with some delicious accompaniments. Creamy coleslaw offers a refreshing crunch, tangy potato salad provides a comforting complement, sweet corn on the cob adds a burst of freshness, and hearty baked beans round out the meal with their rich, savory goodness. These complementary flavors and textures create a complete and satisfying spread that your family and friends will rave about long after the last rib is devoured.
Connect With Our Vibrant Community!
Are you hungry for even more culinary inspiration, clever home tips, or creative ideas to enhance your everyday life? We warmly invite you to join our vibrant online community! We’ve created a special, engaging group on Facebook where fellow enthusiasts gather to share their favorite recipes, exchange invaluable kitchen hacks, discuss grilling techniques, and explore all things delicious and creative. It’s a wonderful, supportive space to ask questions, get fresh ideas, and stay updated with the latest from TidyMom.
Click HERE to request to join our Tidy, Tasty, & Creative Facebook Group – we can’t wait to welcome you into our growing family!
Don’t forget to follow me on Instagram for daily inspiration! Share your TidyMom-inspired culinary creations and clever tips by tagging #tidymom so I can see and celebrate your wonderful work and feature it to our community!
Stay connected and find more inspiration with TidyMom across all our platforms:
Facebook | Twitter | Pinterest | Instagram
For exclusive recipes, insightful tips, and exciting updates delivered straight to your inbox, sign up for our free email subscription:
FREE EMAIL SUBSCRIPTION

We sincerely hope this comprehensive guide empowers you to confidently grill the most incredible, melt-in-your-mouth BBQ ribs you’ve ever tasted. May your summer be filled with delicious food, happy gatherings, and the unmistakable flavor of perfect ribs. Happy grilling!