
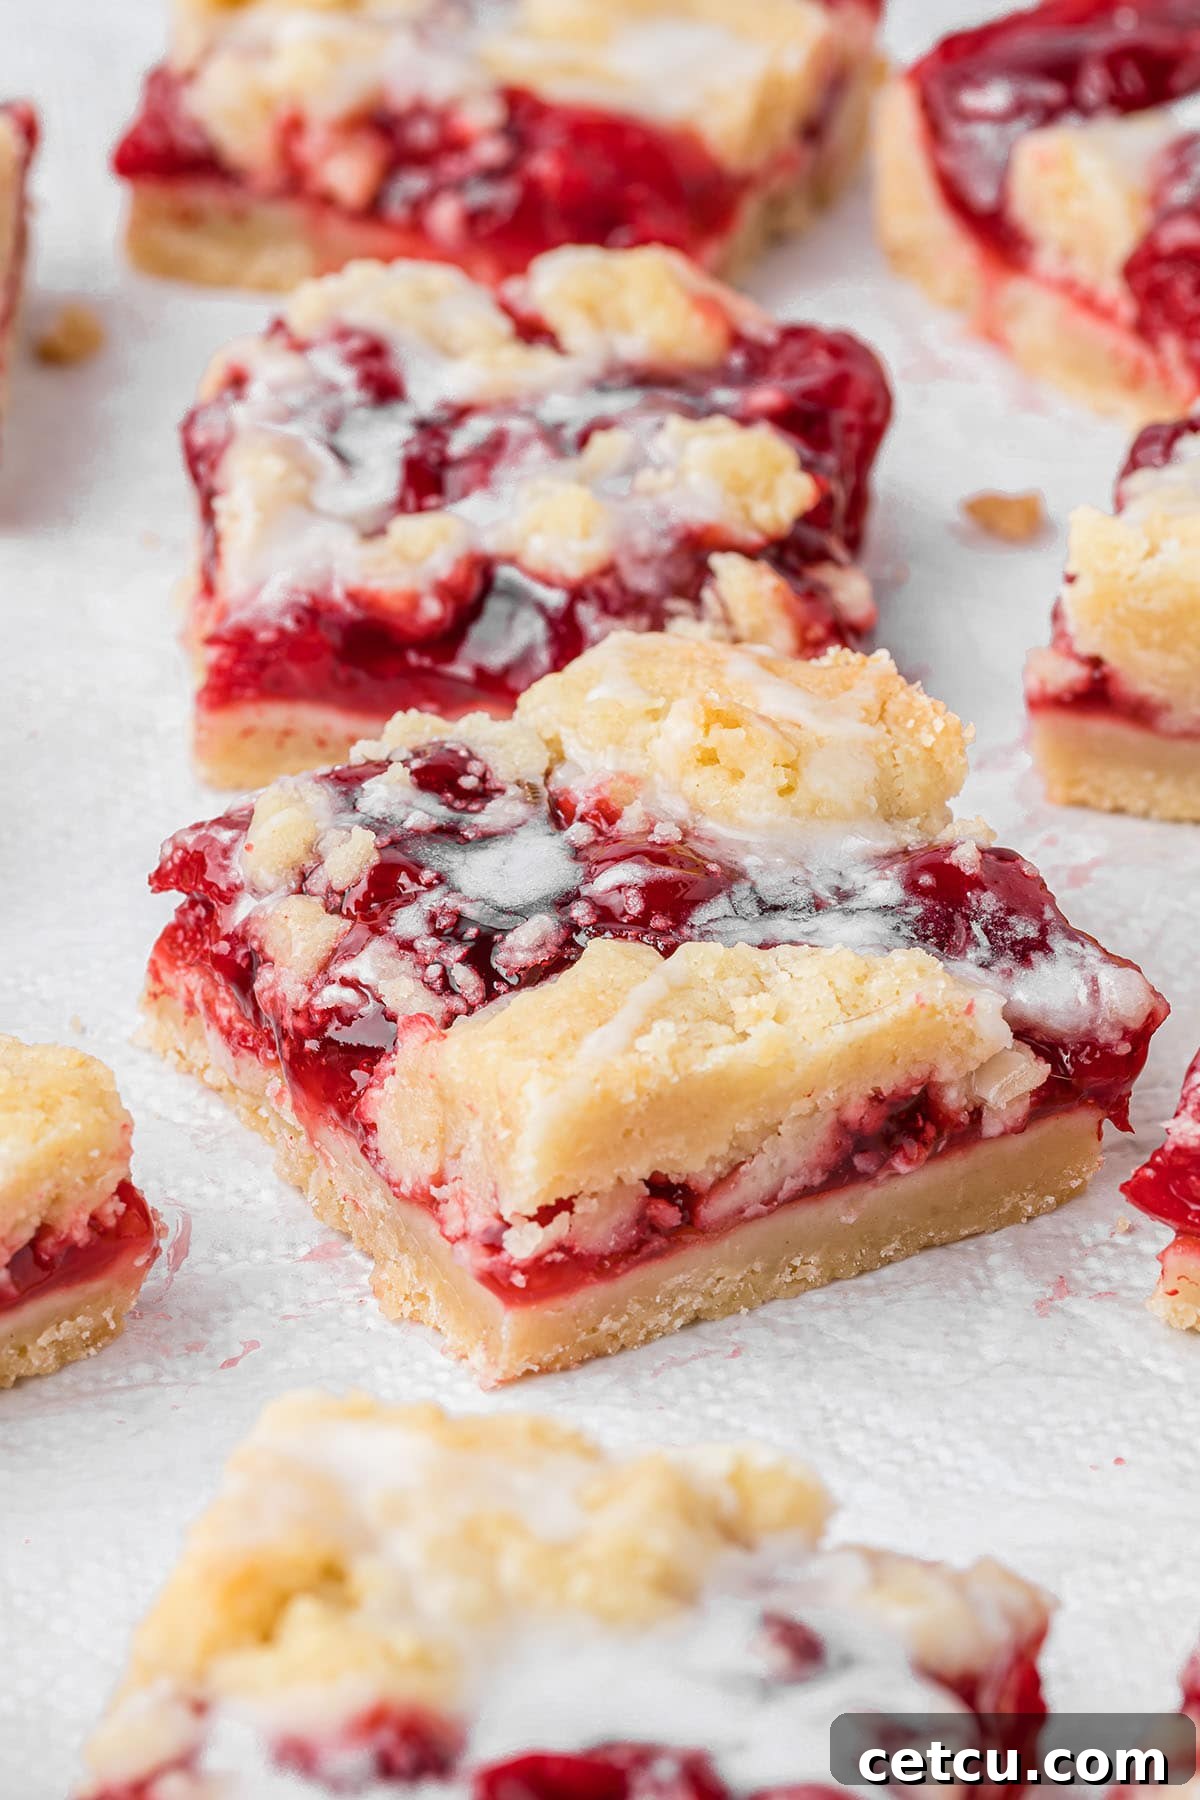
Welcome, dessert enthusiasts! Prepare to discover your new favorite treat: Cherry Pie Bars. Imagine the classic, beloved taste of homemade cherry pie, but with half the effort and double the convenience. These irresistible bars feature a rich, buttery shortbread crust, a luscious layer of plump, juicy cherries, and are elegantly finished with a sweet, creamy almond glaze. They’re easy to make, impossible to resist, and truly a delight in every bite!
Homemade dessert squares are the ultimate solution for any sweet craving, offering quick preparation and convenient serving, perfect for any season or celebration. If you adore these quick-fix treats, you’ll also love exploring other reader favorites like Strawberries & Cream Magic Bars, Hazelnut Energy Bars, Hello Dollies, and Sugar Cookie Bars. These easy, time-saving desserts prove that convenience doesn’t mean compromising on incredible flavor!
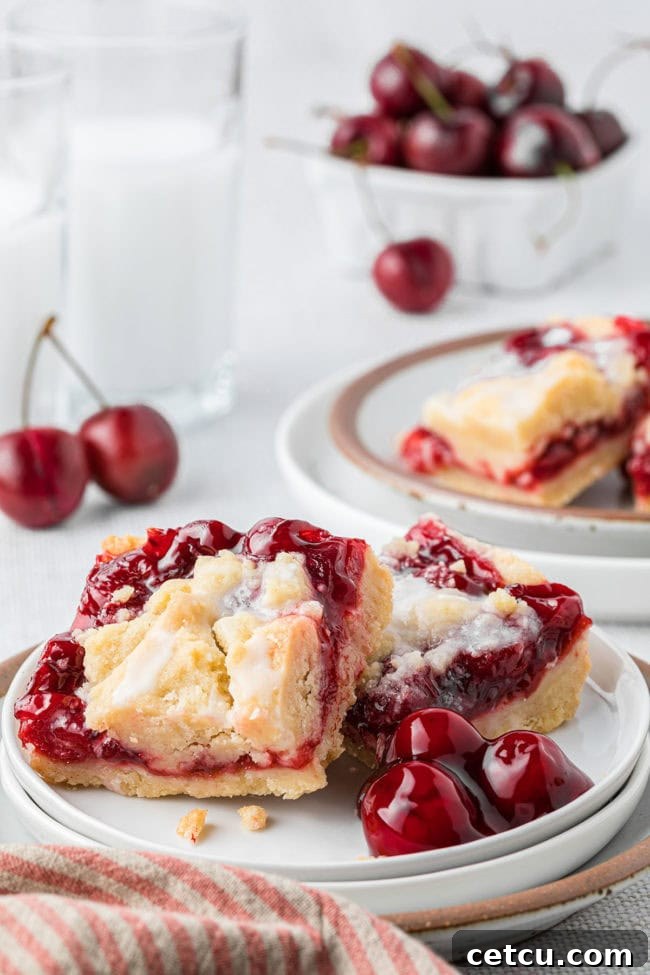
Table of Contents
Why We Love These Easy Cherry Pie Bars
These delightful Cherry Pie Bars have quickly become a staple for many home bakers, and it’s easy to see why. They capture all the comfort and joy of a traditional cherry pie, but with a streamlined process that fits perfectly into a busy schedule. Here are just a few reasons why this recipe is a true winner:
- Time-Saving Convenience: Craving that classic cherry pie flavor but don’t have hours to spend? This recipe is your answer! With only about 15 minutes of active prep time and a quick 20-30 minute bake, you get all the deliciousness of cherry pie in a fraction of the time. It’s perfect for last-minute dessert needs or when you simply want a quick indulgence.
- Irresistible Flavor Profile: Each bar is a symphony of textures and tastes. You’ll savor the sweet-tart burst of plump cherries, perfectly balanced by the rich, buttery, and slightly crumbly shortbread crust. The delicate almond drizzle adds an extra layer of nutty sweetness, elevating the entire experience. It’s a flavor combination that truly satisfies!
- Ideal for Sharing and Crowds: Pre-cut cherry dessert squares are inherently shareable, making them an excellent choice for any gathering. Whether it’s a casual backyard BBQ, a festive picnic, a potluck, or a holiday party, these bars are easy to transport and serve. No slicing messy pies, just grab-and-go deliciousness that everyone will adore.
- Endless Customization Options: While cherry is a classic, the versatility of this recipe allows you to explore other delightful fruit flavors. Easily swap the cherry pie filling for blueberry, peach, raspberry, or even cinnamon apple pie filling to suit your preference or the season. Each variation promises a unique yet equally delicious experience.
- Double the Delight for Larger Gatherings: Planning for a bigger crowd? This recipe scales up effortlessly! Simply double all the ingredients and bake in a larger 10×15-inch sheet pan (or similar size) to yield plenty of bars, ensuring there’s enough to go around for everyone to enjoy.
- Beginner-Friendly Baking: Don’t be intimidated if you’re new to baking! This recipe is incredibly straightforward, utilizing simple ingredients and easy-to-follow steps. It’s a fantastic entry point for aspiring bakers to create something impressive and delicious with minimal fuss.
- Perfect for Any Occasion: From casual weeknight desserts to elegant holiday spreads, these cherry pie bars fit right in. Their charming appearance and delightful taste make them suitable for everything from school bake sales to sophisticated tea parties.
Cherry Pie Bar Recipe Ingredients
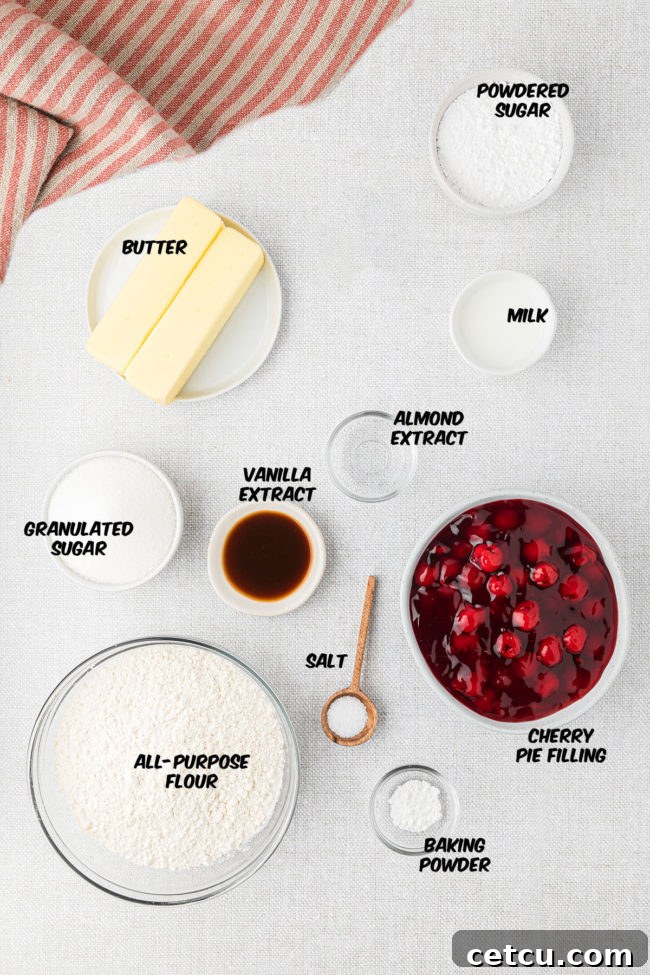
One of the best features of these easy cherry pie bars is how simple the ingredient list is. Combining basic pantry staples with the sheer convenience of canned cherry pie filling, you can whip up a truly delicious sweet treat that’s hard to beat. It’s the perfect go-to for a last-minute homemade dessert recipe that tastes like it took all day to make.
For precise measurements and the full recipe, please refer to the detailed printable recipe card located at the bottom of this post.
Dessert Bar Ingredients:
- Unsalted Butter: Ensure your butter is softened to room temperature, but not melted. This is crucial for achieving that light, fluffy, and perfectly tender shortbread crust. Softened butter creams beautifully with sugar, incorporating air for a delicate texture. Using unsalted butter allows you to control the exact amount of salt in your recipe.
- Granulated Sugar: White granulated sugar provides the essential sweetness and helps create a crisp, golden-brown crust. It also aids in the creaming process with the butter.
- Vanilla Extract: A staple in most baked goods, high-quality vanilla extract enhances the overall flavor profile, adding warmth and depth that complements the cherry and almond notes.
- Almond Extract: This is the secret ingredient that truly elevates these bars, giving them a distinct, sophisticated taste reminiscent of classic cherry desserts. Opt for a good quality pure almond extract for the best results.
- All-Purpose Flour: The foundation of our buttery shortbread crust. For consistent and accurate baking, measuring flour by weight (e.g., 4.2 oz or 120 gm per cup) is highly recommended. If you don’t have a kitchen scale, remember to fluff your flour, spoon it gently into your measuring cup, and then level it off with a straight edge to avoid packing too much in.
- Baking Powder: A leavening agent that gives the shortbread crust a slight lift and tender texture, making it less dense than a traditional shortbread cookie but still perfectly crisp. Always check its expiration date for freshness to ensure proper activation.
- Salt: A small amount of salt is vital for balancing the sweetness and enhancing all the other flavors in the crust. It brings out the best in the butter and cherries.
- Cherry Pie Filling: The star of the show! A standard 21-ounce can of pre-made cherry pie filling makes this recipe incredibly quick and easy. Feel free to use your favorite brand. This is where you can also experiment with other fruit pie filling flavors like apple, blueberry, or peach for delightful variations.
For Almond Drizzle:
- Powdered Sugar: Also known as confectioners’ sugar, this finely ground sugar dissolves smoothly and effortlessly, creating a silky, lump-free icing drizzle that sets beautifully.
- Almond Extract: Echoing the flavor in the crust, almond extract in the glaze intensifies that delightful nutty aroma and taste, tying all the flavors together. For the most authentic and vibrant taste, choose real almond extract whenever possible.
- Milk: Whole milk is often considered the ideal choice for sugar glazes, striking the perfect balance for a luscious consistency. However, you can adjust to your preference: use water or skim milk for a thinner, more delicate drizzle, or opt for heavy cream to achieve a richer, thicker, and more decadent icing that truly makes a statement.
How To Make Easy Cherry Pie Bars
For precise measurements and the full recipe, please consult the detailed recipe card at the bottom of the page.
Crafting these delectable cherry pie bars is a straightforward process, making them accessible for bakers of all skill levels. Here’s a step-by-step guide to bring this sweet treat to life:
- Prepare Your Pan and Oven: Begin by preheating your oven to 350°F (175°C). Next, prepare a 9-inch square baking pan. Line the pan with parchment paper, allowing a 1-2 inch overhang on two sides. This overhang will serve as convenient “handles” later, making it effortless to lift the baked bars out for slicing. Lightly grease the parchment paper with cooking spray to prevent sticking.
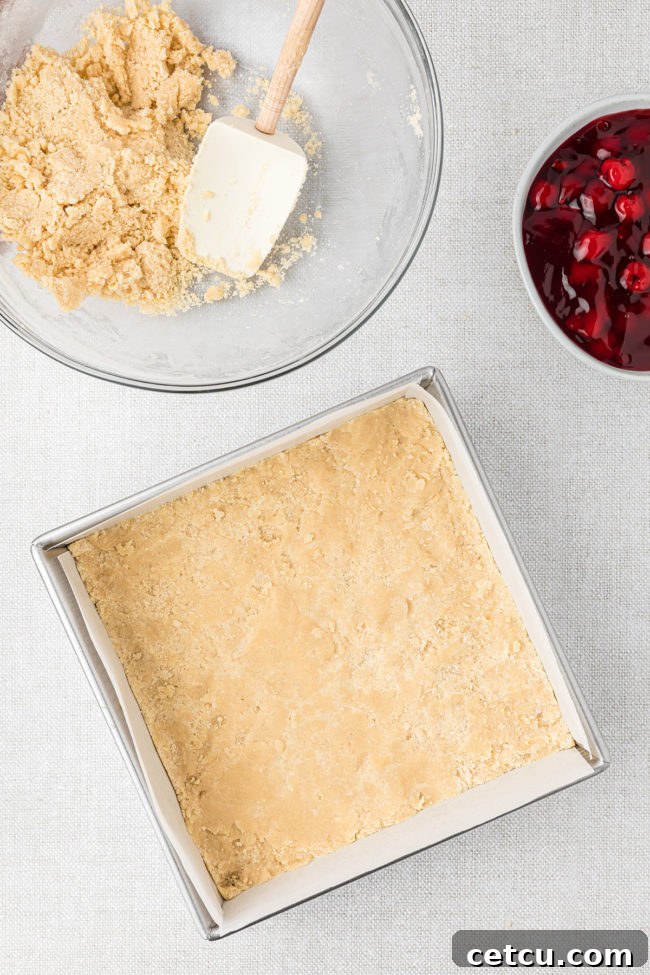
- Create the Shortbread Dough: In a large mixing bowl, using an electric mixer, cream together the softened unsalted butter and granulated sugar until the mixture is visibly light, pale, and fluffy. This typically takes 2-3 minutes. Incorporate the vanilla extract and almond extract, mixing until they are fully blended and the mixture is smooth. Gradually add the all-purpose flour, baking powder, and salt. Mix on low speed until just combined. At this stage, the dough will appear crumbly, which is perfectly normal. It will come together easily when pressed.
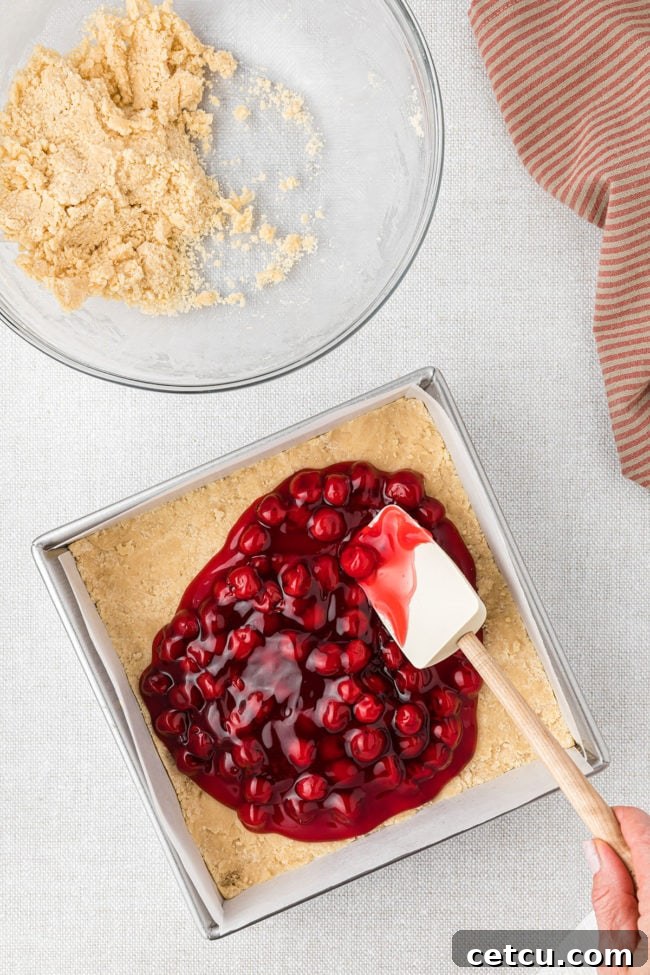
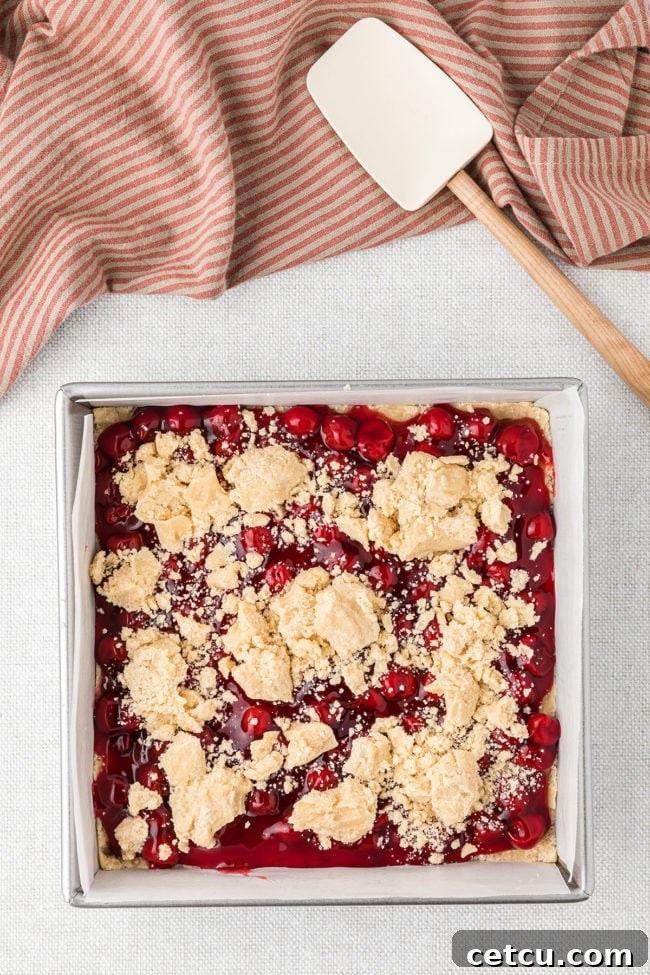
- Assemble the Layers: Take approximately two-thirds of the shortbread dough mixture and press it firmly and evenly into the bottom of your prepared 9-inch square pan. You can use lightly wet hands, a piece of parchment paper, or even plastic wrap over the dough to help press it down smoothly. Once the base crust is formed, carefully spread the entire can of cherry pie filling over the shortbread crust in an even layer. Then, take the remaining one-third of the dough and crumble it in small, spaced-out spoonfuls over the cherry filling. Aim for a relatively even distribution, leaving a little space between the dollops for that charming streusel-like topping effect.
- Bake to Golden Perfection: Place the assembled bars into your preheated oven and bake for 20-30 minutes. The bars are ready when the shortbread topping is beautifully golden brown and, if gently pressed with a fingertip, it doesn’t leave an indent, indicating it’s fully cooked through. Remove the pan from the oven and transfer it to a wire rack to cool completely. This cooling step is essential before glazing and slicing.
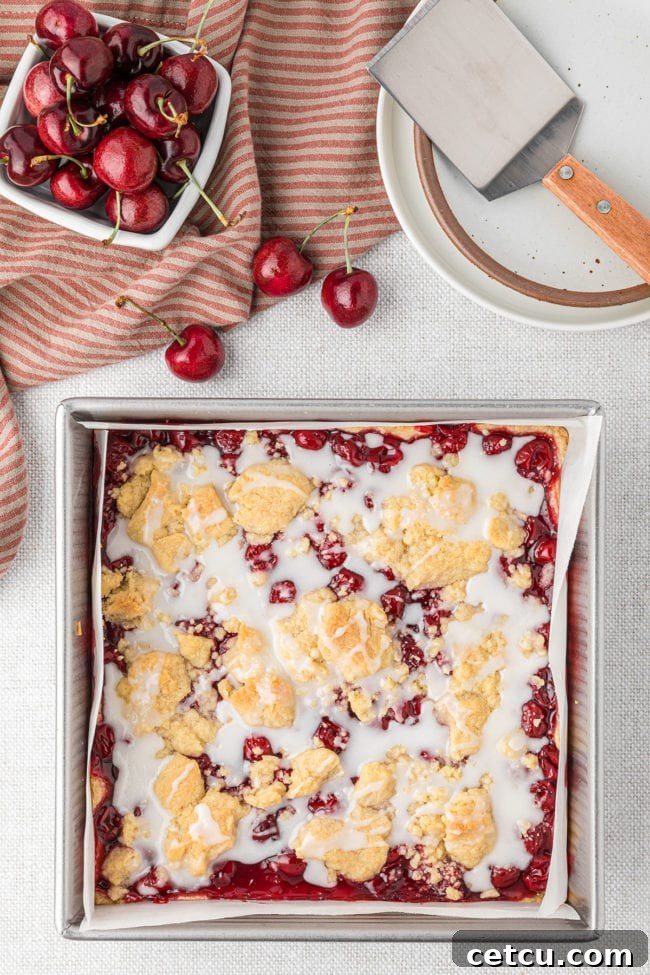
- Glaze and Chill: Once the cherry pie bars have cooled completely to room temperature, it’s time for the finishing touch. Prepare your almond glaze (instructions below). Drizzle the smooth almond glaze generously over the cooled bars. To allow the glaze to set properly and firm up, place the entire pan in the refrigerator for 10-15 minutes. This brief chill also helps the bars achieve a clean, crisp cut.
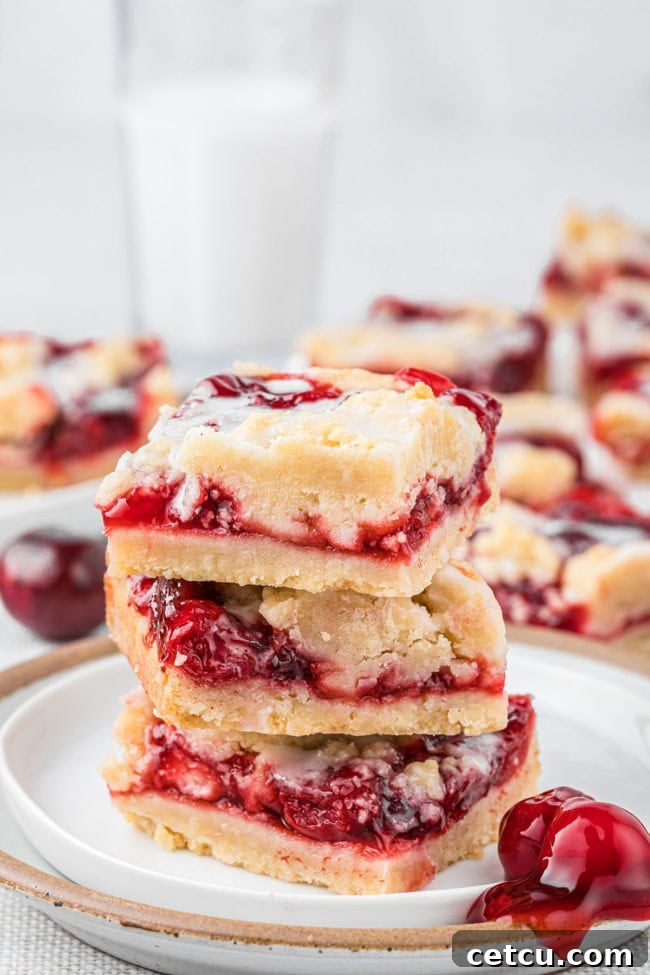
- Slice and Serve: Once chilled, use the parchment paper overhang “handles” to gently lift the entire slab of cherry pie bars out of the pan and onto a clean cutting board. Using a sharp knife, slice the bars into 16 equal squares. These delightful bars can be enjoyed chilled straight from the refrigerator or at room temperature.
Glaze Drizzle
Creating the perfect almond drizzle is quick and easy, adding a touch of elegance and flavor to your bars.
- In a small bowl, whisk together the powdered sugar, almond extract, and milk. Start with the recommended amount of milk and mix until smooth.
- Adjust the consistency as needed: If the glaze is too runny, add a little more powdered sugar, a tablespoon at a time, until it reaches your desired thickness. If it’s too thick, add a tiny splash more milk (or water), stirring well after each addition, until you achieve a pourable but not watery consistency. You’re looking for a consistency that coats the back of a spoon and drizzles easily.
Cherry Dessert Bars Prep + Baking Notes:
Ensuring your cherry pie bars turn out perfectly every time involves a few simple but crucial details. These notes will guide you through the process, from preparing your pan to knowing when your bars are perfectly baked.
- Parchment Paper Handles are Key: Don’t skip the step of lining your baking pan with parchment paper and leaving a 2-inch overhang on two opposite sides. These extended pieces of parchment act as convenient “handles” that allow you to effortlessly lift the entire slab of baked and cooled bars out of the pan. This prevents damage when removing them and makes clean, precise slicing much easier.
- Crumbly Dough is Normal: When you finish mixing the dry ingredients into the butter and sugar mixture, the dough will have a crumbly, sandy texture. This is exactly what you want for a shortbread base and topping! It might seem like it won’t hold together, but it will come together beautifully when you press it into the pan.
- Tips for Pressing the Dough: To get an even and compact shortbread crust, you have a few options for pressing the dough into the baking pan. You can use lightly wet hands to prevent sticking, or place a piece of parchment paper or plastic wrap over the dough and press it down with your hands or the bottom of a flat glass. This ensures a uniform base that bakes evenly.
- Spacing the Crumble Topping: When dropping the remaining dough over the cherry pie filling, try to keep a little space between the small dollops or crumbles. This allows the cherry filling to peek through slightly during baking, creating an appealing visual texture and ensuring some parts of the crumble topping get perfectly golden and crisp.
- Knowing When They’re Done: The cherry bars are fully baked when the edges of the shortbread crust are golden brown, and the crumbly topping also has a nice golden hue. To double-check, gently press the top of the shortbread crumble with your finger. If it springs back without leaving an indent, your bars are ready! Overbaking can make the crust too hard, while underbaking can result in a soggy crust.
- Cooling is Crucial for Structure: Resist the urge to cut into the bars immediately after taking them out of the oven. Allowing them to cool completely on a wire rack is essential. This gives the shortbread crust time to firm up and the cherry filling to set properly, ensuring clean, neat slices and the best possible texture.
Chef Tips for Perfect Cherry Pie Bars
Unlock the full potential of this recipe with these expert tips, designed to ensure your cherry pie bars are nothing short of spectacular.
- Achieving Perfectly Softened Butter: The consistency of your butter is paramount for the shortbread crust. Only soften butter until a gentle fingertip press leaves a slight indention, not a deep mark. If it’s too warm or melted, your dough will be oily and difficult to work with, resulting in a dense rather than tender crust.
- For a Silky Smooth Glaze: To prevent any lumps in your beautiful almond drizzle, always sift powdered sugar through a fine-mesh sieve before whisking it with the other glaze ingredients. This extra step ensures a perfectly smooth, professional-looking finish.
- Clean Slices and Set Filling: Patience is a virtue, especially in baking! For clean-edged slices and a properly set filling, it’s absolutely vital to let the cherry pie bars cool completely at room temperature, then refrigerate them for at least 15-30 minutes (or even longer) before cutting and serving. Trying to slice warm bars will lead to a gooey, messy outcome.
- Scaling for a Crowd: When entertaining a larger group, it’s incredibly easy to make cherry bars for a crowd. Simply double the entire recipe and bake it on a 10×15-inch sheet pan (or a similar size). Be mindful that baking times might slightly vary with a larger pan, so keep an eye on them for that golden-brown finish.
- Black Forest Variation: Elevate your cherry pie bars with a decadent Black Forest variation. Before adding the shortbread crumble topping, sprinkle a generous cup of dark chocolate chips or finely chopped dark chocolate shavings over the cherry pie filling. The rich dark chocolate pairs exquisitely with the tangy cherries and almond, creating a truly irresistible treat!
- Enhance with Spices: For an extra layer of warmth, consider adding a pinch of ground cinnamon or a tiny grating of fresh nutmeg to your shortbread crust dough. These spices beautifully complement the cherry and almond flavors.
- Serving Temperature Matters: Unlike traditional pie which is often served warm, these cherry pie bars are best enjoyed chilled or at room temperature. The chill helps them maintain their shape and provides a refreshing contrast to the sweet filling.
- Creative Topping Ideas: Beyond the almond glaze, consider other toppings! A dusting of powdered sugar, a dollop of fresh whipped cream, or a scoop of vanilla bean ice cream could take these bars to the next level. For a textural crunch, sprinkle some toasted sliced almonds over the glaze before it sets.
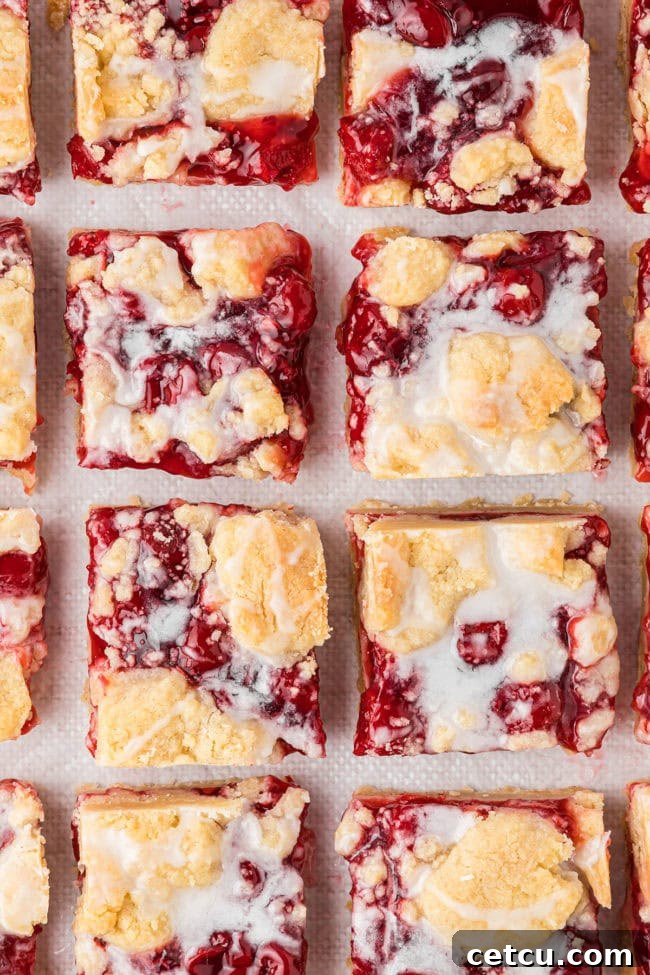
Serving Suggestions for Cherry Pie Bars
These versatile Cherry Pie Bars are delicious on their own, but a few simple additions can elevate them into a truly memorable dessert experience. Here are some ideas for how to serve them:
- Simply as Is: The bars are perfect straight out of the fridge or at room temperature, making them an excellent choice for a casual treat or a grab-and-go snack.
- A Dusting of Powdered Sugar: For a simple yet elegant touch, dust the bars lightly with additional powdered sugar just before serving.
- With Whipped Cream: A dollop of freshly whipped cream provides a light, airy contrast to the rich bars. For extra flavor, you can lightly sweeten the whipped cream with vanilla or a touch of almond extract.
- Alongside Ice Cream: A scoop of vanilla bean ice cream (or even cherry or almond-flavored ice cream) pairs wonderfully with these bars, offering a delightful hot-and-cold contrast if the bars are served at room temperature, or a creamy accompaniment if chilled.
- Coffee or Tea Companion: These bars are an ideal partner for your morning coffee, afternoon tea, or as a sweet ending to an evening meal.
- Seasonal Garnish: In summer, add a few fresh cherries or a sprig of mint for a pop of color and freshness.
How To Store Cherry Pie Bars
Proper storage is key to keeping your delicious cherry pie bars fresh and flavorful for as long as possible. Here’s how to ensure they remain delightful:
- At Room Temperature: If you plan to enjoy them within 1-2 days, freshly baked and completely cooled cherry pie bars can be stored at room temperature. Make sure they are covered tightly with plastic wrap or placed in an airtight container to prevent them from drying out. They will retain their quality for up to 3 days in a cool, dry place.
- In the Refrigerator: To extend their freshness and for optimal taste and texture, especially due to the fruit filling, it’s best to store cherry pie bars in the refrigerator. Place them in an airtight container, and they will keep well for up to a week. Chilling also helps the glaze and crust remain firm, providing a more pleasant eating experience.
How To Freeze Cherry Pie Bars
Want to enjoy these scrumptious bars even further down the line? Freezing them is an excellent option for long-term storage, allowing you to have a convenient, homemade treat whenever the craving strikes.
- Pre-Freezing Preparation: After your cherry pie bars have cooled completely and the glaze has set, it’s best to slice them into individual dessert squares first. This allows for easier thawing and serving later.
- Individual Wrapping: To prevent freezer burn and make it easy to grab just one or two, wrap each individual bar tightly in plastic wrap. For an extra layer of protection, you can then wrap them in aluminum foil.
- Airtight Container: Place the individually wrapped bars into a freezer-safe, airtight container or a heavy-duty freezer bag. This will further protect them from ice crystals and odors from other frozen foods.
- Freezer Lifespan: Stored correctly, your frozen cherry pie bars will remain delicious for 3 to 6 months. Label your container with the date of freezing for easy tracking.
- Thawing Instructions: When you’re ready to enjoy a frozen bar, simply remove it from the freezer. You can let it thaw on the kitchen counter for a few hours (typically 2-4 hours, depending on room temperature) until it’s no longer frozen. Alternatively, you can transfer it to the refrigerator to thaw overnight. Once thawed, they are ready to eat and taste just as fresh as when they were first baked!
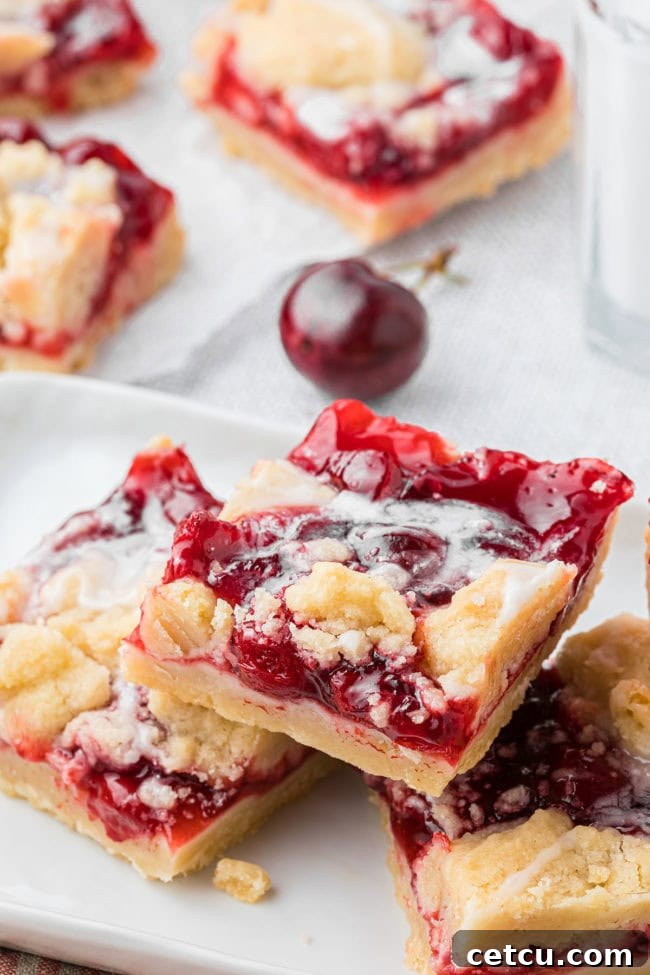
Recipe FAQs About Cherry Pie Bars
While the buttery shortbread crust is a highlight of this recipe, an easy and delicious substitute is a packaged sugar cookie mix! To do this, cut 1/2 cup of softened butter into a 17.5 oz package of sugar cookie mix until the mixture resembles coarse crumbs. Reserve about a cup of this crumb mixture for your topping, then press the remaining mixture firmly into your baking pan to form the base. Voila! It’s a perfect hack for a quick and tasty cherry pie bar crust that saves time without sacrificing flavor.
No, the almond extract in the glaze is entirely optional, although it does add a wonderful depth of flavor that complements the cherries beautifully. If you’re not a fan of almond, have an allergy, or simply don’t have it on hand, you can easily leave it out. Alternatively, you can swap it for another extract flavor you enjoy, such as vanilla extract, lemon extract, or even a touch of rum extract for a different twist.
Absolutely, you sure can! A tub of your favorite canned frosting is a super quick and convenient hack for creating a delicious drizzle topping. Simply microwave a complementing flavor (such as cream cheese, French vanilla, lemon, or even dark chocolate frosting) in short 15-30-second bursts, stirring thoroughly after each interval, until the frosting becomes smooth and pourable. Once it reaches a drizzling consistency, you can elegantly drizzle the melted frosting over your completely cooled cherry dessert bars for a fabulous, fuss-free finishing touch!
While this recipe specifically calls for canned pie filling for ultimate convenience, you can certainly adapt it for fresh or frozen cherries. If using fresh or frozen, you’ll need to prepare a homemade cherry pie filling first. This involves cooking the cherries with sugar, cornstarch (or flour), and a little liquid (like water or lemon juice) until thickened. Ensure the filling cools completely before spreading it over the crust to prevent a soggy bottom. This will add to your prep time but offers a more homemade flavor profile.
Soggy cherry pie bars often result from a few factors. First, not baking the crust long enough can prevent it from firming up. Ensure your oven temperature is accurate and bake until the crust is golden. Second, not allowing the bars to cool completely before cutting can make them seem soggy, as the filling needs time to set. Lastly, excess moisture from the pie filling itself, especially if it’s too thin, can also contribute. Make sure you’re using a standard, thicker pie filling consistency.
The shortbread crust is typically baked through when it achieves a lovely golden-brown color around the edges and on the topping. Another good indicator is to gently press the top crumble with your finger; if it feels firm and doesn’t leave an indentation, it’s likely done. Remember that ovens can vary, so keep an eye on them starting around the 20-minute mark.
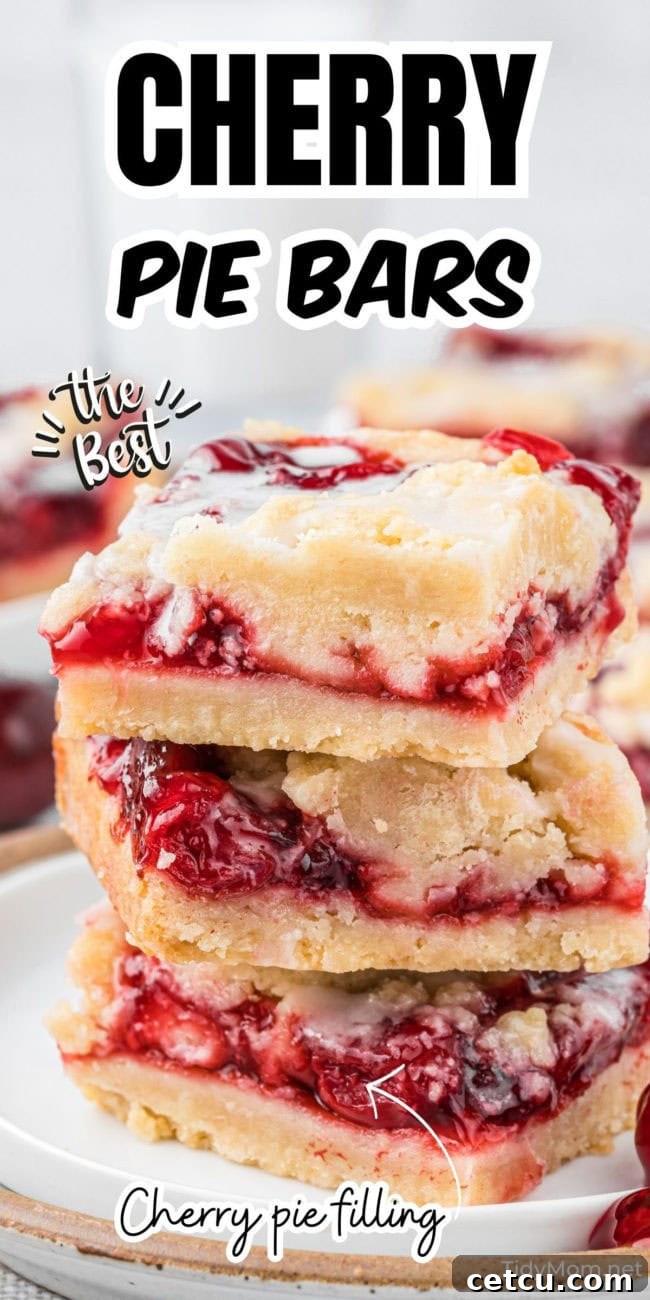
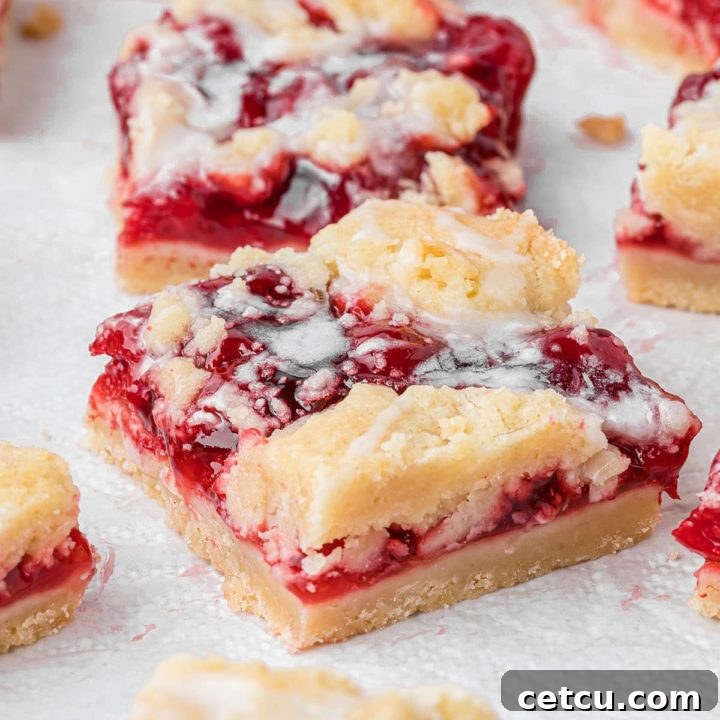
Cherry Pie Bars
16 servings
15 minutes
20 minutes
10 minutes
45 minutes
Ingredients
- 1 cup unsalted butter, softened
- ¾ cup granulated sugar
- 1 teaspoon vanilla extract
- ½ teaspoon almond extract
- 2 cups all-purpose flour
- ½ teaspoon baking powder
- ¾ teaspoon salt
- 1 (21-ounce) can of cherry pie filling
Glaze
- ½ cup powdered sugar
- ¼ teaspoon almond extract
- 1 tablespoon milk
Instructions
- Preheat the oven to 350°F (175°C). Line a 9-inch square pan with parchment paper, leaving a 1-2 inch overhang on two sides. Lightly grease with cooking spray.
- In a large bowl, using an electric mixer, cream together the softened butter and granulated sugar until light and fluffy. Add the vanilla and almond extracts and mix until smooth. Add the all-purpose flour, baking powder, and salt, mixing until just combined. The dough will be crumbly but will come together when pressed.
- Press 2/3 of the shortbread dough firmly into the prepared pan using wet hands or a piece of parchment paper. Spread the cherry pie filling evenly over the dough base.
- Drop the remaining dough in small, spaced-out spoonfuls over the top of the filling, creating a crumble topping. Bake for 20-30 minutes, or until the topping is golden brown and feels firm to the touch when lightly pressed. Remove and let cool completely on a wire rack.
- In a small bowl, whisk together the powdered sugar, almond extract, and milk until you reach your desired drizzle consistency (add more sugar if too runny, more milk if too thick). Drizzle the icing over the completely cooled bars. Place the pan in the refrigerator for 10-15 minutes to allow the glaze to set.
- Using the parchment overhang, lift the cooled bars out of the pan and onto a cutting board. Slice into 16 equal bars. Serve chilled or at room temperature.
Notes
- These bars will keep well on the counter for 1-2 days (covered) or in an airtight container in the fridge for up to a week. For longer storage, freeze them in an airtight container for 3-6 months.
- To serve a crowd, double this recipe and bake it in a 10×15-inch sheet pan (or similar size). Adjust baking time slightly if needed.
- When pressing the dough into the pan, lightly wet your hands or place a piece of parchment paper or plastic wrap over the shortbread crust to press it down evenly and prevent sticking.
- Unlike classic cherry pie, these cherry pie bars are best served chilled or at room temperature. They will not hold their shape as well if served warm.
- Feel free to experiment with other fruit pie filling flavors like apple, blueberry, or peach for a delicious variation.
Nutrition Information:
Yield: 16
Serving Size: 1
Amount Per Serving:
Calories: 215Total Fat: 12gSaturated Fat: 7gTrans Fat: 0gUnsaturated Fat: 4gCholesterol: 31mgSodium: 118mgCarbohydrates: 26gFiber: 0gSugar: 13gProtein: 2g
Nutrition information is estimated based on the ingredients and cooking instructions as described in each recipe and is intended to be used for informational purposes only. Please note that nutrition details may vary based on methods of preparation, origin, and freshness of ingredients used and are just estimates. We encourage, especially if these numbers are important to you, to calculate these on your own for most accurate results.
Did you make this recipe?
Please leave a comment on the blog or share a photo on Instagram
There you have it – a comprehensive guide to baking the most delightful and easy Cherry Pie Bars! This recipe truly is a testament to how simple ingredients and a straightforward process can yield extraordinary results. Whether you’re a seasoned baker or just starting your culinary journey, these bars offer a rewarding experience with every slice.
From their rich, buttery shortbread crust to the vibrant, tangy cherry filling and the sweet almond glaze, every element works in harmony to create a dessert that’s comforting, elegant, and perfectly satisfying. They’re ideal for sharing with loved ones at any gathering, or simply for treating yourself to a moment of sweet indulgence. So, roll up your sleeves, gather your ingredients, and get ready to create a batch of these irresistible cherry pie bars that are sure to become a cherished favorite in your recipe collection!