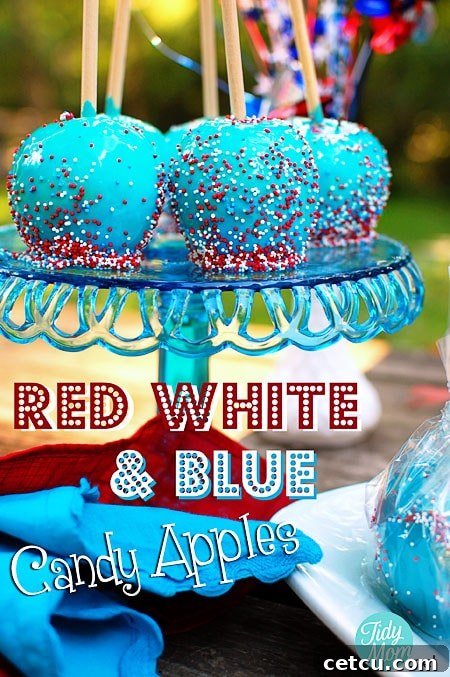
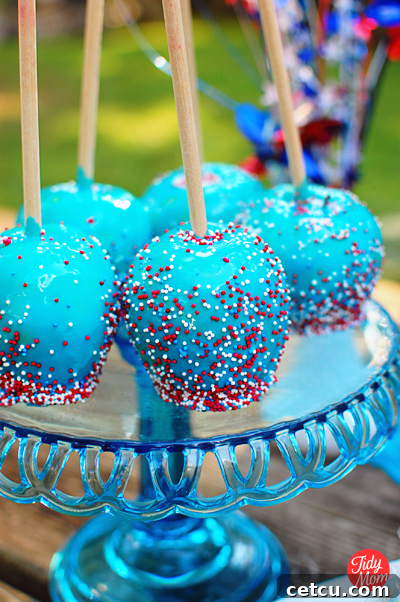
Experience a nostalgic treat with a modern twist! Our Homemade Blue Raspberry Candy Apples feature a delightfully chewy, vibrant blue candy coating enveloping a crisp, tart apple, creating an unforgettable sensory experience.
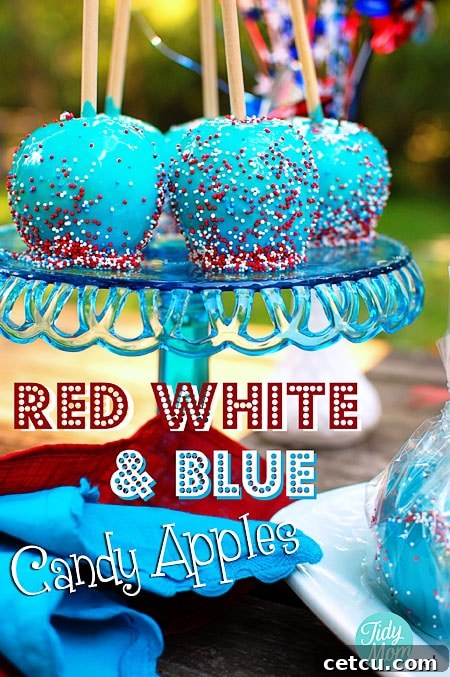
Greetings, fellow dessert enthusiasts! If you’ve been following my culinary adventures on Twitter or Facebook, you might have caught my excited hints about a special project I was tackling recently. It all started quite spontaneously, as many great ideas do. While browsing the vast expanse of the internet one day, I stumbled upon something truly intriguing: Blue Raspberry Candy Apple Magic Mix. The moment my eyes landed on it, a brilliant idea sparked: I absolutely had to create some festive Red, White, and Blue Candy Apples for the upcoming 4th of July celebration!
I’ve always been a devoted admirer of both caramel apples and traditional candy apples. Typically, my indulgence in these delightful treats is reserved for the autumn months, when grocery stores proudly display those charming “Happy Apples.” Despite my long-standing affection, I had never before ventured into the realm of making candy apples from scratch. My initial thought was, “How challenging could it possibly be?”
Oh, how naive I was! While the process isn’t inherently difficult, it certainly comes with a crucial caveat: it’s NOT hard if you possess the precise directions and a bit of insider knowledge. My very first attempt was, to put it mildly, a complete disaster. I vividly recall the moment of crushing disappointment, my head hanging low as tears of frustration welled up. Outwardly, my apples looked absolutely stunning – a perfect mirror image of my mental vision. Yet, there was a fatal flaw.
The candy coating, instead of being delightfully chewy, had solidified into an impenetrable, rock-hard shell. It was akin to a giant lollipop, impossible to cut with a knife, let alone bite into with human teeth. Defeated, I retreated to bed, tossing and turning through the night, haunted by the question of what went wrong. Was the “magic” in the mix meant to transform my beautiful apples into inedible suckers? Surely not.
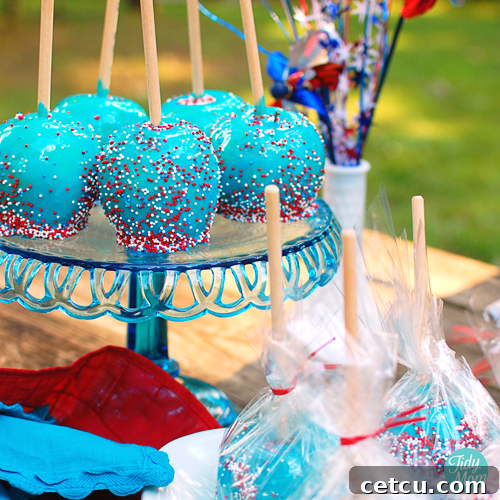
But true culinary passion isn’t easily extinguished. Day two dawned, and I rose with renewed determination, ready to conquer the candy apple challenge once more. After a crucial conversation with my friend Cindy, a seasoned candy maker, the secret was revealed. She pointed out that the package directions, which suggest heating the candy mixture to 300°F, are precisely what yields a hard, lollipop-like consistency. Her invaluable advice? Try heating it to 250°F instead. And what a revelation that was! That seemingly small adjustment made all the difference, resulting in a perfectly chewy, caramel-like texture on my apples!
How to Make Candy Apples
Crafting your own candy apples might seem daunting, but with the right guidance and a bit of patience, you’ll be creating stunning, delicious treats in no time. This recipe specifically focuses on achieving that perfect chewy blue raspberry coating, ideal for any festive occasion, especially patriotic celebrations like the 4th of July.
Essential Supplies for Blue Candy Apples
To embark on your candy apple journey, gathering the correct tools and ingredients is paramount. Here’s what you’ll need:
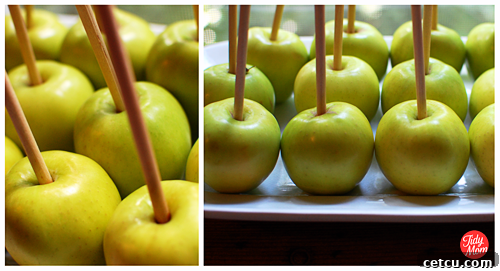
- Apples: I highly recommend Granny Smith apples for their firm texture and tartness, which beautifully balances the sweetness of the candy coating. However, any firm, tart apple variety will work wonderfully. Ensure they are thoroughly washed and dried before use.
- Blue Raspberry Candy Apple Magic Mix: This mix simplifies the flavoring and coloring process. NOTE: Disregard the temperature directions on the package for cooking, unless you specifically desire a very hard candy coating. We will be using a lower temperature for a chewier finish.
- Granulated Sugar & Water: These are combined with the magic mix according to package instructions (but remember our temperature adjustment!).
- Candy Thermometer: This is an absolute non-negotiable tool for candy making. Precision is key to achieving the perfect consistency.
- Large Pot: A heavy-bottomed pot is ideal for making the candy coating, ensuring even heat distribution.
- Wooden Spoon: For stirring the sugar and water until dissolved.
- Candy Apple Sticks: Essential for easy dipping and serving.
- 5″ x 5″ Clear Cellophane Sheets: Perfect for individually wrapping your finished candy apples for gifting or storage.
- Red Twisty Ties: To secure your cellophane wraps, adding a festive touch.
- Sprinkles: Red, white, and blue sprinkles are perfect for a patriotic theme, but feel free to customize!
- 2 Small Bowls: One for sprinkles, and one empty bowl for catching excess sprinkles.
- Baking Sheet Pan: To place your freshly coated apples on.
- Wax Paper: To line your baking sheet, preventing sticking.
- Non-Stick Cooking Spray: For generously greasing the wax paper.
Preparing Your Apples and Workspace
Preparation is key for a smooth candy-making process. Having everything ready before you start cooking the candy will save you stress and ensure the best results.
- Clean and Dry Apples: Begin by thoroughly washing and completely drying your apples. Any moisture on the apple’s skin can prevent the candy coating from adhering properly. After washing, carefully remove the stems.
- Insert Sticks: Firmly insert a candy apple stick into the core of each apple. Push it in about halfway to ensure stability during dipping.
- Prepare Baking Sheet: Line your baking sheet with wax paper. Then, spray the wax paper very generously with non-stick cooking spray. This is critical to prevent the hot, sticky candy apples from welding themselves to the paper. You will place your freshly coated apples on this surface.
- Set Up Sprinkles: Pour your chosen sprinkles into one of the small bowls. Keep the other bowl empty, ready to catch any excess sprinkles as you decorate.
Step-by-Step Directions
This recipe uses approximately half a package of Candy Apple Magic mix, which is sufficient for up to 100 apples. For a smaller batch, adjusting quantities is easy.
- Combine Ingredients: In your large, heavy-bottomed saucepan, combine half of the Blue Raspberry Candy Apple Mix with 2.5 pounds of granulated sugar and 1 cup of water. Place the saucepan over medium heat, stirring continuously until all the sugar has completely dissolved. This initial stirring is crucial to prevent sugar crystals from forming later.
- Attach Candy Thermometer: Secure your candy thermometer to the side of the pan. Ensure the tip of the thermometer is submerged in the mixture but does not touch the bottom of the pan. This will give you an accurate temperature reading.
- Bring to Temperature (The Critical Step!): Increase the heat to medium-high. From this point, do NOT stir the mixture. Allow it to cook undisturbed until the candy thermometer reaches exactly 250°F (121°C). This process typically takes about 15 minutes, but cooking times can vary depending on your stove and pot, so vigilant monitoring is essential. As a vital reminder: the package instructs to cook to 300°F, but cooking to this temperature will result in a hard, brittle candy. For a perfectly chewy candy apple, stick to 250°F!
- Dip Apples Promptly: The moment the candy mixture reaches 250°F, immediately remove the pan from the heat. Working swiftly, carefully dip each apple into the hot candy coating. Tilt the pan slightly to ensure the apple is fully submerged and coated evenly. Gently twirl the apple to allow any excess candy to drip back into the pot. EXERCISE EXTREME CAUTION: The candy coating is incredibly hot and can cause severe burns if it comes into contact with your skin.
- Apply Sprinkles: Immediately after dipping each apple, hold it over your empty sprinkle-catching bowl and generously shower it with sprinkles. You must work very quickly, as the candy coating cools rapidly and sprinkles will not adhere once it begins to set.
- Cooling: Place the freshly dipped and sprinkled apples onto your prepared, greased wax paper-lined baking sheet. Continue this process with the remaining apples. Once all apples are coated, place the entire baking sheet into the refrigerator to cool and set completely. This chilling process helps the candy coating firm up beautifully.
- Enjoy and Store: Once your candy apples have cooled and set, they are ready to be enjoyed! For optimal freshness and texture, it is highly recommended to consume them within three days of making them. Always store your candy apples in the refrigerator. We learned this the hard way: leaving them out overnight, even in an air-conditioned house, caused them to melt and become very sticky.
If you plan to give these delightful treats as gifts or party favors, allow them to cool completely. Then, wrap each apple individually in a clear cellophane sheet and secure it with a pretty ribbon or a festive red twisty tie for an appealing presentation.
Troubleshooting and Pro Tips for Candy Apples
Making candy apples can be a rewarding experience, but a few common issues can arise. Knowing how to prevent or solve them will ensure your success:
- Why is my candy sticky? If your candy coating turns out too sticky, it likely means the mixture didn’t reach a high enough temperature. Ensure your candy thermometer is accurate and that the mixture cooks precisely to 250°F. Humidity can also play a role; try making candy on a dry day.
- Why is my candy too hard? This is the exact problem I encountered initially! It means your candy cooked to too high a temperature (like 300°F). Remember, 250°F is the sweet spot for a chewy texture.
- The candy isn’t sticking to the apple. Ensure your apples are completely clean and dry before dipping. Any residual wax or moisture will prevent the candy from adhering. A quick wipe with a clean cloth and even a brief refrigeration of the apples before dipping can help.
- Working quickly is essential. Once the candy mixture is off the heat, it starts to cool and thicken quickly. Have all your apples prepped, sticks inserted, and sprinkles ready to go so you can dip and decorate efficiently.
- Safety first! Hot sugar is extremely dangerous. Keep children and pets away from the cooking area. If candy coating gets on your skin, do NOT try to wipe it off; instead, immediately run the affected area under cold water.
For more in-depth knowledge on candy making, these resources are incredibly helpful:
- How to Make Candy Apples (includes a great how-to video for visual learners)
I simply adore how these Blue Raspberry Candy Apples turned out! They were every bit as chewy and delightfully delicious as I had envisioned after my initial setback. Giving them a second chance was absolutely worth it. I believe these vibrant, patriotic treats would be an absolutely adorable and festive addition to any 4th of July celebration, Memorial Day picnic, or any event where you want to add a pop of color and flavor!
More 4th of July Recipes and Crafts to Explore
Looking for more ways to celebrate Independence Day? Here are some fantastic recipes and craft ideas that perfectly complement your Red, White, and Blue Candy Apples:
- Fourth of July Marshmallow Pops
- Red White & Blue Cupcakes
- Fourth of July Free Printables
- Fourth of July Snack Cups
- Fourth of July Cupcakes in a Jar
- Red & Hot Boom Gift and Printable
- Flag Hurricanes
- Made in the USA Pins
- Red White and Blue Star Cookies
- Confetti Firecrackers
- Red Hots & Blue Rocket Wreath