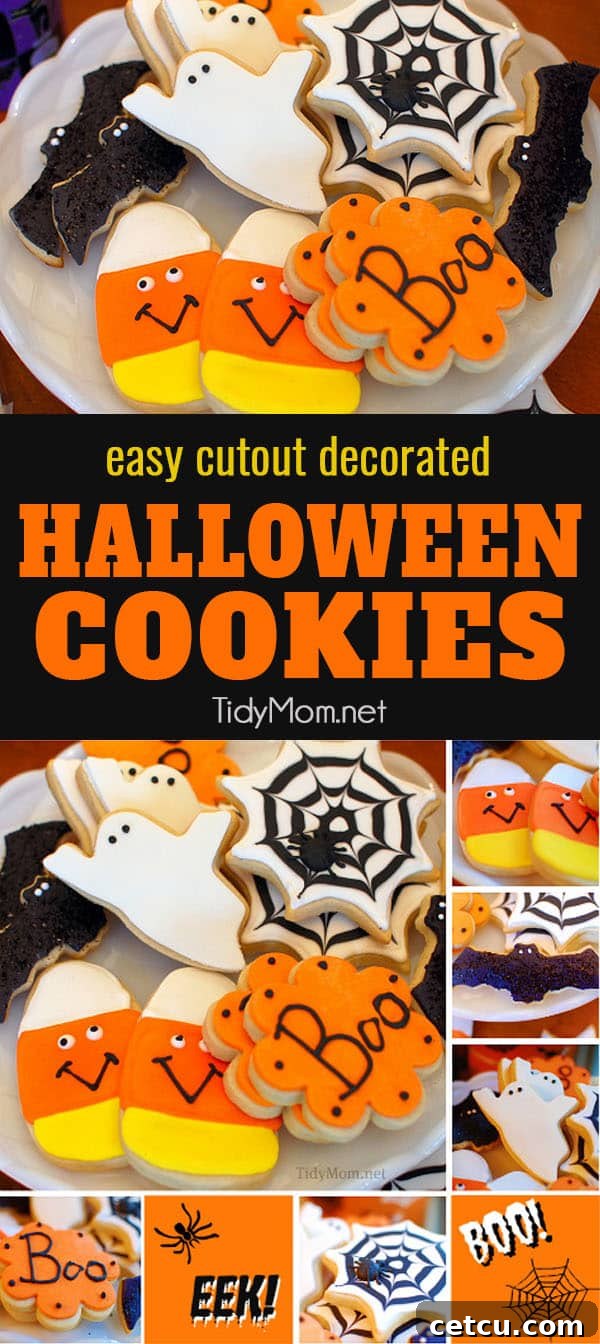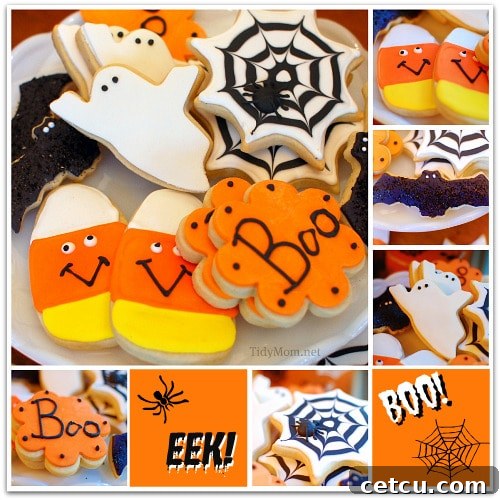
Transform your kitchen into a haunted bakery this season with enchanting Cutout Halloween Cookies! This guide will show you how to decorate spooky, sweet treats using vibrant royal icing, smooth fondant, and an array of festive candies like candy corn, bats, spider webs, and ghosts. Get ready to unleash your inner cookie artist – it’s an incredibly fun and rewarding activity for all ages!
Don’t miss out on fresh baking inspiration and creative ideas! Be sure to sign up for our email newsletter to receive new recipes and decorating tips straight to your inbox!
Table of Contents
Fun Frosted Halloween Cutout Cookies To Make!
There’s something uniquely heartwarming about baking and sharing homemade treats, especially during the festive Halloween season. Recently, I wanted to send a special thank you to a dear family, and what better way to express gratitude than with a batch of beautifully decorated cookies? Halloween cutout cookies are not just delicious; they’re a canvas for creativity, allowing you to craft edible masterpieces that truly capture the spirit of the season.
For years, my go-to choice for decorating cutout butter cookies has always been classic royal icing. Its crisp finish and vibrant colors make for stunning designs. However, my world of cookie decorating expanded significantly after I discovered an incredible video tutorial demonstrating how to effortlessly cover cookies with fondant. The idea of incorporating fondant into my cookie repertoire was instantly appealing, and I knew I had to give it a try for these special Halloween treats.
And let me tell you, the results were absolutely delightful! I was amazed by how incredibly easy it was to work with fondant and how it instantly transformed my cookies into polished, professional-looking confectionery. While I still have a soft spot for the distinct taste and texture of royal icing, having the option of fondant offers a fantastic alternative for those times when you need a quick yet elegant decorating solution.
For this Halloween collection, I decided to experiment by decorating some cookies with fondant and others with traditional royal icing. This allowed me to compare the techniques and enjoy the unique characteristics of both. Can you spot which ones are covered in smooth, pliable fondant versus those adorned with the classic, delicate royal icing?
How Are Butter Cookies Different From Sugar Cookies?
This post may contain affiliate links, which means I may earn a small commission if you make a purchase through my links, at no extra cost to you. Please read my full disclosure policy here.
When it comes to baking exquisite cutout cookies, the choice of dough is paramount. While sugar cookies are a popular choice, I wholeheartedly recommend using a quality butter cookie recipe for your festive cutouts. The key difference lies in their texture and handling. Traditional sugar cookies tend to bake up crispier and have a slightly crunchy bite, often relying on a higher sugar content for their structure.
Butter cookies, on the other hand, are celebrated for their rich, buttery flavor and a wonderfully soft, tender texture that practically melts in your mouth. They are less crumbly than shortbread but significantly softer than a typical sugar cookie, making them absolutely ideal for intricate cutout designs. Their ability to hold their shape beautifully during baking, combined with their delightful chewiness, ensures that your Halloween creations will not only look fantastic but taste heavenly too. This unique balance of firmness and tenderness makes butter cookies the ultimate base for any elaborate decorating endeavors, whether you’re using royal icing or fondant.
CLICK HERE TO GET MY BUTTER COOKIES RECIPE – THE PERFECT CANVAS FOR YOUR HALLOWEEN CREATIONS!
Royal Icing and Fondant Cookie Decorating Tips
Embarking on a cookie decorating adventure requires the right tools and a few insider tips to ensure your Halloween treats turn out perfectly. Here’s a rundown of my essential recommendations for working with both royal icing and fondant:
- Fondant Choice: For smooth and professional finishes, I highly recommend Satin Ice Rolled Fondant in White – Vanilla flavor. It’s incredibly pliable, easy to roll, and provides a delicious, subtle vanilla taste that complements the butter cookies perfectly. You can easily color white fondant with gel food paste to match your Halloween theme.
- Cookie Cutters: A diverse collection of cookie cutters is essential for creating a variety of Halloween shapes. Some of my favorite cutters come from specialized baking supply stores like Sweet Baking Supply, but you can also find excellent sets at local craft stores or online. Wilton offers a fantastic and affordable set of 18 Halloween Cookie Cutters for around $20, featuring popular shapes like pumpkins, ghosts, bats, and witches’ hats.
- Meringue Powder for Royal Icing: The secret to consistent, strong royal icing lies in quality meringue powder. I recently switched to CK Meringue Powder, and the difference in results has been remarkable. It helps achieve that perfect stiff peak consistency, vibrant colors, and a smooth, quick-drying finish.
- Food Coloring: For truly vibrant and concentrated colors that won’t thin out your icing or fondant, stick with gel food pastes. Americolor Soft Gel Food Paste is my absolute favorite. A tiny drop delivers intense color, allowing you to create deep blacks, fiery oranges, and ghoulish greens for your Halloween designs.
- The Power of a Stand Mixer: Making royal icing, especially in larger batches, can be quite the arm workout. My Kitchenaid Mixer is an absolute lifesaver! It whips up smooth, consistent royal icing in minutes, freeing you up to focus on the fun part – decorating. It’s an investment that pays dividends in any baking enthusiast’s kitchen.
- Dough Thickness: Aim for a consistent dough thickness, typically about 1/4 inch, when rolling out your butter cookie dough. This ensures even baking and sturdy cookies that won’t easily break when handled or decorated.
- Chilling the Dough: Don’t skip chilling your cookie dough! After preparing, wrap it tightly and refrigerate for at least 30 minutes, or even overnight. This prevents spreading and helps the cookies maintain their intricate shapes during baking.
- Cooling Completely: Before you even think about decorating, ensure your baked cookies are completely cool. Warm cookies will melt or smudge your icing and fondant. A cooling rack is your best friend here!
Watch My Video for Easy Cookie Rolling and Cutting!
Are you new to cutout cookies or just looking for a refresher on the best techniques? Sometimes seeing is believing, and a video can make all the difference in understanding the nuances of cookie preparation. I’ve put together a comprehensive video tutorial that demonstrates just how effortless it can be to roll out your dough to the perfect thickness and use your cookie cutters to create flawless shapes.
In this video, you’ll learn tips and tricks for preventing dough from sticking, achieving uniform thickness, and carefully transferring your cutouts to the baking sheet. Watch closely as I guide you through each step, ensuring your Halloween cookie base is as perfect as your decorations. It’s a quick and invaluable resource that will build your confidence in the kitchen!
Don’t stop there! Explore more of my recipe videos for additional baking inspiration and step-by-step guides.
Expert Tips for Freezing Cutout Cookies
Baking for a holiday like Halloween can be a demanding task, especially if you plan to make a large batch of decorated cookies. The good news is that cutout cookies are incredibly freezer-friendly, allowing you to prepare ahead of time and reduce stress closer to your event. Freezing cookies effectively can save you valuable time and ensure you always have a delicious base ready for decorating. Here’s how to do it:
Freezing Unbaked Dough:
- Wrap Tightly: After making your butter cookie dough, divide it into manageable portions. Shape each portion into a disc or log. Wrap each disc/log tightly in plastic wrap, then an additional layer of aluminum foil. This double layer prevents freezer burn.
- Label and Date: Always label your wrapped dough with the date and type of cookie. Dough can be frozen for up to 3 months.
- Thawing: When ready to bake, transfer the dough from the freezer to the refrigerator to thaw overnight. Once thawed, you can roll and cut as usual.
Freezing Cutout (Unbaked) Cookies:
- Flash Freeze: Roll out your dough and cut out your Halloween shapes. Place the unbaked cookie cutouts in a single layer on a baking sheet lined with parchment paper. Flash freeze them for about 15-30 minutes until firm.
- Store in Layers: Once firm, transfer the cookies to an airtight freezer-safe container. Place parchment paper between layers of cookies to prevent them from sticking together.
- Bake from Frozen: You can bake these directly from frozen, adding a few extra minutes to the baking time, or let them thaw slightly on the baking sheet before baking.
Freezing Baked (Undecorated) Cookies:
- Cool Completely: Ensure your baked cookies are completely cooled before freezing. Any residual warmth will cause condensation and ice crystals.
- Layer with Parchment: Arrange the cooled cookies in an airtight freezer-safe container, placing parchment paper between each layer to protect them.
- Thawing for Decorating: When ready to decorate, simply remove the desired number of cookies from the freezer and let them thaw at room temperature for an hour or two. Once thawed, they’re ready for royal icing or fondant!
By utilizing these freezing tips, you can spread out your cookie-making process, making holiday baking much more manageable and enjoyable. Do you bake Halloween Cutout Cookies? Share your favorite freezing techniques in the comments!
Need More Cutout Cookie Inspiration? Explore Our Butter Cookie Creations!
The versatility of our butter cookie recipe knows no bounds! If you’re looking for more ways to utilize this perfect cookie base, here are some additional festive and fun cutout cookie ideas we’ve made:
- Decorated Christmas Cookies: Adorned with festive snowflakes, Santa hats, and twinkling lights, these cookies bring holiday cheer to any spread.
- Valentine’s Day Cookies: Express your love with heart-shaped delights, intricately decorated with romantic colors and sweet messages.
- Easter Cookies: Celebrate spring with charming bunnies, colorful eggs, and delicate floral designs.
- Father’s Day Cookies: Personalized cookies shaped like tools, ties, or sports memorabilia make the perfect gift for dad.
- Smiley Face Cookies: Brighten anyone’s day with these cheerful, easy-to-decorate treats, perfect for any occasion.
- Snowman Cookies: Capture the magic of winter with adorable snowman cutouts, complete with tiny scarves and carrot noses.
Love These Halloween Cookies? Pin It for Later!
If these spooky and sweet Halloween cutout cookies have captured your imagination, don’t forget to save this guide for future baking adventures! Pin your favorite images to your Pinterest boards and share the inspiration with friends and family. Happy baking and happy haunting!