
We are thrilled to bring you invaluable advice from the renowned cookie expert, Bridget Edwards of Bake at 350, and author of the celebrated book Decorating Cookies. Bridget is here to share her ultimate guide on how to freeze cookies for Holiday baking, transforming your festive preparations from frantic to fantastic.
Prepare to revolutionize your baking routine and enjoy a more relaxed holiday season. Let’s dive into the sweet secrets of make-ahead cookies!
Pin It
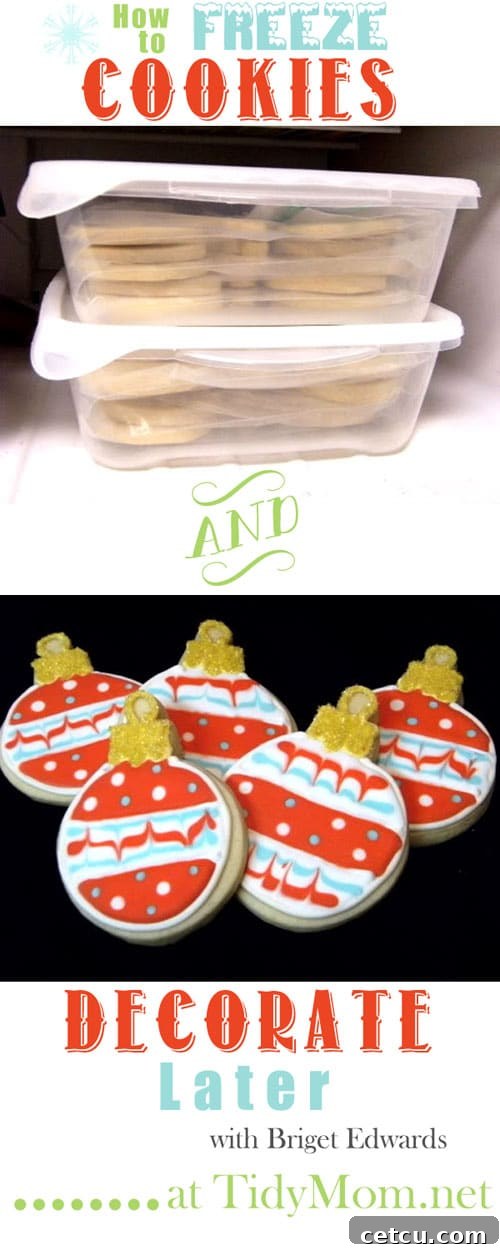
Unlock Stress-Free Holiday Baking: The Power of Freezing Cookies
Hello, baking enthusiasts! As the holiday season approaches, the excitement for festive treats often comes hand-in-hand with the daunting thought of endless hours in the kitchen. Between gift shopping, decorating, and holiday gatherings, finding time to bake dozens of cookies for teachers, neighbors, friends, and family can feel overwhelming. But what if we told you there’s a simple, game-changing solution to conquer your holiday baking stress?
That’s right! You can absolutely FREEZE your cookies and cookie dough, saving precious time and effort later. This ingenious technique allows you to spread out your baking tasks, ensuring fresh, delicious cookies are always at your fingertips without the last-minute rush. Bridget Edwards, our esteemed cookie guru, is here to guide us through her tried-and-true methods for perfect frozen cookies, every single time.
Why Should You Freeze Your Holiday Cookies?
The benefits of incorporating freezing into your cookie-making process extend far beyond just saving time:
- Spread Out the Workload: Instead of dedicating an entire weekend to baking, you can bake in smaller batches over several weeks or even months leading up to the holidays.
- Reduce Holiday Stress: Eliminate the eleventh-hour scramble to get all your cookies baked and decorated. Enjoy a calmer, more organized holiday season.
- Ensure Freshness: Freezing locks in freshness and flavor. Thawed cookies often taste just as good, if not better, than freshly baked ones.
- Be Prepared for Any Occasion: Unexpected guests, last-minute gift needs, or a sudden craving for something sweet? Frozen cookies or dough mean you’re always ready.
- Batch Bake Efficiently: Maximize your oven time by baking large quantities of your favorite recipes, then freezing them for future use.
Freezing Unbaked Cookie Dough: Your Future Self Will Thank You!
Freezing cookie dough is an excellent strategy for anyone looking to bake fresh cookies on demand. This method offers unparalleled convenience and flexibility, allowing you to have warm, homemade cookies in minutes.
Method 1: Freezing Drop Cookie Dough (Chocolate Chip, Oatmeal, Snickerdoodle)
- Scoop and Chill: Prepare your favorite drop cookie dough. Using a cookie scoop, portion out individual balls of dough onto a baking sheet lined with parchment paper.
- Flash Freeze: Place the entire baking sheet into the freezer for 1-2 hours, or until the dough balls are firm. This prevents them from sticking together when stored.
- Transfer to Storage: Once firm, transfer the frozen dough balls into a freezer-safe, airtight bag or container. Label with the date, cookie type, and baking instructions.
- Baking from Frozen: When ready to bake, place frozen dough balls on a prepared baking sheet. You may need to add 1-3 minutes to the original baking time. No need to thaw!
Method 2: Freezing Rolled Cookie Dough (Sugar Cookies, Shortbread)
- Form a Disk or Log: After preparing your dough, shape it into a flat disk or a log (for slice-and-bake cookies). Wrap it tightly in plastic wrap, then an additional layer of aluminum foil to prevent freezer burn.
- Store: Place the wrapped dough into a freezer-safe bag. Label with the date and cookie type.
- Thawing and Baking: To use, transfer the dough from the freezer to the refrigerator to thaw overnight. Once thawed, roll out and cut as usual.
- Alternatively (for logs): For slice-and-bake logs, you can often slice the dough directly from a partially thawed state, or even fully frozen with a sharp, heavy knife.
Method 3: Freezing Cut-Out Cookie Dough
- Roll and Cut: Roll out your dough to the desired thickness. Cut out your shapes using cookie cutters.
- Flash Freeze: Carefully arrange the cut-out shapes on a parchment-lined baking sheet. Flash freeze until solid (1-2 hours).
- Store: Transfer the frozen shapes to an airtight freezer container, layering them with parchment paper if necessary to prevent sticking.
- Baking: Bake from frozen, adding a few extra minutes to the baking time. This method is excellent for maintaining shape and preventing spread.
Freezing Baked, Unfrosted Cookies: Bridget’s Tried-and-True Method
This is where Bridget’s expertise truly shines for holiday sugar cookies, gingerbread, or any plain baked cookie you plan to decorate later. This method saves immense time during the busiest part of the holiday season.
Steps for Freezing Baked, Unfrosted Cookies:
- Bake and Cool Completely: This step is non-negotiable. Cookies must be completely cool to the touch before freezing. Any residual warmth will create condensation, leading to soggy cookies and ice crystals.
- Layer with Care: Arrange your cooled cookies in gallon freezer bags or freezer-safe plastic containers. Place a layer of wax paper or parchment paper between each layer of cookies. This prevents them from sticking together and offers a layer of protection.
- Utilize Freezer-Safe Containers: While freezer bags are good, placing those bags into rigid freezer-safe plastic containers provides an essential extra layer of protection. This prevents your delicate cookies from getting crushed by other items in the freezer.
- Seal and Label: Remove as much air as possible from the freezer bags/containers before sealing. Clearly label each container with the type of cookie and the date it was frozen. This ensures you know what you have and helps you use them within their optimal freezer life (typically up to 3-4 weeks for best quality, though they can last longer).
Thawing Baked, Unfrosted Cookies:
When you’re ready to decorate, simply remove the desired number of containers from the freezer. Allow them to thaw at room temperature for approximately 3 hours or more. It’s crucial not to refrigerate them during thawing, as this can introduce too much moisture and negatively affect their texture. Once thawed, they are perfectly ready for decorating with royal icing, buttercream, or glazes.
Freezing Baked, Decorated Cookies: Yes, You Can!
This is fantastic news for anyone planning a big party, an elaborate cookie gift set, or simply wanting to get ahead on holiday preparations. Royal icing-decorated cookies, in particular, freeze beautifully.
Steps for Freezing Baked, Decorated Cookies:
- Ensure Icing is Completely Dry: This is the most critical step. Royal icing must be completely set and hardened – typically 8-24 hours depending on humidity and icing consistency – before freezing. Freezing wet or tacky icing will lead to smudges and ruined designs.
- Flash Freeze (Optional but Recommended): For very delicate or elaborately decorated cookies, flash freezing them individually on a parchment-lined baking sheet for 15-30 minutes can add an extra layer of protection before final packaging.
- Individual Wrapping: Gently wrap each decorated cookie in plastic wrap. This provides a barrier against freezer burn and prevents any potential sticking or damage to the decorations.
- Layer in Airtight Containers: Place the individually wrapped cookies into an airtight freezer-safe container. Use wax paper or parchment paper between layers for added protection.
- Label: Don’t forget to label the container with the cookie type and date.

Thawing Baked, Decorated Cookies:
To thaw, remove the container from the freezer and let it sit at room temperature for several hours. The most important tip here is to **leave the cookies in their bags or containers during the entire thawing process.** This helps manage condensation. As the cookies slowly come to room temperature while still sealed, the condensation will form on the outside of the packaging rather than directly on the cookies and their delicate icing. Once fully thawed, you can unwrap and enjoy your perfectly preserved masterpieces.
Essential Tips for Freezing Cookie Success
To ensure your frozen cookies and dough are always top-notch, keep these additional tips in mind:
- Use Quality Ingredients: Great cookies start with great ingredients. Freezing won’t improve the quality of a subpar cookie.
- Avoid Overfilling: Don’t cram too many cookies into one container. This increases the risk of crushing and makes thawing more difficult.
- Remove Air: Air is the enemy of frozen goods. Use freezer bags designed to remove as much air as possible, or use a vacuum sealer for best results.
- Maintain Consistent Freezer Temperature: A stable freezer temperature (0°F / -18°C or lower) is key to preventing freezer burn and maintaining quality.
- Know Your Shelf Life: While cookies can technically last longer, for optimal flavor and texture, aim to consume frozen cookie dough within 3 months and baked cookies (frosted or unfrosted) within 3-4 weeks for best quality, up to 2-3 months.
- Which Cookies Don’t Freeze Well? Generally, very delicate cookies like meringues, cookies with fresh fruit fillings, or those with very soft, whipped cream-based frostings do not fare well in the freezer. Always test a small batch if unsure.
Transform Your Holiday Baking Experience
Bridget’s expert advice empowers you to take control of your holiday baking, turning what can often be a stressful endeavor into a joyful and manageable tradition. Imagine having a stash of ready-to-decorate sugar cookies, or a freezer full of cookie dough waiting to be baked for a fresh-from-the-oven treat. This simple technique not only saves time but also ensures that you can enjoy the process of creating beautiful and delicious cookies without feeling rushed.
We extend our deepest gratitude to Bridget for sharing her passion and invaluable insights. Her “I can do it” attitude and generously shared advice are truly inspiring. Her beautiful cookies brighten our days and demonstrate how easy it can be to achieve professional-looking results with a little planning.
So, go ahead, grab your apron, and start your make-ahead cookie journey. Your future self (and your holiday guests!) will thank you. Happy cookie decorating and happy holidays!