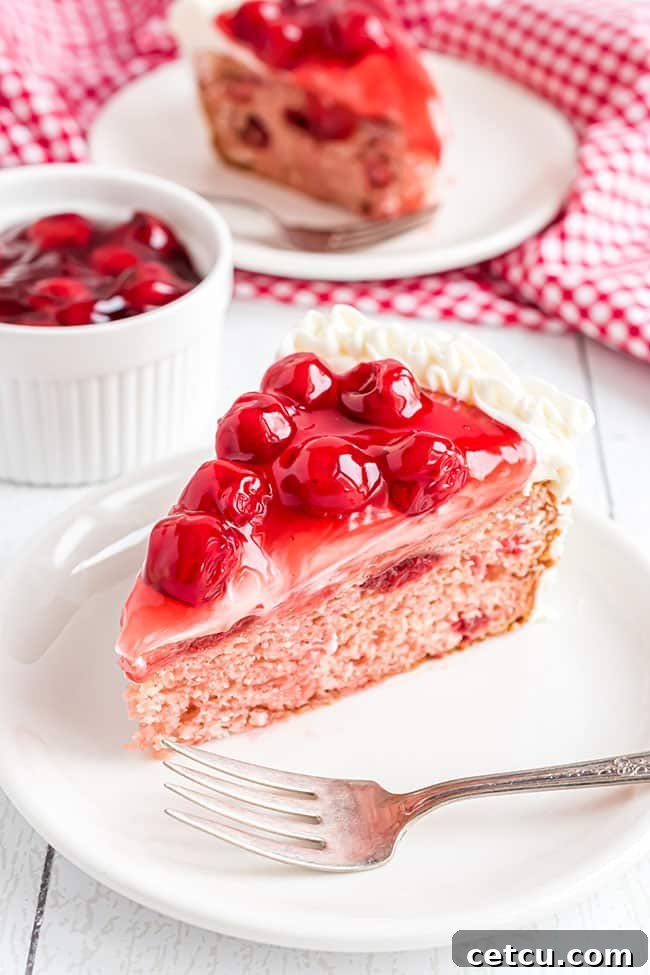
You don’t have to wait for Valentine’s Day to bake something truly special. This exquisite Heart Shaped Cherry Cake recipe is a delightful creation that goes far beyond a single holiday. Imagine a moist, tender white cake, perfectly complemented by sweet, luscious dark cherries, each bite bursting with vibrant flavor and the unmistakable warmth of homemade love. This cake isn’t just a dessert; it’s a heartfelt gesture, perfect for celebrating anniversaries, birthdays, or simply expressing affection on an ordinary day. Its charm lies in its elegant presentation and the ease with which it comes together, making it a favorite for bakers of all skill levels. Get ready to impress and delight with a cake that tastes as good as it looks.
Why You’ll Fall in Love with This Heart Shaped Cherry Cake
Crafted with a simple vanilla cake mix and an infusion of charm, this cherry-filled cake stands out as the ultimate dessert for any special occasion or whenever your heart desires to spread a little sweetness. Here’s why this recipe will quickly become a cherished favorite in your baking repertoire:
- Effortlessly Elegant: This stunning heart-shaped cake comes together in surprisingly little time, making it an ideal treat to whip up for those you cherish without spending hours in the kitchen. Its beautiful form speaks volumes, conveying thoughtfulness and care with minimal fuss.
- Timeless & Special: There’s an undeniable classic appeal and a touch of magic in presenting a cake shaped like a heart. It transcends trends, instantly making any gathering feel more intimate and celebratory. It’s a simple shape, yet profoundly impactful.
- Infinitely Adaptable: While cherries are the star, this recipe is incredibly versatile. Craving a different flavor profile? This cake base welcomes variations with open arms. Are you already picturing a rich chocolate rendition, perhaps with a hint of almond? The possibilities are endless.
- Pantry Staple Friendly: Utilizing basic ingredients commonly found in most kitchens, including the star component – cherry pie filling – this recipe is accessible and convenient. (And yes, for many home bakers, a can of cherry pie filling is absolutely a pantry staple, ready to transform ordinary into extraordinary!)
- Beginner Baker Approved: This cake is not only visually appealing but also remarkably easy to execute, even for those new to the art of baking. The clear, concise steps ensure a successful outcome, boosting confidence and satisfying sweet cravings.
- Perfect for Every Celebration: While it shines on Valentine’s Day, its inherent warmth and delightful flavor make it suitable for anniversaries, birthdays, Mother’s Day, or simply a weekend indulgence. It’s a universal symbol of love and celebration.
Essential Equipment for Your Baking Journey
Creating this wonderful white cake with luscious cherry pie filling on top doesn’t require a professional kitchen setup. With just a few basic tools, you’ll be well on your way to baking a masterpiece. Here’s what you’ll need:
- Heart-Shaped Cake Pan: The star of the show! A heart-shaped cake pan (8 or 9-inch, 2½-inch deep) is essential for achieving that iconic shape. If you don’t have one, don’t worry! You can use a standard 9 x 13-inch cake pan, and later cut the cooled cake into a heart shape using a template, or simply enjoy a delicious rectangular cherry cake. The love is in the flavor, after all!
- Mixing Bowls: You’ll need at least two, preferably a large one for the cake batter and a medium one for the frosting. Glass or stainless steel bowls are excellent choices for their durability and ease of cleaning.
- Electric Mixer: A hand mixer or a stand mixer will make the task of combining ingredients much easier and ensure a smooth, well-aerated batter and fluffy frosting. While you can mix by hand, an electric mixer saves time and effort, especially for the buttercream.
- Rubber Spatula: Indispensable for folding in the cherry pie filling without deflating the batter and for leveling the cake batter evenly in the pan. Its flexible nature allows you to scrape down the sides of the bowl, ensuring no ingredient is left behind.
For perfecting the beautiful buttercream frosting, a couple of additional items will come in handy:
- Icing Spatula: An offset icing spatula is particularly useful for spreading frosting smoothly and evenly over the cake, especially when working on curved surfaces. A straight spatula also works well.
- Decorating Bag and Tip: A decorating bag, whether reusable or disposable, fitted with a 1M star tip, will allow you to pipe beautiful borders and decorative flourishes, giving your cake a professional, bakery-quality finish. The 1M tip is a versatile choice for swirls, rosettes, and borders.
Having these tools ready before you start will streamline your baking process, making the creation of your Heart Shaped Cherry Cake a truly enjoyable experience.
Gather Your Ingredients: The Heart of the Recipe
For specific amounts and detailed instructions, please refer to the printable recipe card at the bottom of the post.
For the Moist Cherry Cake Base
- White Cake Mix – The foundation of our delightful heart-shaped cake is a simple white cake mix. While my personal preference often leans towards a reliable brand like Duncan Hines for its consistent results, feel free to choose any high-quality white cake mix you trust. Using a box mix not only saves precious time but also serves as a fantastic base that we’ll elevate with additional ingredients, creating a flavor and texture that tastes completely homemade.
- Large Eggs – Always ensure your eggs are at room temperature. Room temperature eggs emulsify better with other ingredients, creating a smoother, more uniform batter and a lighter, fluffier cake crumb. If you’ve forgotten to take them out, a quick trick is to place them in a bowl of warm water for 5-10 minutes.
- Baking Powder – This leavening agent is crucial for creating a lighter, more tender crumb. In this recipe, it reacts with the inherent acidity of the cherries in the batter, providing the essential lift needed to prevent the cake from being too dense. It helps ensure a beautifully risen and airy cake.
- Vanilla Extract And Almond Extract – The quality of your extracts significantly impacts the final flavor. Always opt for the best quality pure vanilla extract your budget allows; it offers a rich, complex aroma that imitation vanilla can’t match. Almond extract adds another layer of subtle, complementary flavor that pairs wonderfully with cherries. If you prefer an alcohol-free option, pure vanilla “flavoring” is available, but pure extract is always recommended for superior taste.
- Cherry Pie Filling – The star of the show! This canned convenience is a shortcut to incredible flavor and moisture. Choose a good quality cherry pie filling with whole or halved cherries for the best texture and visual appeal. It infuses the cake with a sweet, fruity burst that defines this recipe.
For the Velvety Buttercream Frosting
- Unsalted Butter – Your butter should be softened, but critically, not melted. Allow it to come to room temperature so it’s pliable enough to leave a small imprint when gently pressed with a finger, but not shiny or oily. This ideal consistency is key for creating a smooth, airy buttercream that creams beautifully without separating. Using unsalted butter allows you to control the salt content.
- Vanilla And Almond Extract – Just as with the cake, these extracts are vital for building complex layers of flavor and a delightful aroma in your frosting. The combination with butter and sugar creates that irresistible “mmm” factor. You can even try your hand at making your own quality vanilla extract for an extra special touch.
- Powdered Sugar – Also known as confectioners’ sugar or icing sugar. Using sifted powdered sugar is crucial for achieving a smooth, glide-like consistency in your buttercream, free of lumps. It provides the perfect sweetness and contributes to the light, airy texture of the frosting.
- Milk – Whole milk is highly recommended as it creates a richer, smoother, and less watery consistency compared to skim or low-fat versions. The higher fat content contributes to a creamier mouthfeel. If you only have a low-fat version, start with 2 tablespoons less than specified and gradually add more, one tablespoon at a time, until you achieve your desired texture and spreadability.
- Food Coloring (Optional) – If you wish to create a romantic pink or vibrant red hue for your frosting, gel food coloring is the superior choice. Gel colors are highly concentrated, allowing you to achieve intense colors with just a tiny amount, without altering the frosting’s consistency, unlike liquid food colorings.
TIP: Ensure your baking powder is fresh for optimal cake lift! A simple test: pour a little baking powder into a small bowl of hot water. If it fizzes actively, it’s still good to use! If not, it’s time to replace it.
Step-by-Step Guide: Crafting Your Heart Shaped Cherry Cake
Here’s a quick rundown of the simple steps for making a heartwarming cherry cake – no fuss, just straightforward instructions leading to stunning, delicious results!
For precise measurements and a complete, detailed recipe, please refer to the printable recipe card conveniently located at the bottom of this page.
Part 1: Preparing the Moist Cherry Cake Batter
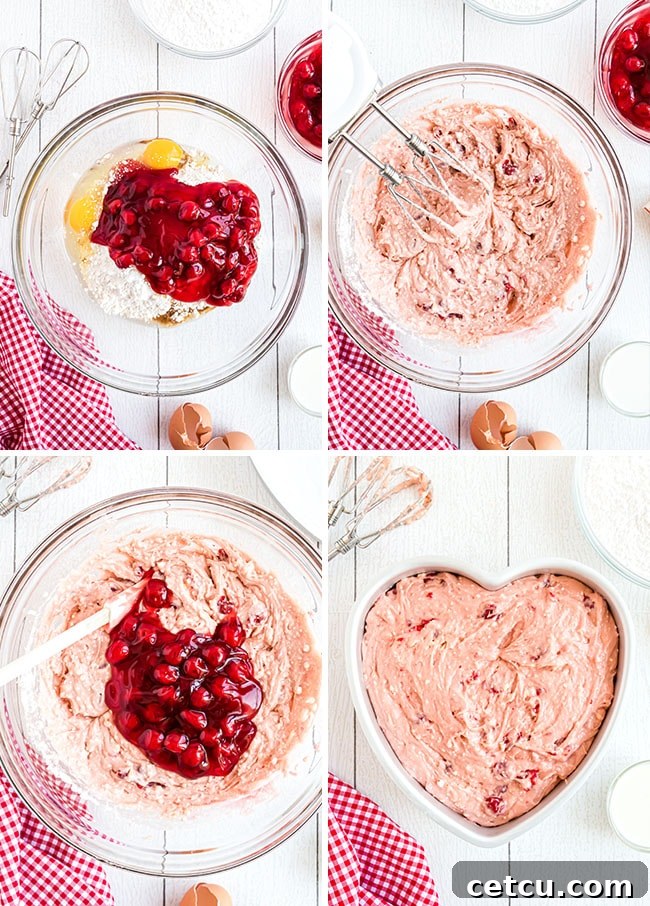
- STEP ONE: Preheat Oven and Prepare Pan. Begin by preheating your oven to 325°F (160°C). Lightly grease and flour your heart-shaped cake pan (8 or 9 x 2½ -inch) to prevent sticking. If using a 9×13-inch pan, grease and flour it similarly. This crucial step ensures your beautiful cake releases easily after baking.
- STEP TWO: Mix the Cake Ingredients. In a large mixing bowl, combine your dry white cake mix, room temperature eggs, baking powder, vanilla extract, almond extract, and only 1/2 can of the cherry pie filling. Mix these ingredients on medium speed with an electric mixer until they are just moistened and well combined, ensuring there are no dry pockets of cake mix.
- STEP THREE: Gently Fold in Cherries. With a rubber spatula, gently fold in the remaining 1/2 can of cherry pie filling until it is just combined with the batter. This hand-folding step helps to distribute the cherries without overmixing the batter, which can lead to a tough cake. The batter will appear thick, which is exactly what we want.
- STEP FOUR: Pour and Level. Carefully pour the thick cake batter into your prepared heart-shaped cake pan. Use your rubber spatula to gently level the top of the batter, ensuring an even surface for baking. This promotes uniform rising and a beautifully flat top.
- STEP FIVE: Bake to Perfection. Place the cake pan in your preheated oven. Bake for approximately 65-75 minutes for a heart-shaped pan, or 40-45 minutes for a 9×13-inch pan. Baking times can vary, so the best indicator of doneness is when an inserted toothpick into the center of the cake comes out clean. Once baked, remove the cake from the oven and allow it to cool completely in the pan on a wire rack. This slow cooling prevents the cake from cracking or sinking. Once fully cooled, carefully invert the vanilla cherry cake onto a serving platter or cake stand, ready for its delicious decoration.
The Science Behind the Rise: Why Add Extra Baking Powder to a Cake Mix?
While a box cake mix typically contains leavening agents, adding a bit of extra baking powder to your Heart Shaped Cherry Cake batter serves two important purposes, ensuring a light, tender, and beautifully risen cake every time.
1. Revitalizing Older Cake Mixes: One common reason to boost the baking powder is to “freshen up” or enhance older cake mixes. Baking powder, like all leavening agents, has a limited shelf-life. Over time, its potency can diminish, resulting in a cake that doesn’t rise as much as it should. A small addition of fresh baking powder can compensate for any loss in leavening power, ensuring your cake achieves the desired height and fluffy texture.
2. Counteracting Acidity for Optimal Lift: The second, and most relevant reason for this particular recipe with white cake mix and cherry pie filling, is to prevent the cake from being too heavy while still providing a satisfying and pleasing weight. Cherries, like many fruits, are naturally acidic. When added to a cake batter, this increased acidity can interfere with the chemical reactions of the baking powder already present in the cake mix. The additional baking powder is specifically added to the cherry pie filling cake batter to provide enough reactive power to counteract this higher acid content. This ensures that the cake will lift properly during baking, resulting in a light, airy crumb rather than a dense or sunken cake.
It’s a delicate balance that helps achieve that perfect, tender texture we all crave in a homemade cake. This thoughtful addition transforms a simple box mix into a cake that tastes delightfully homemade and professional.
Important Note: More is NOT Better Here! While essential, too much baking powder can have adverse effects. An excessive amount will create a bitter, metallic taste in your cake. Furthermore, if too much baking powder is used, the cake’s center may rise too rapidly and dramatically, only to collapse during or after baking, leaving you with a crater in the middle. Always stick to the recommended amount for the best results.
How To Make Velvety Buttercream Icing
A truly spectacular cake deserves an equally spectacular frosting. This velvety buttercream icing is rich, smooth, and the perfect complement to our Heart Shaped Cherry Cake.
Remember, for precise measurements, always refer to the full recipe available in the printable recipe card at the bottom of the page.
- STEP ONE: Cream Butter and Extracts. In a large mixing bowl, using an electric mixer, cream together the softened butter, vanilla extract, and almond extract. Beat on medium-high speed for 3-5 minutes until the mixture is light, fluffy, and pale in color. This process incorporates air, which is essential for a light and airy buttercream. Ensure your butter is at the ideal softened temperature for best results.
- STEP TWO: Gradually Add Powdered Sugar. With the mixer on low speed, slowly begin adding the sifted powdered sugar, one cup at a time. Beat well after each addition to fully incorporate the sugar and prevent a cloud of sugar from enveloping your kitchen. Once all the sugar is added, increase the speed to medium and beat for another 2-3 minutes until the frosting is smooth and lump-free. Sifting the sugar beforehand makes this step much easier.
- STEP THREE: Achieve Perfect Consistency. Add 2 tablespoons of milk to the frosting and mix well. Observe the consistency. If you desire a thinner, more spreadable frosting, continue adding milk one tablespoon at a time, beating after each addition, until you’re happy with the texture. For piping, a slightly thicker consistency is usually preferred, while a spreadable consistency is great for covering the cake.
- STEP FOUR: Add Food Coloring (Optional). If you’re opting for a pink or red hue, add a few drops of gel food coloring to the frosting. Mix on medium speed until the color is uniformly distributed throughout the buttercream. Start with a small amount and add more gradually until you achieve your desired shade. This step allows for beautiful customization of your cake’s appearance.
This method ensures a perfectly smooth, rich, and spreadable buttercream that will elevate your Heart Shaped Cherry Cake to new heights of deliciousness.
Creative Twists: Substitutions & Variations
Making this Heart Shaped Cherry Cake is just the beginning! This recipe is wonderfully adaptable, allowing you to personalize it with various flavors and decorations. Get creative and make it uniquely yours!
Decoration Inspiration for Your Heartfelt Cake:
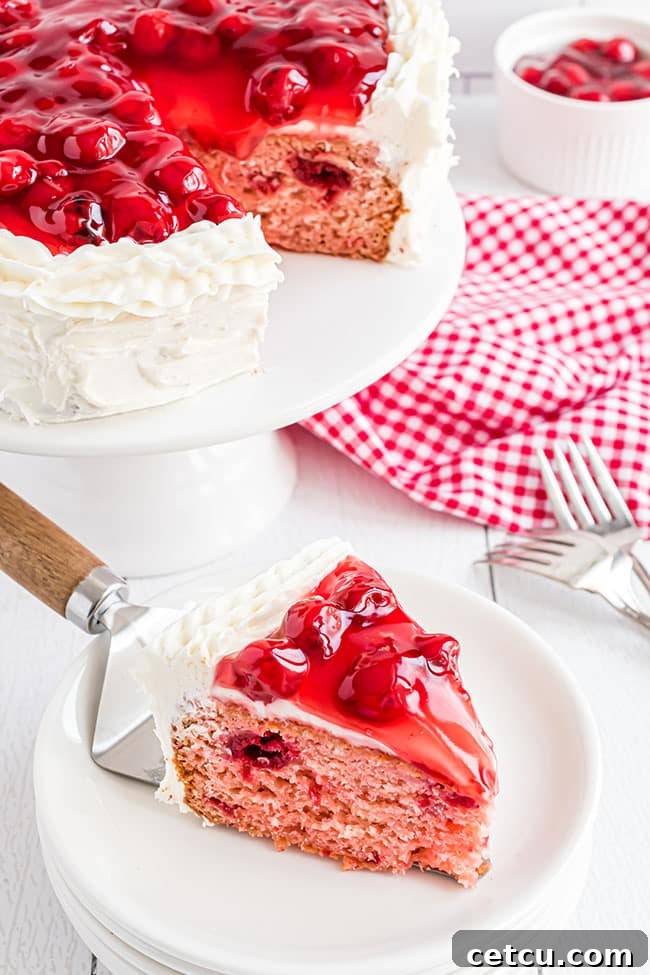
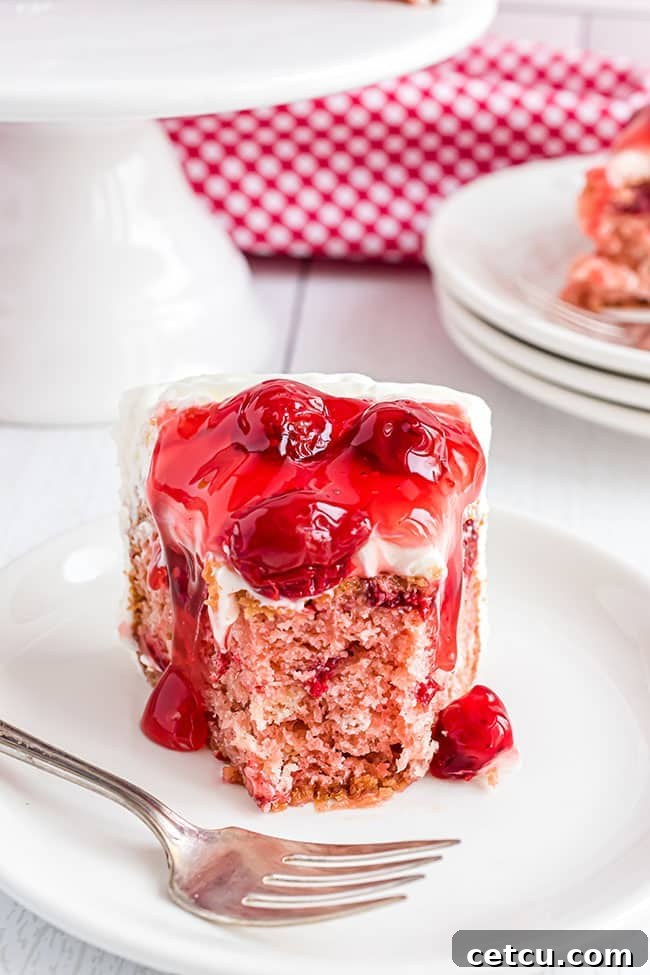
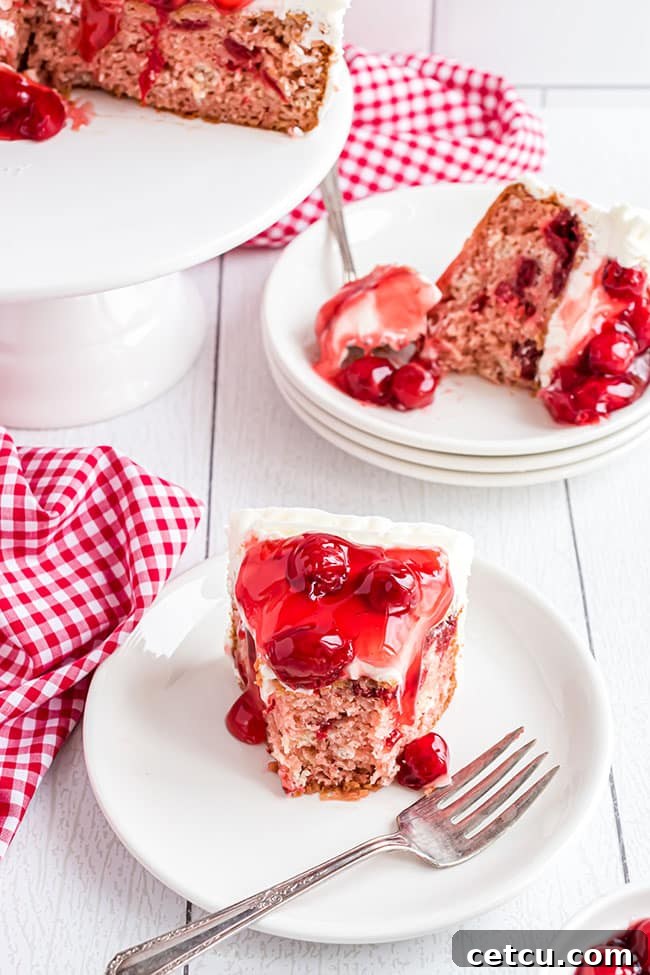
- Piped Cherry Border: For a truly elegant touch, pipe some of the buttercream around the cherry pie filling on top of the cake, just as I did. This not only creates a beautiful, professional-looking addition but also serves a practical purpose, helping to keep the luscious cherries from slipping off the cake when serving.
- Chocolate Chip or Sprinkle Topping: After frosting your vanilla cherry heart cake with a smooth layer of buttercream, top it generously with mini chocolate chips for a subtle cocoa crunch, or colorful sprinkles for a festive, celebratory look. Valentine’s Day sprinkles are especially charming!
- Pink Dream Cake: Tint your entire buttercream frosting a lovely soft pink hue using gel food coloring. Once the cake is completely iced in pink, sprinkle the top with mini chocolate chips and a small amount of extra cherry pie filling for a delightful contrast in color and texture.
- Cherry Liquor Infusion: Elevate your buttercream frosting by adding a dash of cherry liquor (such as Kirsch). This intensifies the cherry flavor and adds a sophisticated note. Garnish the finished cake with elegant curls of shaved white or dark chocolate for a gourmet touch.
- Black Forest Inspired: Transform your cake into a Black Forest delight by frosting it with a rich chocolate buttercream. A hint of cherry liquor in the chocolate frosting will deepen the flavor profile, perfectly complementing the cherry filling.
Sweet Heart Cake Flavor Variations:
- Chocolate Cherry Chip: For those who adore the combination of chocolate and cherry, consider adding some mini or regular chocolate chips directly into the white cake mix and cherry pie filling batter. This ensures a creamy chocolate complement in each and every bite, enhancing the overall flavor experience.
- True Black Forest Experience: If you’re a devoted fan of traditional black forest cake, simply swap out the white cake mix for a rich chocolate cake mix in this heart-shaped cherry cake recipe. Once baked and cooled, cover it with a smooth, glossy chocolate ganache icing instead of buttercream for an authentic, decadent finish.
- Elevate Canned Frosting: Short on time but still want a homemade touch? You can easily use canned frosting and miraculously make it taste more like homemade by whipping it vigorously with an electric mixer for 2-3 minutes. This simple step incorporates air, giving the canned frosting a much lighter, fluffier texture that rivals scratch-made buttercream.
- Strawberry Sweetheart: Not a fan of cherries, or looking for a different fruit? Make and decorate this heart-shaped cake with delicious strawberry pie filling instead of cherry. The vibrant red color and sweet strawberry flavor will create another lovely and equally romantic dessert.
- Other Fruit Fillings: Experiment with other pie fillings like blueberry, apple, or peach for seasonal variations. Each fruit will bring its unique flavor profile to this versatile cake base.
- Cream Cheese Frosting: For a tangier, richer frosting, consider using a cream cheese frosting instead of buttercream. The slight tanginess pairs beautifully with the sweet cherry filling.
More Sweet Treats to Share Your Love
Why settle for store-bought candy when you can create delectable homemade treats that truly express your affection? Ditch the ordinary this year and surprise your loved ones with a homemade treat for Valentine’s Day or any special occasion. These recipes are sure to warm hearts and tantalize taste buds:
- Red Velvet Cake Mix Brownies: Indulgent, fudgy brownies with that classic red velvet flavor – incredibly easy thanks to a cake mix!
- Chocolate Covered Strawberry Cake Balls: Bite-sized delights combining the sweetness of strawberries with a rich chocolate coating, perfect for gifting.
- Chocolate Dipped Valentine Brownies: Simple brownies made extra special with a dip in chocolate and festive sprinkles.
- Chocolate Covered Cherry Cake: Another fantastic option for cherry and chocolate lovers, offering a different take on this classic flavor pairing.
To me, Valentine’s Day, or any day you choose to celebrate love, is truly about the simple, thoughtful gestures you make to show someone how much you care. This beautifully crafted heart-shaped cake, made with your own hands, definitely goes beyond words to say, “I Love You!” It’s a testament to the joy of baking and the power of shared sweetness.
Heart Shaped Cherry Cake
15 servings
15 minutes
40 minutes
55 minutes
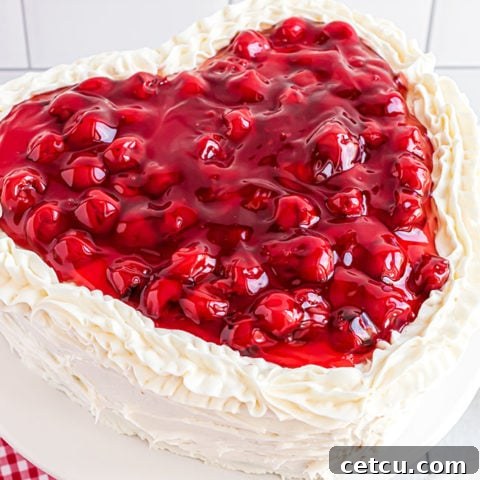
You don’t have to wait for Valentine’s Day to make this Heart Shaped Cherry Cake recipe. Moist white cake “coupled” with sweet cherry pie filling just bursting with flavor and the love you put into it is perfect for any occasion or any time.
Ingredients
- 1 white cake mix
- 2 large eggs
- 1 teaspoon baking powder
- 1 teaspoon vanilla extract
- 1 teaspoon almond extract
- 1 (21 oz) can cherry pie filling (*more if using as garnish)
For Buttercream Frosting:
- 1 cup unsalted butter, softened
- 1 teaspoon vanilla extract
- 1 teaspoon almond extract
- 4 cups (1 pound) powdered sugar, sifted
- 2-4 tablespoons whole milk
- Food coloring (optional, gel recommended)
Garnish
- Additional cherry pie filling (optional garnish)
- Mini chocolate chips or sprinkles (optional)
Instructions
Sweetheart Cherry Cake
- Preheat oven to 325° F (160°C). Lightly grease an 8 or 9 x 2½ -inch heart-shaped cake pan. (Alternatively, you can substitute a 9×13-inch pan.)
- In a large bowl, mix together on medium speed, the dry cake mix, eggs, baking powder, both extracts, and 1/2 can of cherry pie filling until just moistened and well combined. Gently fold in the remaining 1/2 can of cherry pie filling by hand using a rubber spatula until evenly distributed. (If you prefer smaller cherry pieces, you can add the whole can and mix with the electric mixer, but folding helps keep whole cherries intact). The batter should appear thick.
- Pour the cake batter into the prepared pan, and level the top with a spatula to ensure even baking.
- Bake for 65-75 minutes for the heart-shaped pan, or 40-45 minutes for a 9×13-inch pan, or until a toothpick inserted into the center comes out clean. Remove the cake from the oven and allow it to cool completely in the pan on a wire rack. Once fully cooled, invert the cake onto a serving platter to decorate.
Buttercream Frosting
- Using an electric mixer, cream the softened butter, vanilla extract, and almond extract until light and fluffy, about 3-5 minutes.
- Slowly add the sifted powdered sugar, one cup at a time, beating well after each addition until fully incorporated. Add 2 tablespoons of milk and mix well. If needed, continue adding milk 1 tablespoon at a time until the frosting is smooth, creamy, and has a spreadable consistency.
- Mix in food coloring, if desired, to achieve a pink or red icing. You can also leave it white for a classic look. If coloring, ensure the color is uniform throughout.
To Decorate:
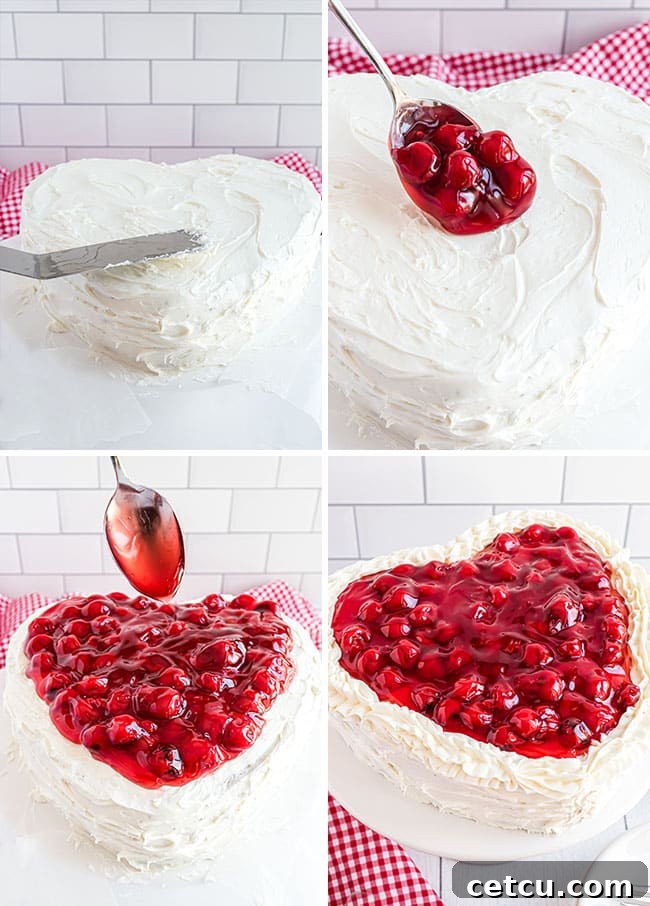
- Frost all sides and the top of the cooled cake with white buttercream frosting using an icing spatula.
- Optional Garnishes: Evenly spoon about 1/2 can of additional cherry pie filling over the top of the cake, keeping the pie filling about one inch from the edge. Alternatively, sprinkle with mini chocolate chips or decorative sprinkles.
- Fill a decorating bag, fitted with a 1M star tip, with some of the frosting. Pipe a decorative border around the edge of the cherry pie filling or whatever topping you used. This adds a beautiful finish and helps secure the topping.
Notes
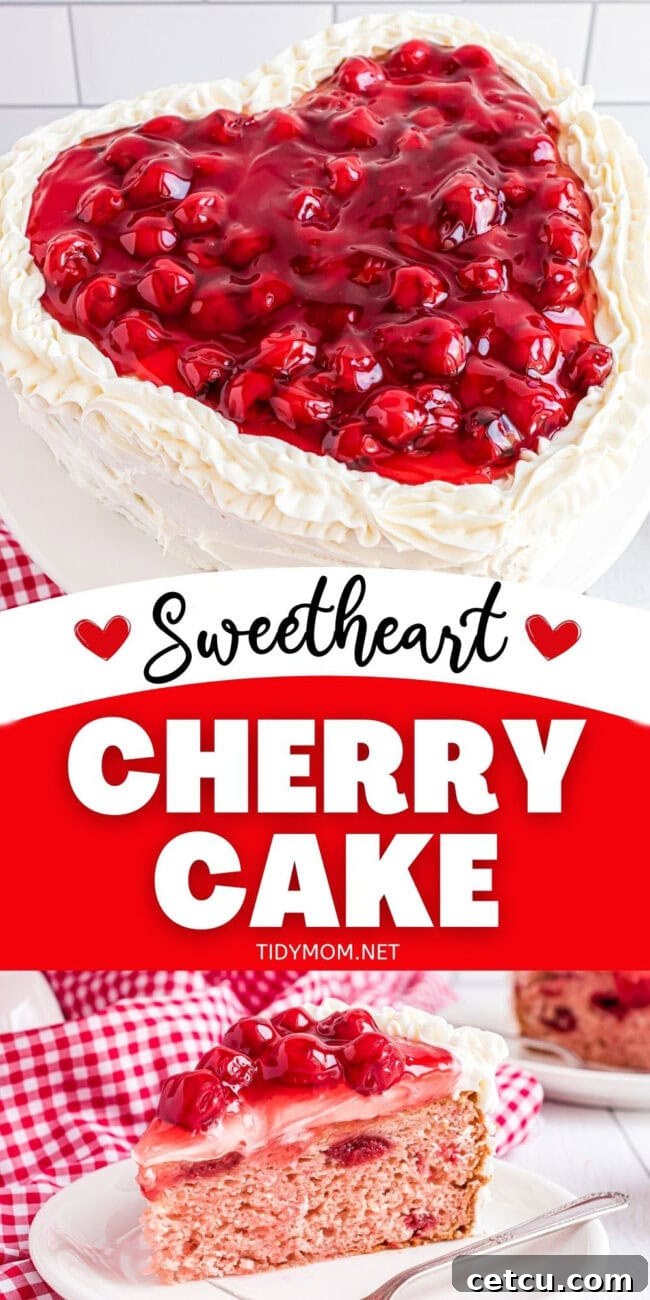
There are several delightful options for decorating this heart-shaped cake to suit your taste and occasion. I personally love to cover the entire cake in a smooth, classic white buttercream frosting as a base. Then, I add a generous layer of cherry pie filling, or perhaps some mini chocolate chips or festive Valentine sprinkles, to the center of the top. To complete the look and give it a polished, bakery-style finish, I pipe a decorative border of frosting around the edge of the topping. This technique creates an elegant presentation that’s both simple and stunning, making your homemade cake look truly professional.
Nutrition Information:
Yield: 15
Serving Size: 1 slice
Amount Per Serving:
Calories: 157
Total Fat: 14g
Saturated Fat: 8g
Trans Fat: 1g
Unsaturated Fat: 4g
Cholesterol: 58mg
Sodium: 159mg
Carbohydrates: 7g
Fiber: 0g
Sugar: 3g
Protein: 1g
Nutrition information is estimated based on the ingredients and cooking instructions as described in each recipe and is intended to be used for informational purposes only. Please note that nutrition details may vary based on methods of preparation, origin, and freshness of ingredients used.
Did you make this recipe?
We’d love to see your creation! Please leave a comment on the blog or share a photo on Instagram and tag us!
Originally posted in January 2010. UPDATED February 2022. We’ve given this beloved post a refresh with more detailed information and improved visuals! The original delicious recipe remains unchanged.