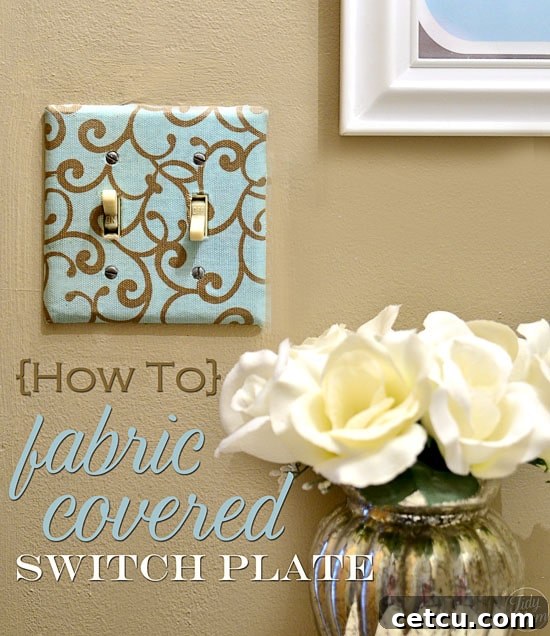
Unlock your creativity and add a touch of personalized elegance to your home decor with this simple yet impactful DIY project. Last week, I shared how I crafted stunning fabric-covered canvas wall art for my bathroom, transforming the space with custom flair. Building on that theme, I realized the perfect complementary touch would be a matching **fabric-covered switch plate**. This small detail can make a huge difference, seamlessly integrating with your existing decor and giving your room a polished, custom-designed feel. If you’ve been looking for an easy, affordable, and incredibly satisfying way to upgrade your living space, you’ve come to the right place. Let’s dive into creating a beautiful, cohesive look for your home, one switch plate at a time!
Transform Your Space: The Art of Fabric-Covered Switch Plates
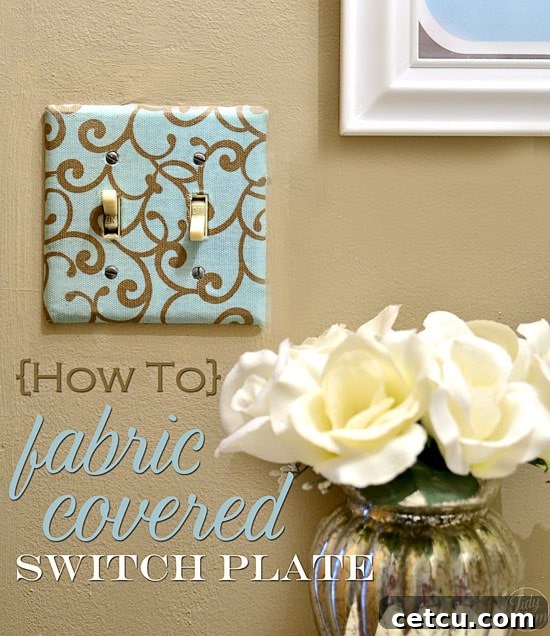
In the world of interior design, it’s often the subtle details that leave the biggest impression. While functional, standard switch plates can sometimes stick out or clash with your carefully curated decor. This DIY fabric-covered switch plate project offers an innovative and highly customizable solution. Imagine a bland plastic switch plate becoming a mini canvas, reflecting the vibrant patterns or soothing textures of your room’s aesthetic. It’s an inexpensive project that yields surprisingly professional results, allowing you to extend your design theme to every corner, even to the most overlooked elements.
Beyond aesthetics, there’s immense satisfaction in creating something with your own hands. This project is not only easy but also quick, making it perfect for beginners or anyone looking for a speedy home decor refresh. Whether you want to match existing fabrics, introduce a pop of contrasting color, or simply cover up an old, discolored switch plate, this tutorial will guide you through every step. Let’s gather our materials and begin this exciting journey of personalization.
Essential Supplies for Your Fabric Covered Switch Plate
Before we embark on this creative endeavor, ensuring you have all the necessary supplies will make the process smooth and enjoyable. Most of these items are readily available at craft stores or even around your home, highlighting the budget-friendly nature of this project. Here’s what you’ll need:
- Switch Plate Cover: Start with any standard plastic switch plate. You can use an old one you want to refresh or purchase an inexpensive new one. Ensure it’s clean and free of dust or grease for optimal adhesion.
- Small Piece of Fabric: This is where your creativity truly shines! Select a fabric that complements your room’s decor. A piece slightly larger than your switch plate (e.g., 6×8 inches for a standard single switch plate) will be ample. Cotton quilting fabric works wonderfully due to its manageable thickness and wide array of patterns, but feel free to experiment with other light- to medium-weight fabrics.
- Plastic or Protective Work Surface: Mod Podge can be sticky! Protect your workspace by laying down a plastic tablecloth, old newspaper, or a cutting mat. This makes cleanup a breeze and prevents any accidental messes.
- Mod Podge (Matte, Gloss, or Satin Finish): This versatile adhesive, sealer, and finish is the cornerstone of our project. Choose the finish that best suits your desired look – matte for a subtle, non-reflective surface; gloss for a shiny, protective sheen; or satin for a balanced, elegant touch.
- Sponge Brush or Small Paintbrush: Essential for applying Mod Podge smoothly and evenly without leaving brush strokes. A 1-inch sponge brush is ideal for this size project, ensuring good coverage.
- X-Acto Knife or Craft Knife: A sharp X-Acto knife is crucial for precise cuts, especially around the switch openings and screw holes. Safety first: always use it on a self-healing cutting mat and exercise extreme caution.
- Sharp Scissors: For initially cutting your fabric and trimming larger excess pieces. A good pair of fabric scissors will ensure clean, fray-free edges.
- Pencil or Fabric Marker (Optional): Useful for tracing the switch plate onto your fabric before cutting, ensuring you have enough allowance.
- Ruler (Optional): For precise measurements when cutting fabric or trimming edges.
Step-by-Step Guide: Crafting Your Custom Fabric Switch Plate
This project is surprisingly straightforward, even for novice crafters. Follow these steps carefully, and you’ll have a beautifully customized switch plate in no time.
Step 1: Prepare Your Switch Plate and Fabric
Begin by removing your chosen switch plate cover from the wall. If it’s an old one, give it a thorough cleaning to remove any dirt or grime. A clean surface is paramount for good adhesion. Next, lay your chosen fabric flat. Place the switch plate on top of the fabric and cut around it, leaving approximately 0.5 to 1 inch of extra fabric on all sides. This allowance gives you room to maneuver and ensures complete coverage without struggling to align edges perfectly. Consider the fabric’s pattern placement at this stage if you have a specific design you want centered on the plate.
Step 2: Apply the First Layer of Mod Podge
Place your switch plate cover face-up on your protected work surface. Using your sponge brush, apply a generous, even layer of Mod Podge directly onto the entire front surface of the switch plate. Make sure to cover every part, including the edges and the areas around the openings. Don’t be shy with the Mod Podge; this layer acts as the adhesive to bond the fabric securely to the plate. Smooth out any visible brush strokes as much as possible.
Step 3: Position and Smooth Your Fabric
Carefully pick up your cut fabric piece and center it over the Mod Podge-covered switch plate. Gently lay the fabric down, starting from one edge and working your way across, ensuring it adheres smoothly. Once the fabric is in place, use your fingers to gently but firmly press down on all surfaces, working from the center outwards to the edges. This action helps to eliminate any air bubbles or creases. Spend a few moments ensuring the fabric is perfectly flat and wrinkle-free. A credit card or a brayer can also be used for extra smoothing.
Step 4: Allow to Dry Slightly and Trim Excess Fabric
Let the fabric-covered switch plate sit for about 10-15 minutes, allowing the Mod Podge to partially dry and secure the fabric in place. This slight drying time makes the trimming process much easier and cleaner. Once slightly tacky but not fully dry, carefully trim the excess fabric around the perimeter of the switch plate using your sharp scissors. Cut as close to the edge of the switch plate as possible for a neat finish, taking care not to snip into the plate itself or the newly adhered fabric. Precision here will make a big difference in the final look.
Step 5: Cut Out Switch and Screw Openings
Now comes the detailed work. Use your X-Acto knife to carefully cut out the openings where the light switch toggles or outlets will protrude. For toggle switches, make precise cuts around the four sides of the opening. For rocker switches or outlets, follow the contours carefully. It’s often helpful to pierce the center of the opening first and then cut outwards to the corners or edges. You can choose to leave one side of the fabric attached inside the opening (creating a small flap) or cut it completely free. Additionally, use the tip of your X-Acto knife to punch holes where the screw openings are located on the switch plate. Ensure these holes are clean and clear.
Step 6: Secure Inner Edges with Mod Podge
Flip the switch plate over to the back side. If you left small fabric flaps in the switch openings, apply a tiny amount of Mod Podge to the back of these flaps and carefully fold them inward, pressing them down to adhere to the back of the switch plate. This provides a clean, finished edge around the openings. If you cut the fabric completely free, you can apply a very thin line of Mod Podge along the inner edges of the fabric around the openings on the front side, using a small brush or toothpick, to prevent fraying and ensure a crisp finish. Allow this to dry.
Step 7: Apply Final Sealing Coats of Mod Podge
Turn the switch plate back over to the front. Apply a thin, even coat of Mod Podge over the entire fabric surface. This layer acts as a sealant, protecting the fabric, providing durability, and giving it a uniform finish. Allow this coat to dry completely, which typically takes 15-20 minutes, or longer depending on humidity. Once dry, apply a second thin coat for added protection and a more durable finish. If you desire a very high gloss or extra protection, a third coat can be applied. Ensure each coat dries thoroughly before applying the next.
Step 8: Final Touches and Installation
Once all coats of Mod Podge have completely dried and cured (this might take several hours or even overnight for full hardness), your beautiful new fabric-covered switch plate is ready for installation! Re-attach it to your wall, carefully aligning the screw holes. Stand back and admire your handiwork. You’ve just transformed a mundane household item into a unique piece of custom decor!
Tips for Achieving Professional Results
- Fabric Choice Matters: Lightweight cotton fabrics are easiest to work with for beginners as they conform well and don’t add bulk. Avoid very thick or stretchy fabrics, which can be challenging to smooth and adhere evenly.
- Less is More with Mod Podge (for topcoats): While you want a good amount for initial adhesion, subsequent sealing coats should be thin and even to prevent visible brush strokes and excessive drying time.
- Patience with Drying: Don’t rush the drying process between coats. Adequate drying time ensures a strong bond and a smooth, durable finish.
- Sharp Tools are Key: A dull X-Acto knife or scissors will lead to jagged edges and frustration. Always use sharp tools for clean cuts.
- Consider Screw Heads: For a completely seamless look, you might consider painting the screw heads to match your fabric or a dominant color in the pattern before screwing them back in.
- Test First: If you’re using a particularly delicate or unfamiliar fabric, test a small piece with Mod Podge beforehand to ensure it doesn’t bleed or react unexpectedly.
Maintenance and Care for Your Fabric Switch Plate
Once your fabric-covered switch plate is installed, it’s remarkably durable. To clean it, simply wipe it gently with a damp cloth. Avoid harsh chemicals or abrasive cleaners, which could damage the Mod Podge finish. For tougher spots, a mild soap solution on a cloth can be used sparingly. The Mod Podge acts as a protective layer, making the fabric resistant to dust and light moisture.
Beyond the Switch Plate: Expanding Your Fabric Crafting
This technique isn’t limited to switch plates! Once you’ve mastered this project, you can apply the same Mod Podge and fabric method to other small household items. Think outlet covers, picture frames, small boxes, or even coasters. It’s an excellent way to use up fabric scraps and create cohesive design elements throughout your home. The possibilities are endless when you combine the versatility of Mod Podge with your favorite fabrics.
There you have it – a simple yet effective way to add a personal and stylish touch to your home. Fabric-covered switch plates are a testament to how small DIY projects can significantly enhance your living environment. They offer a custom look that store-bought items simply can’t replicate, all while being kind to your budget and kindling your creative spark. So go ahead, pick out your favorite fabric, and give your switch plates the makeover they deserve!
~~~~~~~~~~~~~~~~~~~~~~