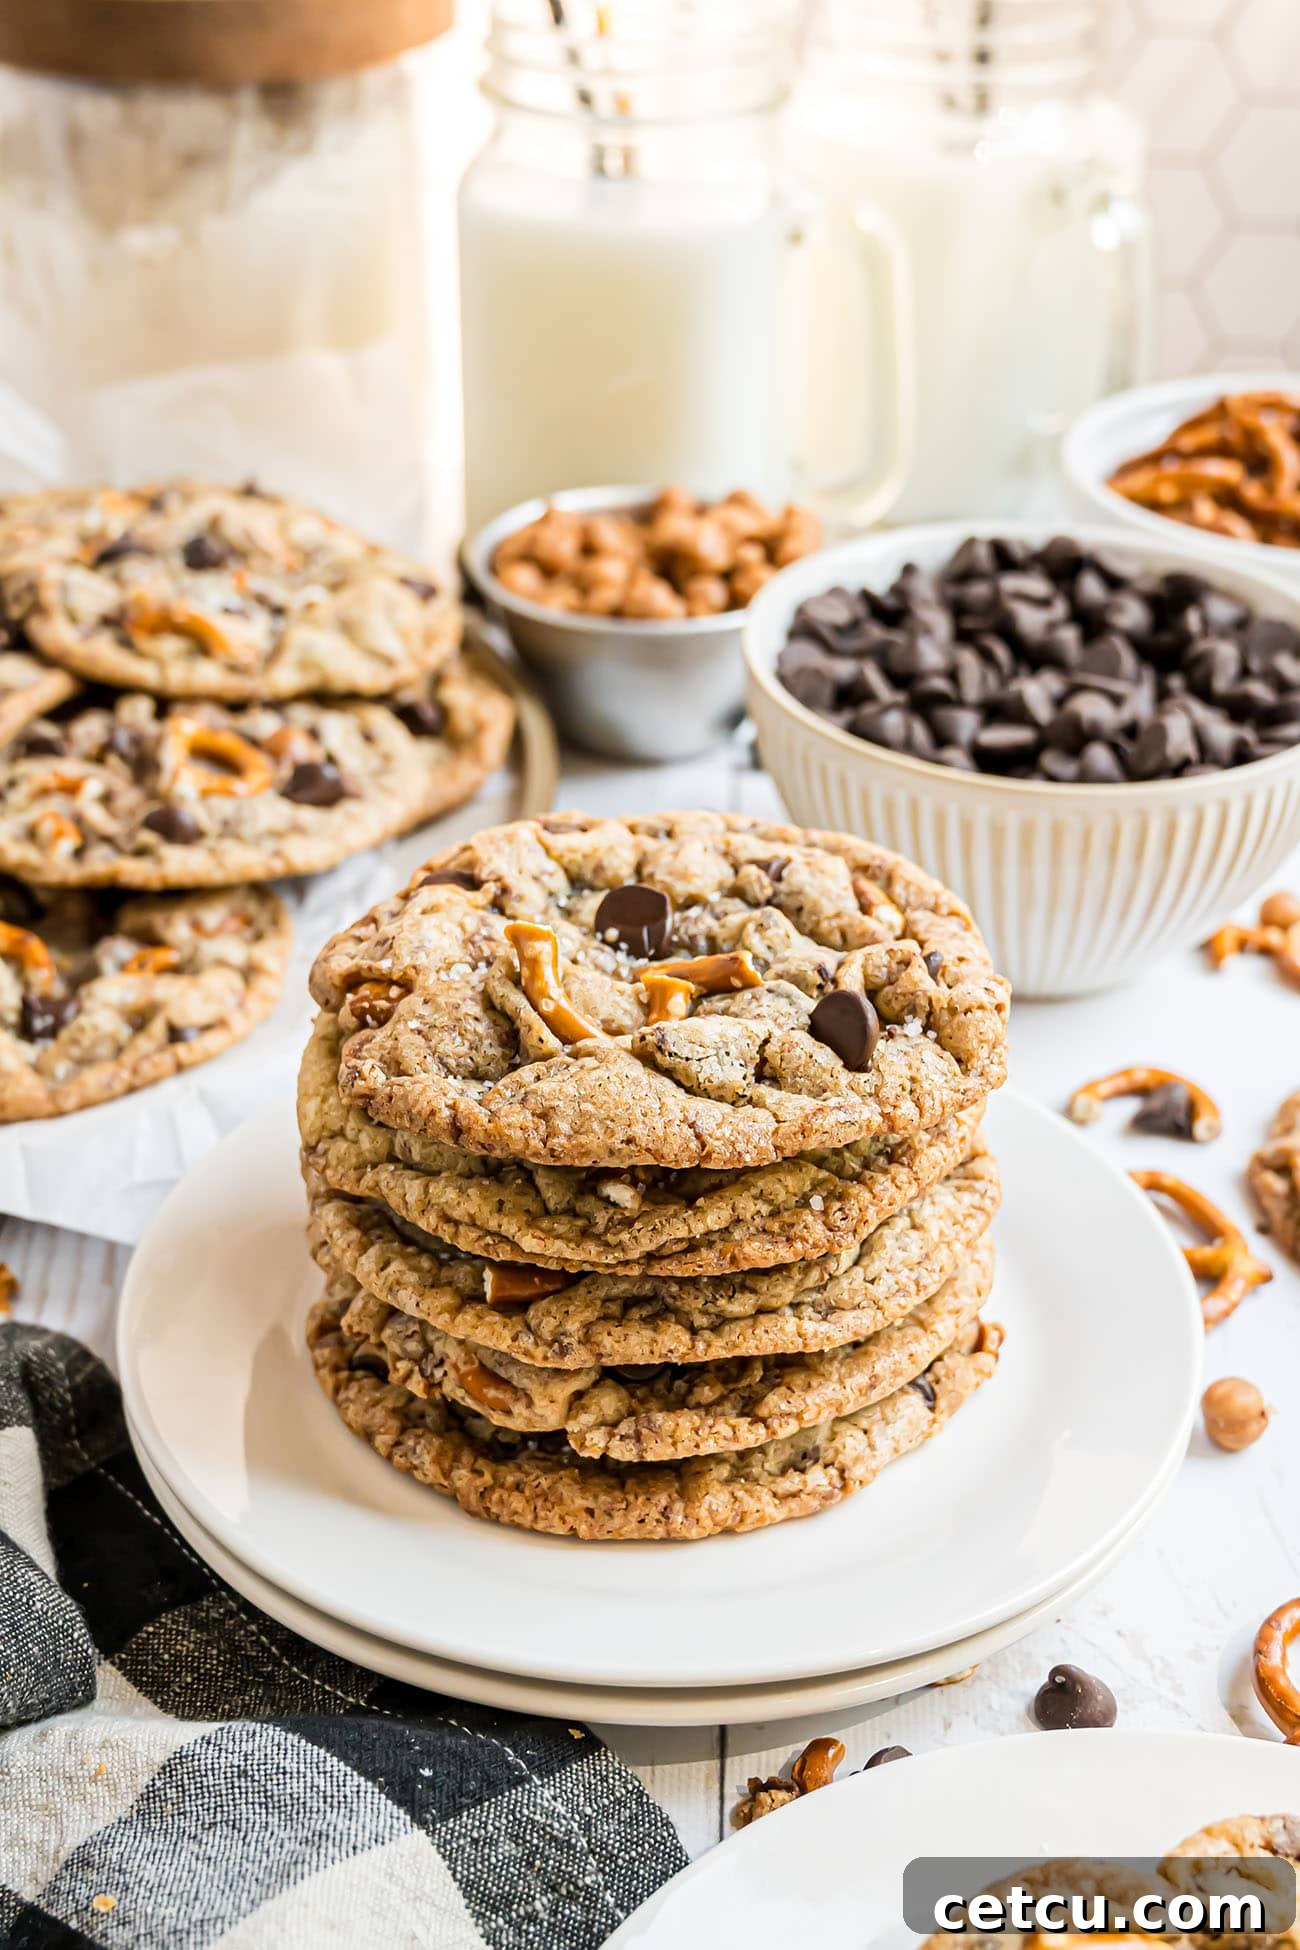
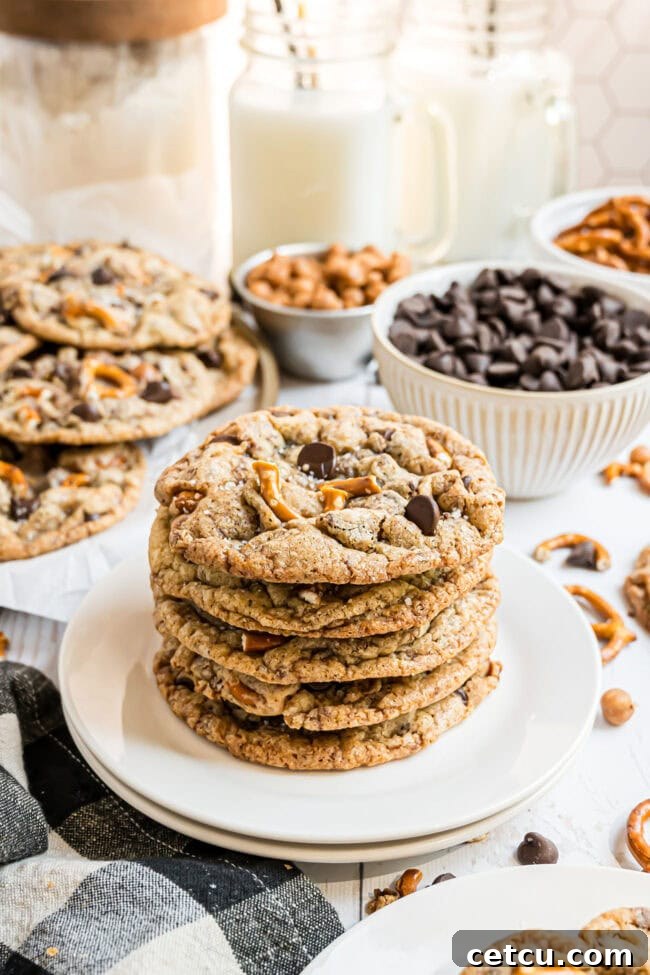
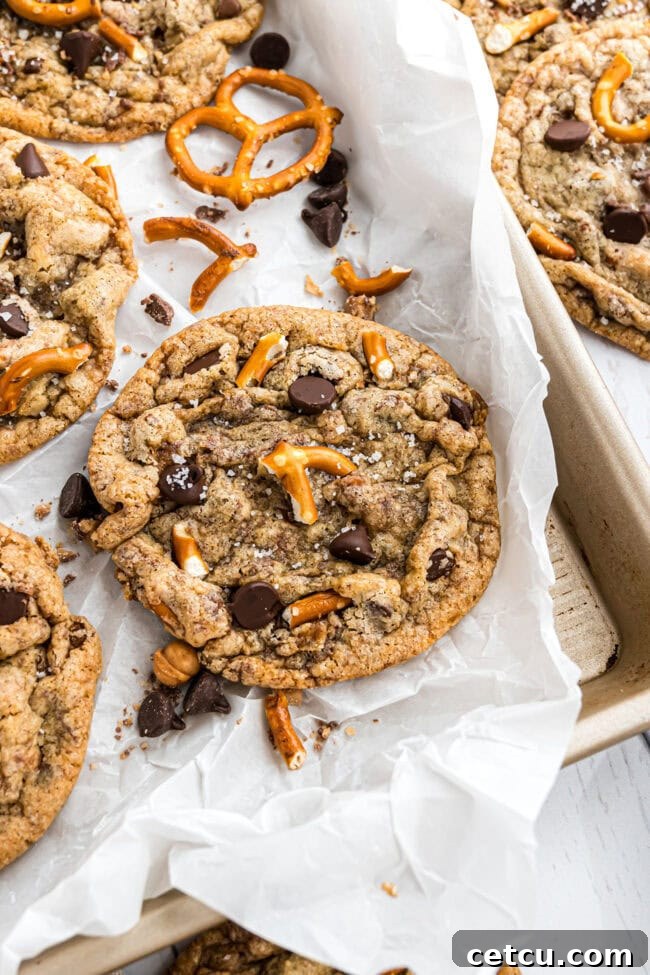
Prepare your taste buds for an extraordinary culinary adventure with our ultimate Kitchen Sink Cookie recipe! These aren’t just any cookies; they’re a delightful symphony of flavors and textures, meticulously crafted to deliver the perfect balance of sweet and salty in every single bite. Each cookie is generously loaded with irresistible mix-ins like rich toffee bits, luscious chocolate chips, crunchy pretzel twists, and chewy caramel bits, creating a truly unforgettable treat that promises to be a total crowd-pleaser. To elevate the experience even further, we finish them with a delicate sprinkle of coarse sea salt, adding an extra layer of delightful crunch and highlighting their complex flavor profile.
If you’re constantly on the hunt for more sensational cookie recipes to expand your baking repertoire, you’re in luck! Be sure to explore some of our other cherished creations that are guaranteed to impress: our decadent Chocolate Fudge Cookies, the sophisticated Toffee Chocolate Chip Shortbread Cookies, the irresistibly nutty Peanut Butter Blowout Cookies, and the delightfully rich Red Velvet Gooey Butter Cookies. Each recipe offers a unique journey into the world of homemade deliciousness!
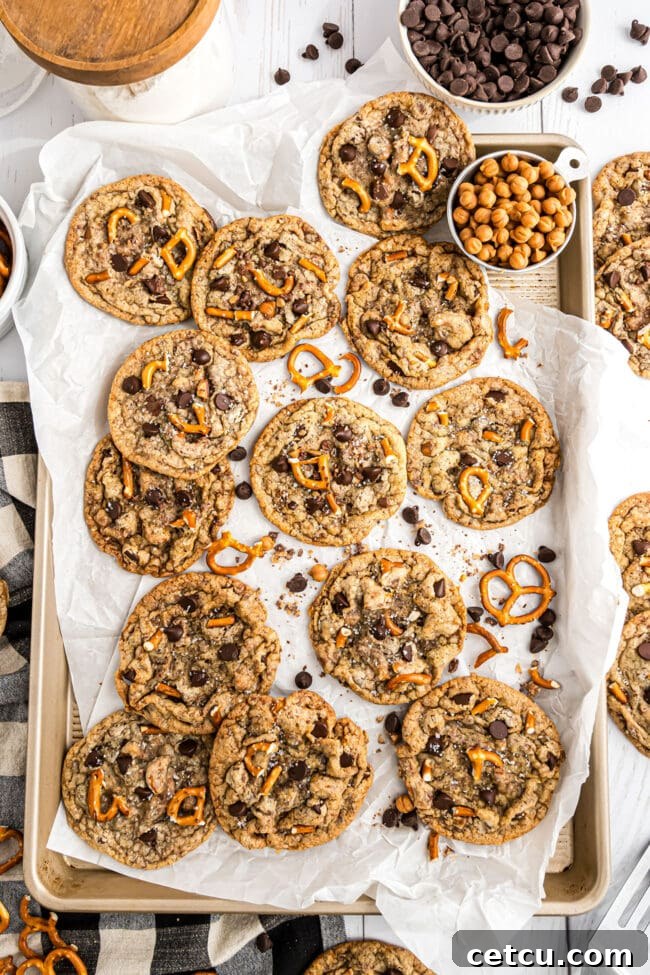
Table of Contents
Why We Love Kitchen Sink Cookies
- A Symphony of Sweet and Salty: These cookies are a masterclass in flavor balance, expertly combining the rich sweetness of toffee, chocolate, and caramel with the delightful savory crunch of pretzels and the subtle brininess of sea salt. This dynamic interplay creates an unbeatable taste experience that excites the palate and leaves you craving more. It’s the ultimate answer to those moments when you can’t decide between a sweet treat and a salty snack.
- Irresistibly Soft and Delicious: Thanks to the generous use of brown sugar, these cookies boast an incredibly soft, chewy texture that remains moist and tender for days. Each bite offers a satisfying yielding quality that makes them a true pleasure to eat. The harmonious blend of flavors ensures they’ll be a standout winner on any dessert table or a comforting pick-me-up throughout your day.
- Effortlessly Easy to Make: Despite their gourmet appearance and complex flavor, these Kitchen Sink Cookies are surprisingly simple to prepare. With straightforward steps and readily available ingredients, you can whip up a batch of these crowd-pleasing treats in no time. They are perfect for impromptu afternoon snacks, thoughtful homemade gifts, festive holiday cookie exchanges, or impressing guests at your next party.
- Endlessly Customizable and Versatile: One of the greatest joys of this recipe is its incredible adaptability. The “kitchen sink” concept truly encourages creativity, allowing you to personalize each batch to your heart’s content. Whether you’re looking to use up leftover pantry staples or experiment with new flavor combinations, you can easily swap ingredients or add new mix-ins to create your own unique signature version, making every baking session an exciting new adventure.
The Intriguing Origin of Kitchen Sink Cookies
Kitchen Sink Cookies earn their whimsical name for a very good reason: they’re designed to incorporate “everything but the kitchen sink”! This playful adage perfectly encapsulates the spirit of these cookies, which are all about versatility, resourcefulness, and a delightful chaos of ingredients. The idea is to raid your pantry and toss in a vibrant medley of mix-ins, from classic chocolate chips and crunchy nuts to savory pretzels and chewy toffee bits, creating a beautifully unpredictable blend of flavors and textures.
The concept behind these cookies dates back to a time when home bakers often made the most of what they had on hand, turning leftovers and forgotten ingredients into something truly special. It’s a celebration of creativity and a testament to the fact that some of the best culinary creations emerge from a bit of playful experimentation. Each batch is inherently unique, a reflection of the baker’s personal touch and the eclectic treasures found in their own “kitchen sink.” This makes every cookie a unique treat that tells a story, ensuring no two bites are ever exactly alike, and always capturing the fun, imaginative spirit of their name!
Essential Ingredients You’ll Need
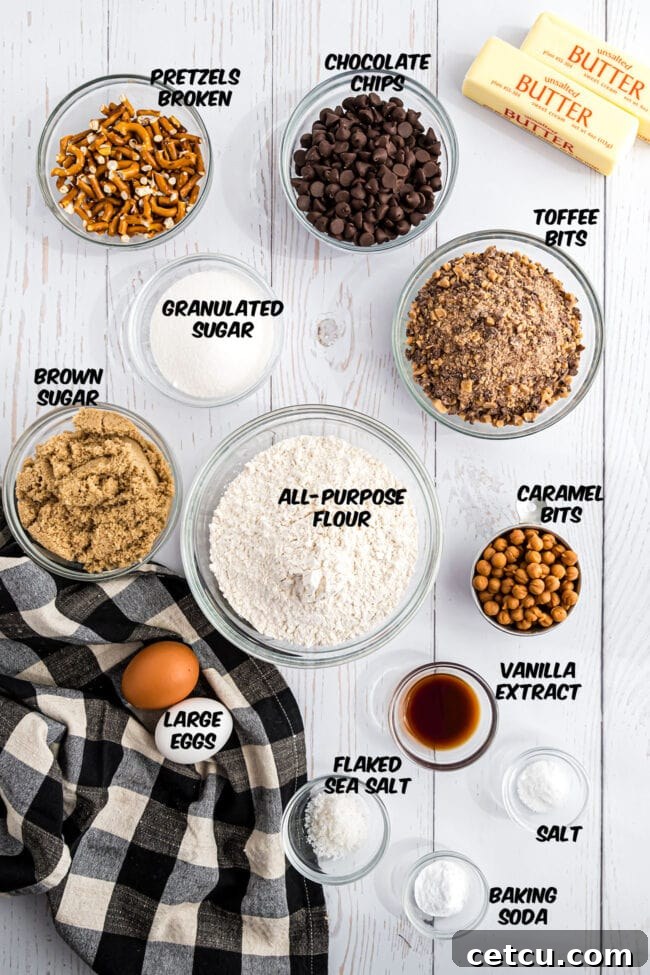
For precise measurements and detailed instructions, kindly refer to the comprehensive printable recipe card located at the very bottom of this post.
- Unsalted Butter, Softened: The foundation of any great cookie, softened butter creams beautifully with sugar, incorporating air for a light, tender crumb. Ensure it’s truly softened, not melted, for the best results.
- Light Brown Sugar, Packed: This ingredient is crucial for adding moisture, chewiness, and a rich, molasses-like depth of flavor that is characteristic of classic cookies. Make sure to pack it firmly when measuring!
- Granulated Sugar: Providing additional sweetness and contributing to the cookie’s crisp edges, granulated sugar balances the richness of the brown sugar.
- Vanilla Extract: A baking staple, pure vanilla extract enhances all the other flavors, adding a warm, aromatic note that is indispensable in cookies.
- Eggs, Room Temperature: Room temperature eggs emulsify better with the butter and sugar, creating a smoother, more uniform dough. This contributes to the cookies’ consistent texture and rise.
- All-Purpose Flour: The primary structural component of the cookies. Proper measurement is key to achieving the right consistency – see our special tip below on how to measure correctly!
- Salt: A pinch of salt is vital for balancing the sweetness of the other ingredients and enhancing all the flavors, making them pop.
- Baking Soda: This leavening agent helps the cookies spread and achieve a soft, slightly chewy interior. Always check its freshness; expired baking soda won’t yield the desired results.
- English Toffee Bits: These delightful morsels melt slightly as they bake, creating pockets of buttery, caramelized flavor that adds an irresistible chewiness and richness.
- Semi-Sweet Chocolate Chips or Milk Chocolate Chips: Essential for that classic cookie appeal, chocolate chips bring a melty, comforting sweetness. Choose your preferred type for a darker or milder chocolate experience.
- Broken Pretzel Twists: The secret weapon for that perfect salty crunch! Pretzels provide a fantastic textural contrast and a savory counterpoint to the sweet elements.
- Caramel Bits or Chips: These soft, gooey pieces introduce a rich, buttery, and slightly sticky sweetness that melts beautifully into the cookies, adding another layer of indulgence.
- Coarse or Flaked Sea Salt for Topping: A finishing touch that makes all the difference. Sprinkling coarse sea salt on top before baking intensifies the sweet and salty contrast and adds a pleasant, subtle textural element.
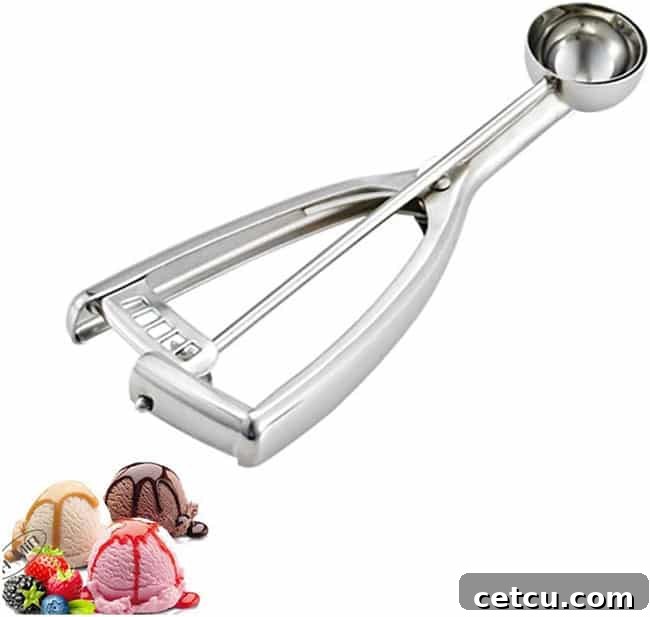
Featured Product: The Indispensable Cookie Scoop
Achieve bakery-perfect cookies every time with this versatile cookie scoop! Designed for precision and ease, it’s perfect for creating beautifully rounded, uniform balls of cookie dough, ensuring consistent baking and a professional finish. But its utility doesn’t stop there – this scoop is also ideal for perfectly portioning ice cream, crafting uniform meatballs, neatly filling cupcake liners, and even creating elegant melon balls for appetizers. A true kitchen essential for any aspiring or seasoned baker!
Step-by-Step Directions For Baking Perfect Kitchen Sink Cookies
Baking these extraordinary cookies is an incredibly rewarding and surprisingly simple process. The prep time is minimal, and with our clear, concise instructions, you’ll be well on your way to enjoying these sweet and salty delights. Honestly, the hardest part will be patiently waiting for them to cool before you devour them!
- Cream Butter and Sugars: Begin by placing your softened unsalted butter, light brown sugar, and granulated sugar into a large mixing bowl. Using an electric mixer, cream these ingredients together on medium-high speed until the mixture becomes wonderfully light, fluffy, and pale in color. This process usually takes about 3-4 minutes and is crucial for incorporating air into the dough, which contributes to the cookies’ texture.
- Incorporate Wet Ingredients: With the mixer still running, slowly pour in the vanilla extract, ensuring it is fully combined. Then, add the room temperature eggs one at a time, beating well after each addition until just incorporated. Continue to beat for another 2-3 minutes until the mixture is cohesive. Remember to scrape down the sides of the bowl with a rubber spatula frequently to ensure all ingredients are evenly mixed.
- Add Dry Ingredients: In a separate bowl, sift together your all-purpose flour, salt, and baking soda. This sifting step helps to aerate the flour and remove any lumps, ensuring a smooth dough. Gradually add the sifted dry ingredients to your wet mixture, mixing on the lowest speed possible. Mix only until the dry ingredients are just incorporated and no streaks of flour remain. Be careful not to overmix, as this can lead to tough cookies.
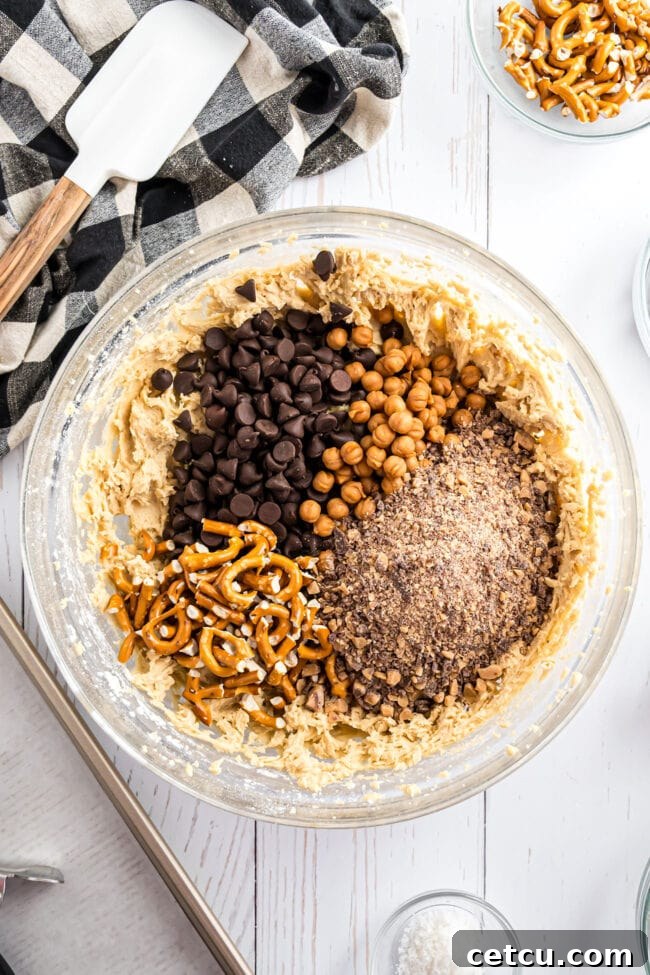
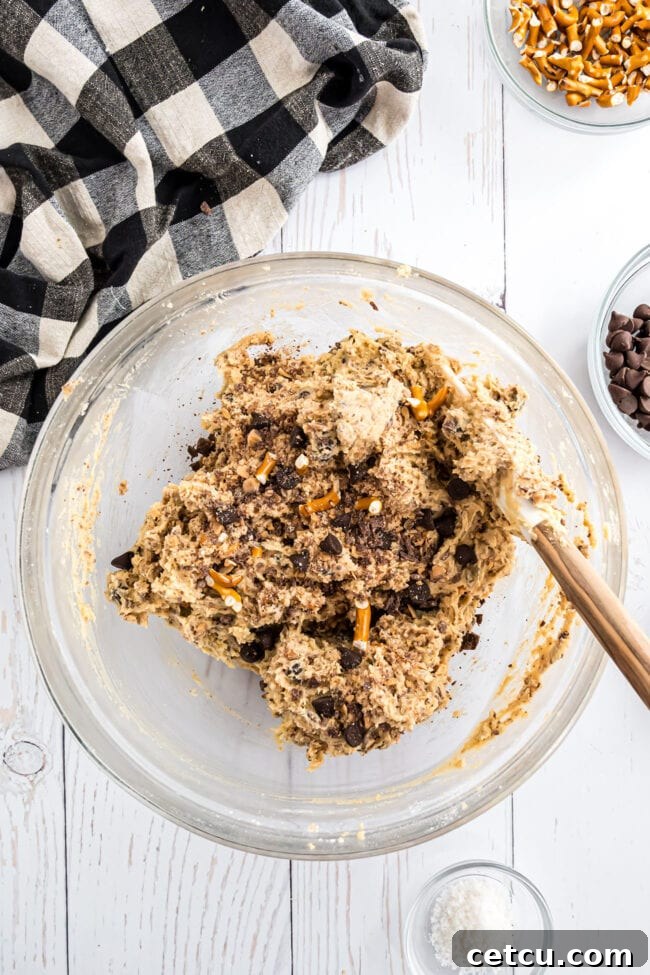
- Fold in the Mix-ins: This is where the “kitchen sink” magic truly happens! Using a sturdy rubber spatula (avoid using your electric mixer for this step), gently fold in your English toffee bits, semi-sweet chocolate chips (or milk chocolate), broken pretzel twists, and caramel bits. Distribute them evenly throughout the dough, making sure every cookie will get a generous amount of these delicious treasures. Reserve a small handful of mix-ins for topping if desired.
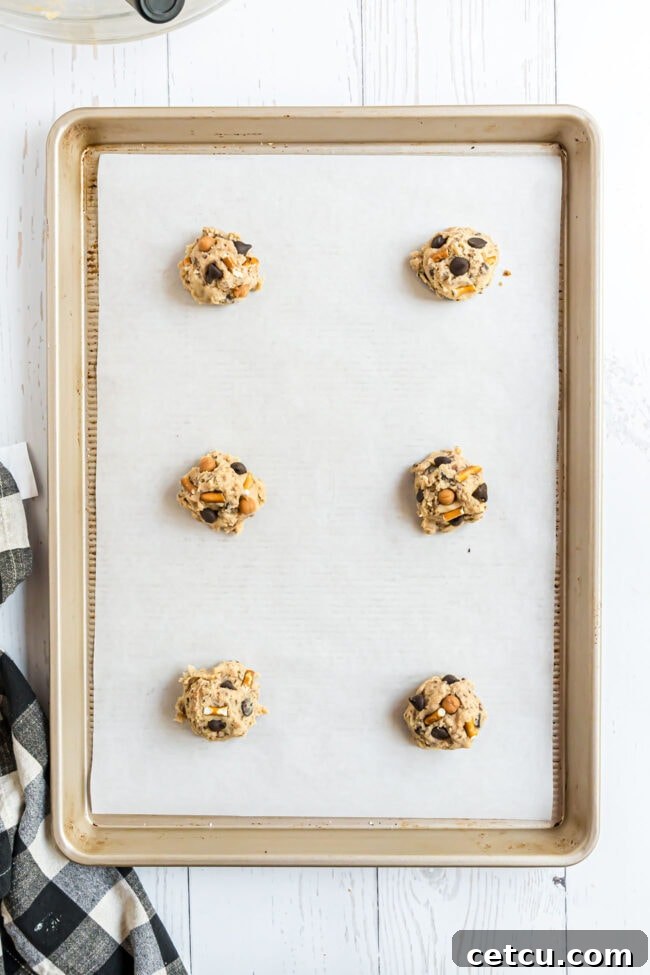
- Form and Prepare for Baking: Using a cookie scoop (approximately 2 tablespoons in size) for uniform cookies, scoop the dough and roll it into smooth balls. Place these dough balls onto a prepared baking sheet lined with parchment paper or a silicone baking mat, ensuring they are spaced at least 2 inches apart to allow for proper spreading. If you reserved some mix-ins, gently press a few extra chocolate chips, pretzel pieces, or caramel bits onto the top of each cookie dough ball for an appealing finish. Finally, sprinkle a delicate pinch of coarse or flaky sea salt on top of each cookie.
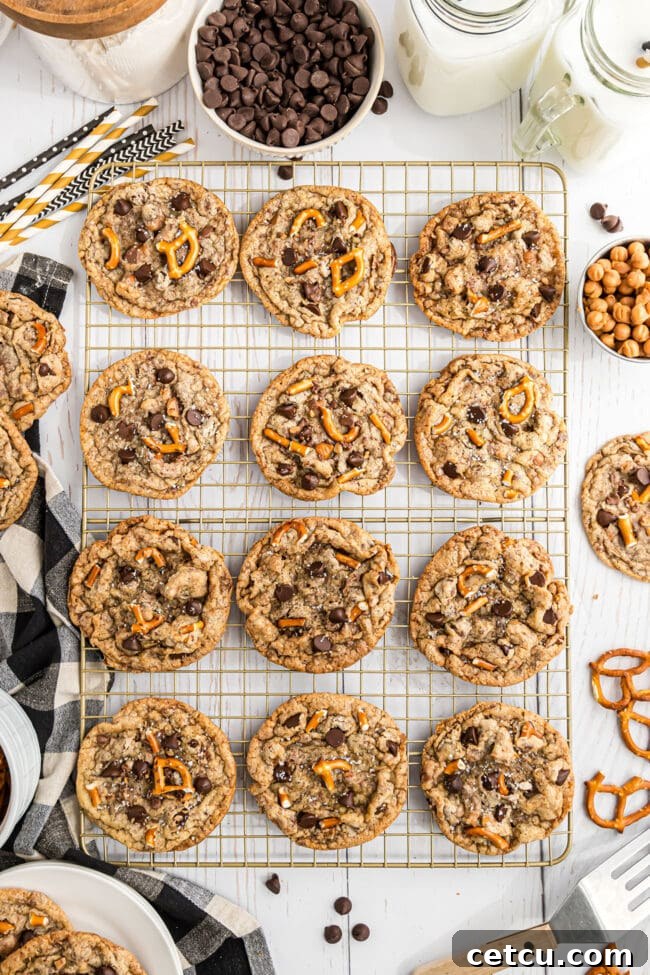
- Bake to Golden Perfection: Bake in your preheated oven for 13-15 minutes, or until the edges of the cookies are beautifully golden brown and the centers are just set but still look slightly soft. Overbaking will result in dry cookies, so keep a close eye on them! Once baked, remove the baking sheet from the oven and let the cookies cool on the sheet for about 5 minutes. This allows them to firm up slightly before transferring them to a wire rack to cool completely. Enjoy the irresistible aroma that fills your kitchen!
For the complete and comprehensive recipe, including precise ingredient quantities, please consult the full recipe card conveniently located at the bottom of this page.
How To Measure Flour Properly for Perfect Baking Results
Did you know that the way you measure flour can significantly impact the outcome of your baked goods? Improperly measured flour is one of the most common reasons for dry, dense, or crumbly cookies. For the most precise and consistent results, the ideal method is to measure your flour by weight using a digital kitchen scale. Typically, 1 cup of all-purpose flour weighs between 120 to 130 grams, depending on the brand and how it’s milled. This method eliminates variability and ensures perfect proportions every time.
If you don’t have a scale, don’t worry, you can still achieve a relatively accurate measurement using the “spoon and level” method. Instead of scooping flour directly with your measuring cup (which compacts the flour, adding too much), gently spoon the flour into your measuring cup until it’s overflowing. Then, use the back of a knife or a straight edge to level off the top, sweeping away any excess flour. This prevents the flour from becoming overly packed, giving you a measurement that is much closer to the ideal weight and guaranteeing lighter, more tender cookies. Never use your measuring cup as a scoop, as this can add up to 25% more flour than needed!
Optimal Storage Tips for Freshness
To preserve the deliciousness and extend the shelf life of your Kitchen Sink Cookies, proper storage is key. Once completely cooled, you can store these delightful treats at room temperature in an airtight container for up to 2 weeks. Ensure the container is truly airtight to prevent them from drying out and losing their delightful chewiness.
If you wish to keep them fresh for a longer period, you have excellent options. Store the cookies in an airtight container or a resealable plastic bag in the refrigerator for up to 2 months. This method, as recommended by the USDA, helps to maintain their freshness and prevent spoilage. For even more extended storage, the freezer is your best friend! Place the cooled cookies in a freezer-safe bag or an airtight container, separating layers with parchment paper if stacking, and freeze them for an impressive 8-12 months. When you’re ready to enjoy, simply thaw them at room temperature or warm them slightly in the oven for a freshly baked experience. This way, you can always have a delicious cookie ready for any craving!
Get Creative: Variations + Additions
The beauty of Kitchen Sink Cookies lies in their incredible adaptability. Feel free to unleash your inner baker and customize this recipe with various delightful additions and substitutions to make them uniquely yours!
- Caramel Alternatives: If you don’t have caramel bits on hand, no problem! You can easily use soft caramel squares. Simply unwrap them and cut each square into quarters for a similar gooey texture.
- Nutty Enhancements: For an added layer of crunch and rich flavor, incorporate your favorite nuts. Chopped pecans, walnuts, pistachios, or peanuts all work wonderfully and complement the sweet and salty profile.
- Chip Swaps: Experiment with different types of baking chips! Instead of caramel bits, try peanut butter chips for a nutty twist or butterscotch chips for a warm, buttery flavor.
- Chocolate Diversification: Don’t limit yourself to semi-sweet chocolate chips. Elevate the chocolate experience by using dark chocolate chips for a more intense flavor, milk chocolate chunks for extra creaminess, or even white chocolate chips for a sweeter, milder contrast. A combination of several types of chocolate can be truly divine!
- Tropical Touch: Fold in some shredded coconut (sweetened or unsweetened) for a tropical hint and an interesting textural element. It pairs surprisingly well with the chocolate and caramel.
- Marshmallow Melt: For an extra gooey and soft center, add some mini marshmallows. They’ll melt into pockets of sweet, fluffy goodness during baking, creating a s’mores-like experience.
- Dried Fruit Fun: A handful of dried cranberries, raisins, or chopped dried apricots can add a lovely chewy texture and a tangy contrast to the richness of the other ingredients.
- Spice it Up: A pinch of cinnamon or a tiny dash of nutmeg can add a subtle warmth, especially if you’re baking these for the fall or winter holidays.
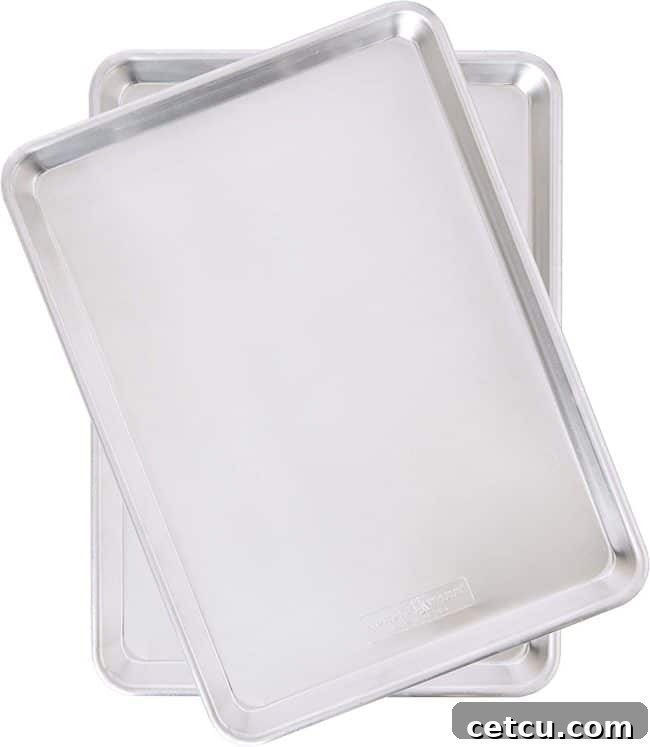
Featured Product: Essential Aluminum Half Sheet Pans
Discover the secret to professional-grade baking with our favorite aluminum half sheet pans! Crafted for exceptional durability and even heat distribution, these pans are built to last a lifetime without rusting. Their robust construction ensures consistent baking results, whether you’re creating a batch of our delicious Kitchen Sink Cookies or preparing a savory sheet pan dinner. This versatile and reliable pan will quickly become your go-to kitchen essential for all your sweet and savory culinary endeavors!
Mastering the Art of Cookie Baking: Expert Tips
Achieving cookie perfection is easier than you think with these tried-and-true baking tips. Follow these guidelines to ensure your Kitchen Sink Cookies turn out beautifully every time, guaranteeing tender textures, consistent shapes, and irresistible flavors.
- Read the Entire Recipe First: Before you even start gathering ingredients, take a moment to read the full recipe from start to finish. This helps you understand the process, anticipate steps, and prepare all necessary tools and ingredients, preventing last-minute surprises.
- Avoid Overmixing the Dough: Once the dry ingredients are added to the wet, mix only until they are just combined. Overmixing develops the gluten in the flour, which can lead to tough, dry cookies rather than the soft, chewy texture we desire.
- Measure Flour Correctly: As highlighted earlier, proper flour measurement is critical. Use a digital kitchen scale for accuracy, or employ the “spoon and level” method to avoid adding too much flour, which can drastically alter the cookie’s texture.
- Ensure Fresh Ingredients: Always check the expiration dates of your leavening agents (baking soda, baking powder) and other perishable ingredients. Fresh ingredients are vital for successful chemical reactions and optimal flavor. Stale baking soda, for instance, won’t allow your cookies to rise properly.
- Gentle Folding for Mix-ins: When incorporating your chocolate chips, pretzels, toffee, and caramel, use a rubber spatula and fold them in gently by hand. An electric mixer can crush delicate mix-ins like pretzels and overmix the dough, so hand-folding preserves texture and prevents overworking.
- Cool Baking Sheets: Never place fresh cookie dough balls on a hot baking sheet. Residual heat from a previous batch can cause the butter to melt too quickly, making the cookies spread excessively and lose their shape. Always allow the pan to cool completely between batches, or use multiple pans to rotate.
- Room Temperature Ingredients: Ensure your butter and eggs are at room temperature as specified in the recipe. Room temperature ingredients emulsify better, creating a smoother, more uniform dough that bakes more evenly.
- Don’t Overbake: Cookies continue to cook slightly even after they’ve been removed from the oven. For a chewy center, take them out when the edges are golden brown but the centers still look a little soft. They will firm up as they cool.
Bake Your Way to Happiness!
With their delightful and diverse mix of irresistible flavors, harmonious textures, and comforting aroma, Kitchen Sink Cookies are truly the ultimate treat designed to satisfy every sweet and salty craving. They embody everything wonderful about homemade baking – warmth, generosity, and pure indulgence. Whether you’re sharing them with loved ones or savoring a moment of quiet bliss, these cookies are guaranteed to bring smiles.
Don’t wait any longer to experience this incredible blend of toffee, chocolate, pretzels, and caramel, all crowned with a whisper of sea salt. Gather your ingredients, follow our easy steps, and bake up a batch today. You’ll be amazed at how quickly these delectable cookies disappear before your very eyes, becoming an instant favorite in your home!

Love This Recipe?
We’d absolutely love to hear your thoughts and see your wonderful creations! Your feedback means the world to us. Please leave a review below and share your experience – let us know how much you enjoyed baking and tasting this recipe!
Kitchen Sink Cookie Recipe
about 24 cookies
15 minutes
15 minutes
30 minutes
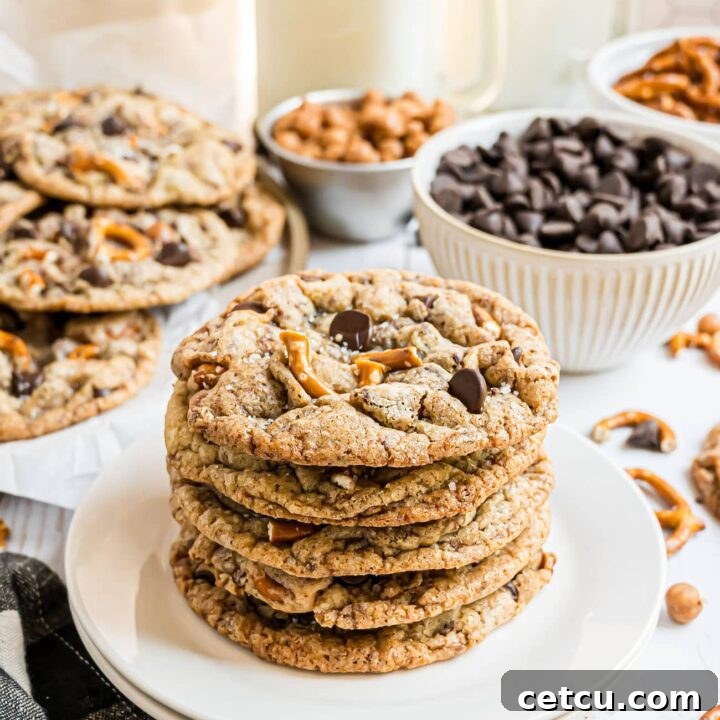
These Kitchen Sink Cookies are loaded with chocolate, caramel, pretzels, and toffee for the perfect sweet and salty treat! An easy, crowd-pleasing cookie that’s endlessly customizable and always delicious.
Ingredients
- 2 sticks (1 cup) unsalted butter, softened
- 1 cup packed light brown sugar
- ½ cup granulated sugar
- 2 teaspoons vanilla extract
- 2 large eggs, room temperature
- 2 ¼ cups (270 grams) all-purpose flour
- 1 teaspoon salt
- 1 teaspoon baking soda
- 8 ounce package English toffee bits
- 1 cup semi-sweet chocolate chips (or milk chocolate)
- ¾ cup broken pretzel twists
- ½ cup caramel bits (or caramel chips)
- Coarse or flaked sea salt for topping
Instructions
- Preheat the oven to 350° F (175°C). Line a baking sheet with parchment paper or a silicone baking mat and set aside.
- Using a large bowl with an electric mixer, cream the softened butter and sugars until light and fluffy (on medium-high speed for about 4 minutes). Add the vanilla extract and eggs one at a time, beating for another 3 minutes until well combined. Scrape down the sides of the bowl as needed.
- In a separate bowl, sift the flour, baking soda, and salt. Slowly add the dry ingredients to the wet ingredients, mixing on low speed just until the dry ingredients are incorporated and no streaks of flour remain. Do not overmix.
- Using a rubber spatula, gently fold in the chocolate chips, toffee bits, caramel bits, and broken pretzels until evenly distributed throughout the dough.
- Divide the dough into balls of approximately 2 tablespoons each. Place them at least 2 inches apart on the prepared baking sheets. Gently press a few extra mix-ins onto the top of each cookie ball, and sprinkle with a pinch of coarse or flaky sea salt.
- Bake in the preheated oven for 13-15 minutes, or until the edges are golden brown and the centers are just set. Let the cookies sit on the baking sheet for about 5 minutes before transferring them to a wire rack to cool completely.
Notes
Storage
Store these cookies at room temperature in an airtight container for up to 2 weeks. For longer freshness, refrigerate in an airtight container for up to 2 months, or freeze them for 8-12 months as recommended by the USDA.
Did you make this recipe?
Please leave a comment on the blog or share a photo on Instagram