3-Ingredient Oreo Fudge: The Easiest No-Bake Treat for Any Occasion
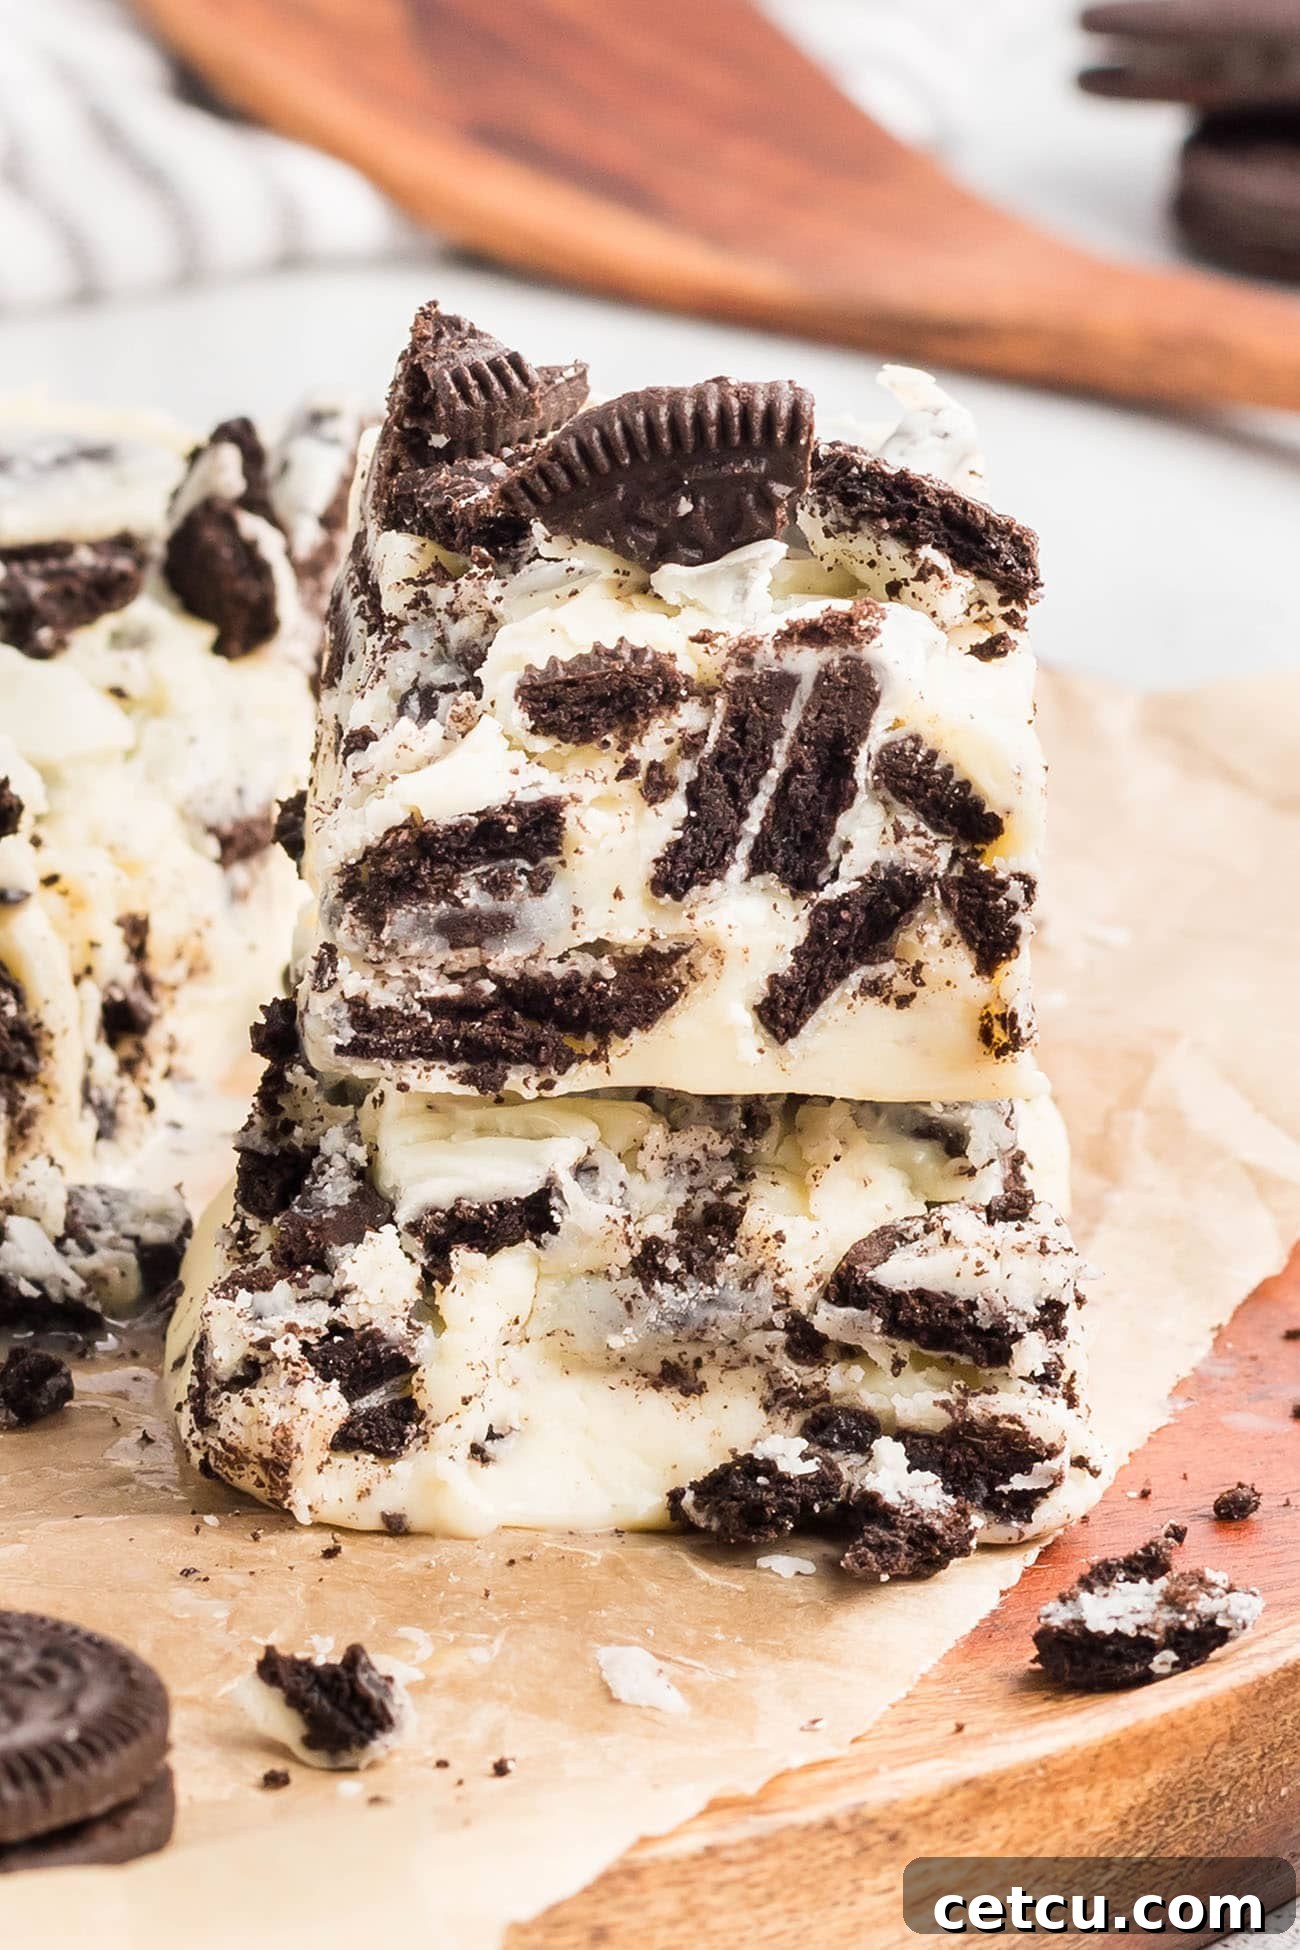
Delight your senses with the incredibly easy, rich, and creamy **3-Ingredient Oreo Fudge**. This no-bake recipe is a true marvel, marrying the beloved crunch of Oreo cookies with a velvety smooth fudge base. Perfect for satisfying sudden sweet cravings or impressing guests with minimal effort, this simple dessert comes together quickly and is always a showstopper.
If you’re a fan of fuss-free, delicious sweets that are guaranteed to earn rave reviews, you’ll love this recipe. And for more effortless delights, be sure to explore my Frozen Strawberry Dessert, refreshing Piña Colada Dessert Bars, super quick 3-Ingredient Ice Cream, and the decadent Extra Rich One Bowl Chocolate Cake.
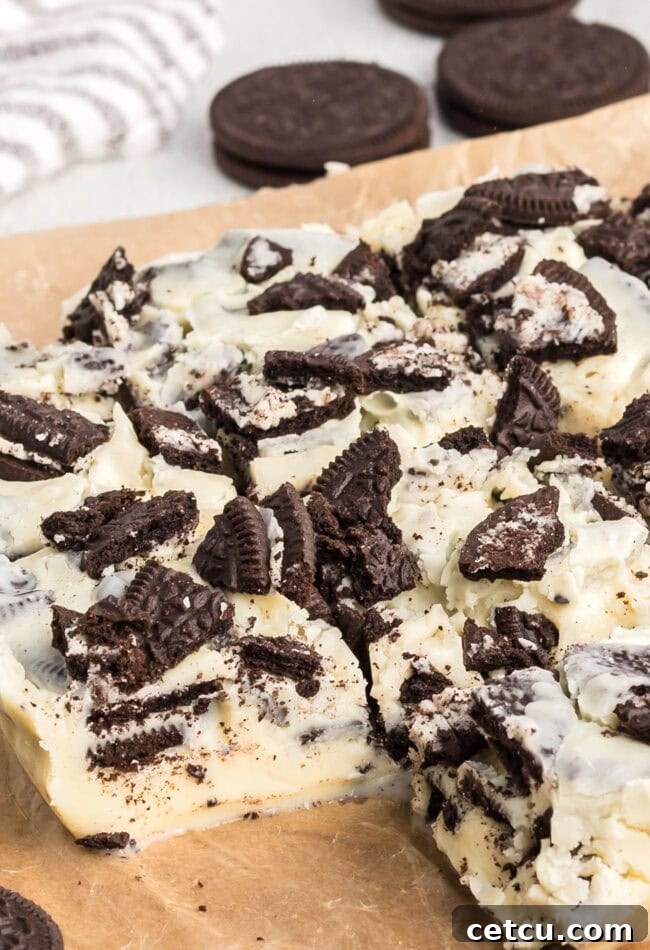
Table of Contents
Why You Need to Make 3-Ingredient Oreo Fudge
This 3-Ingredient Oreo Fudge isn’t just a dessert; it’s a testament to how simple ingredients can create something truly extraordinary. Here’s why this recipe deserves a permanent spot in your culinary repertoire:
- Effortlessly Simple. You won’t find an easier fudge recipe anywhere! With just three core ingredients and no complicated techniques or specialized equipment like a candy thermometer, this fudge is perfect for beginners and seasoned bakers alike. It’s a genuine no-bake wonder, coming together quickly without any stress.
- Unforgettably Delicious. If your heart beats for Oreos, then prepare to fall in love. This sweet fudge captures the iconic flavor of your favorite sandwich cookie, delivering a delightful blend of creamy sweetness and chocolatey crunch. It’s guaranteed to conquer any sweet tooth and leave everyone asking for more.
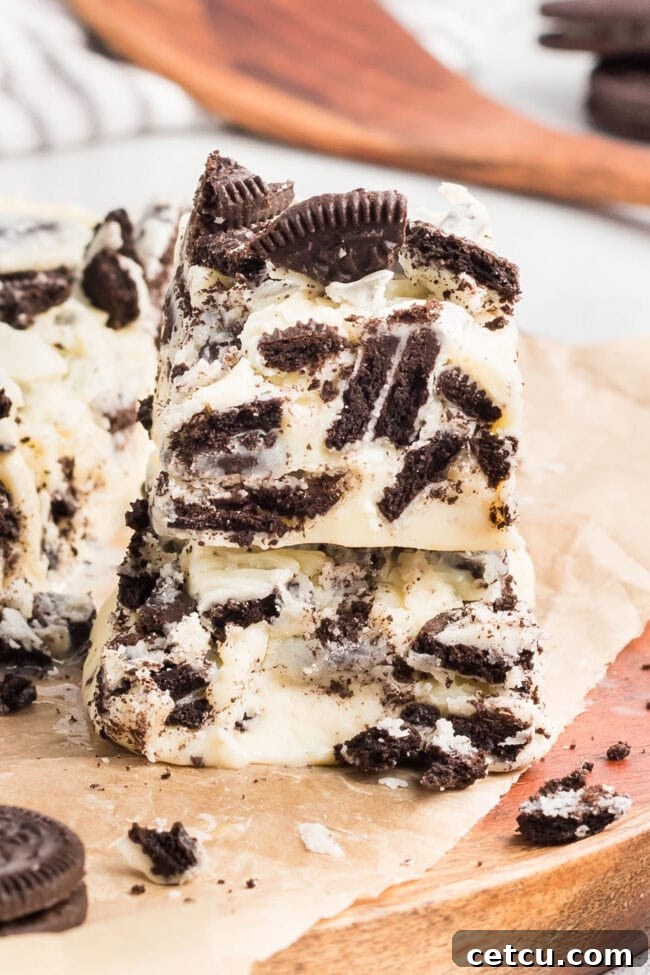
- Irresistibly Rich Texture. Beyond its incredible taste, this fudge boasts a luxurious texture. It’s wonderfully smooth and creamy, punctuated by satisfying bits of crumbled Oreos that add the perfect amount of chew and crunch in every bite.
- Perfect for Any Gathering. Always a crowd-pleaser, easy Oreo fudge is a fantastic addition to any dessert table. Whether it’s a casual family gathering, a festive holiday party, or a thoughtful homemade gift, this fudge adapts to every occasion. It’s simple to make in larger batches, making it ideal for sharing.
- A Go-To No-Bake Treat. Skip the oven and the elaborate cleanup! This no-bake recipe is a lifesaver when you need a quick dessert without heating up your kitchen, especially during warmer months or when oven space is limited.
Essential Ingredients for Your Easy Oreo Fudge
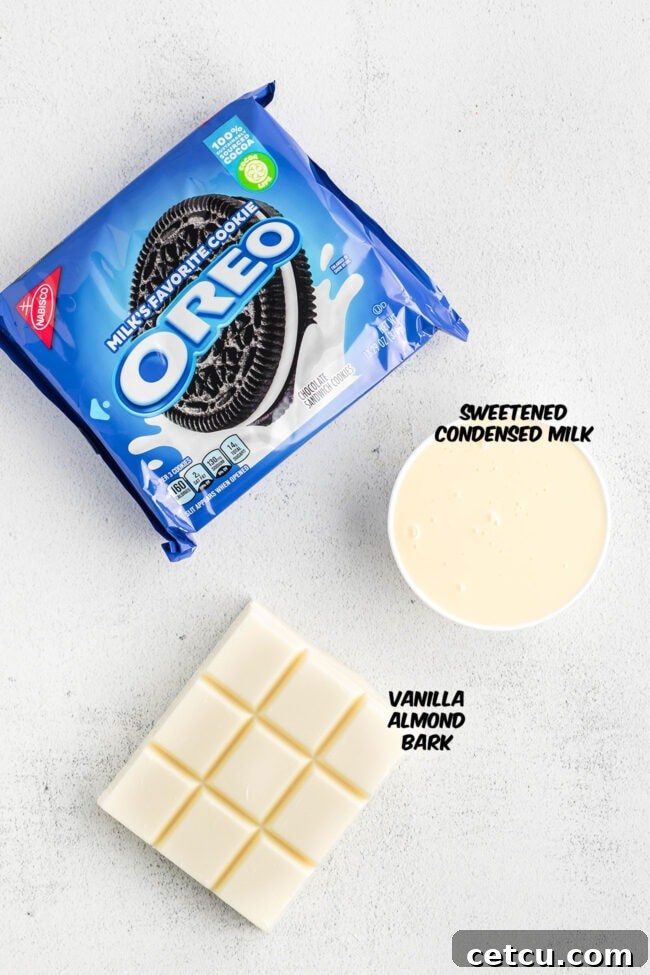
The beauty of this Oreo fudge lies in its simplicity. You truly only need three basic ingredients to create this rich, creamy, and undeniably addictive treat. Forget complicated shopping lists and enjoy the ease of these kitchen staples:
For precise measurements and detailed instructions, please consult the printable recipe card located at the very end of this post.
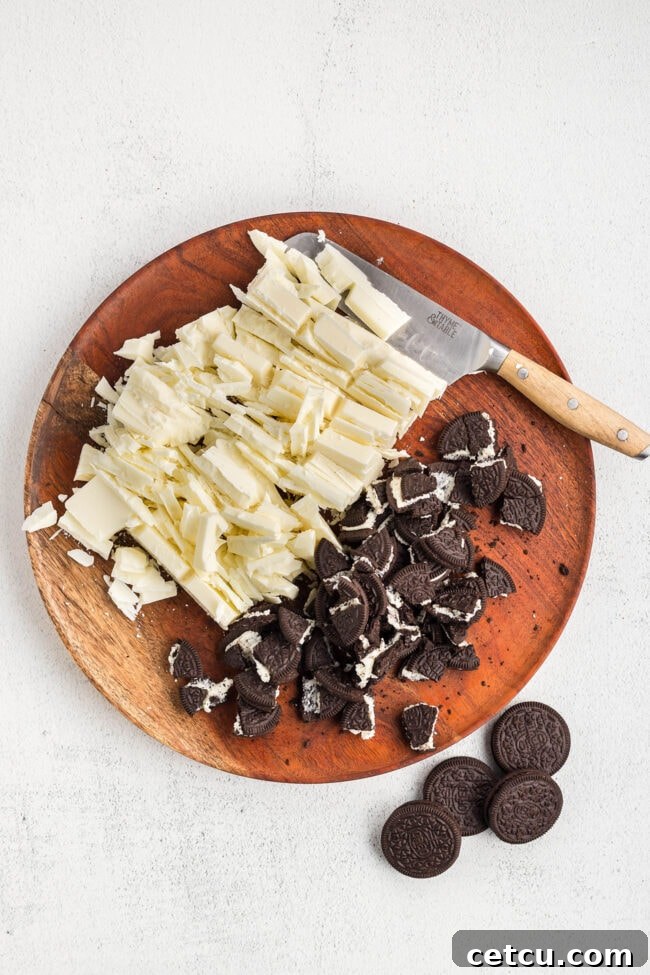
- Oreo Cookies: The star of the show! You’ll need a good amount of these classic sandwich cookies, chopped or broken into small pieces. The size of the pieces will determine the texture of your fudge, so aim for a mix of fine crumbs and larger chunks for the best bite. You can crush them in a food processor or place them in a resealable plastic bag and crush them with a rolling pin.
- Vanilla Almond Bark, chopped into pieces: This ingredient is key to the fudge’s smooth, firm texture and sweet vanilla flavor. Almond bark (also known as vanilla-flavored candy coating) is designed to melt smoothly and set firmly, making it ideal for fudge and other confections. If you can’t find almond bark, quality white chocolate chips can be used as an alternative, though the texture might vary slightly.
- Sweetened Condensed Milk: This thick, sweet milk provides both the creamy consistency and much of the sweetness for the fudge. It’s crucial that you use *sweetened condensed milk* and not evaporated milk, as they are not interchangeable in this recipe. The high sugar content and viscosity of sweetened condensed milk are essential for the fudge to set properly and achieve its signature rich flavor.
Step-by-Step Guide: How to Make 3-Ingredient Oreo Fudge
Creating this simple Oreo fudge is incredibly straightforward, resulting in a creamy, delicious treat with minimal effort. Follow these easy steps to whip up your own batch:
For precise measurements and detailed cooking times, please refer to the full recipe card at the bottom of the page.
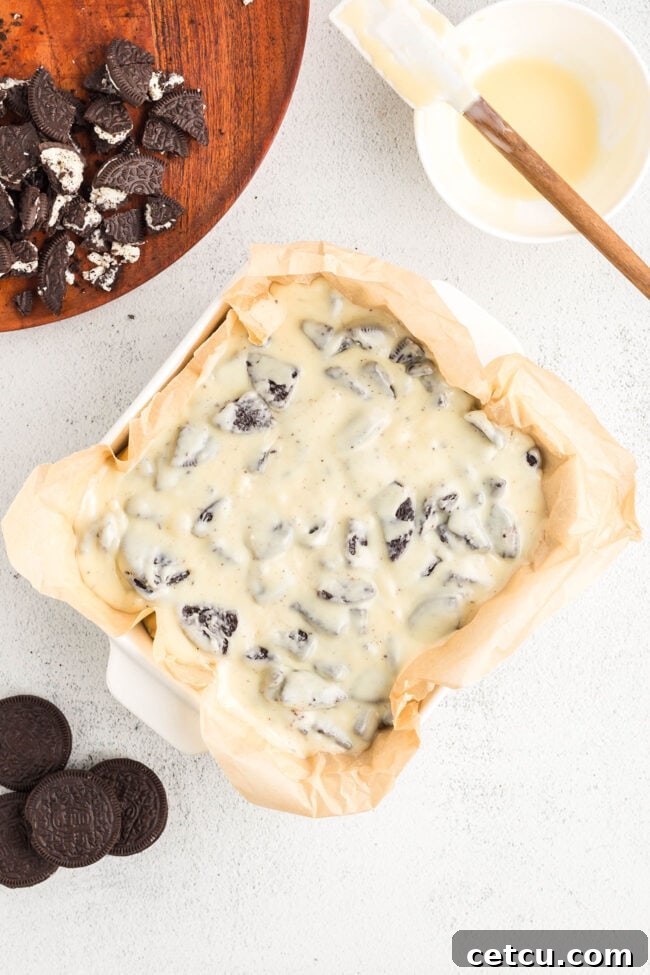
- Prepare Your Pan: Begin by lining an 8×8 or 9×9-inch baking dish with parchment paper. This crucial step prevents the fudge from sticking and makes it incredibly easy to lift out and cut once it has set. Leave a slight overhang of parchment paper on the sides to use as “handles.”
- Melt the Base: In a medium saucepan, combine the chopped vanilla almond bark and the sweetened condensed milk. Place the saucepan over very low heat. Stir occasionally at first, then continuously once the mixture starts to melt. Heat gently until the bark is fully melted and the mixture is completely smooth and uniform, usually taking about 5-6 minutes of continuous stirring after melting begins. Be careful not to overheat.
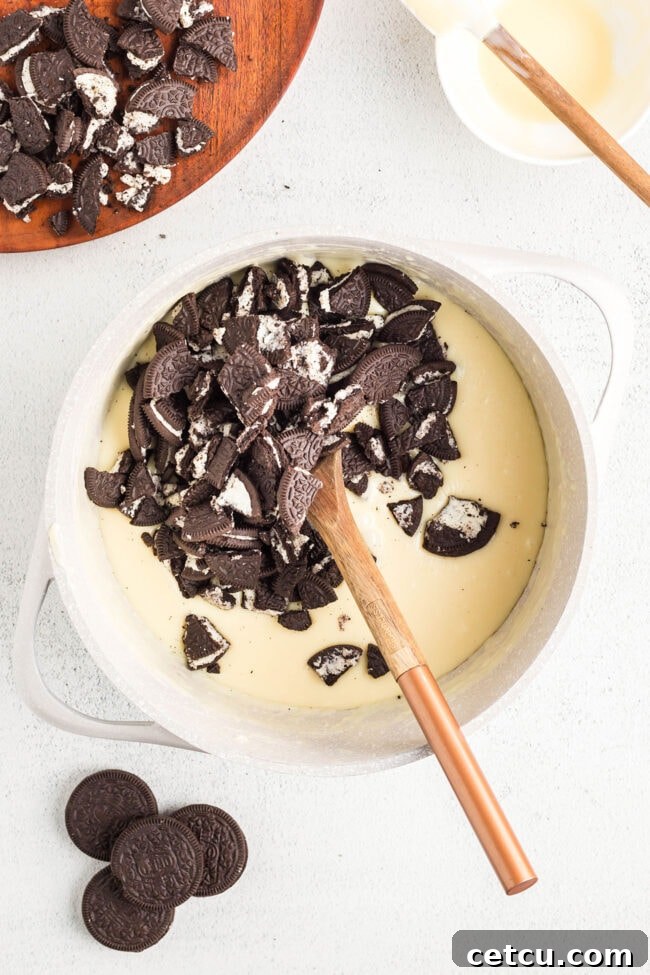
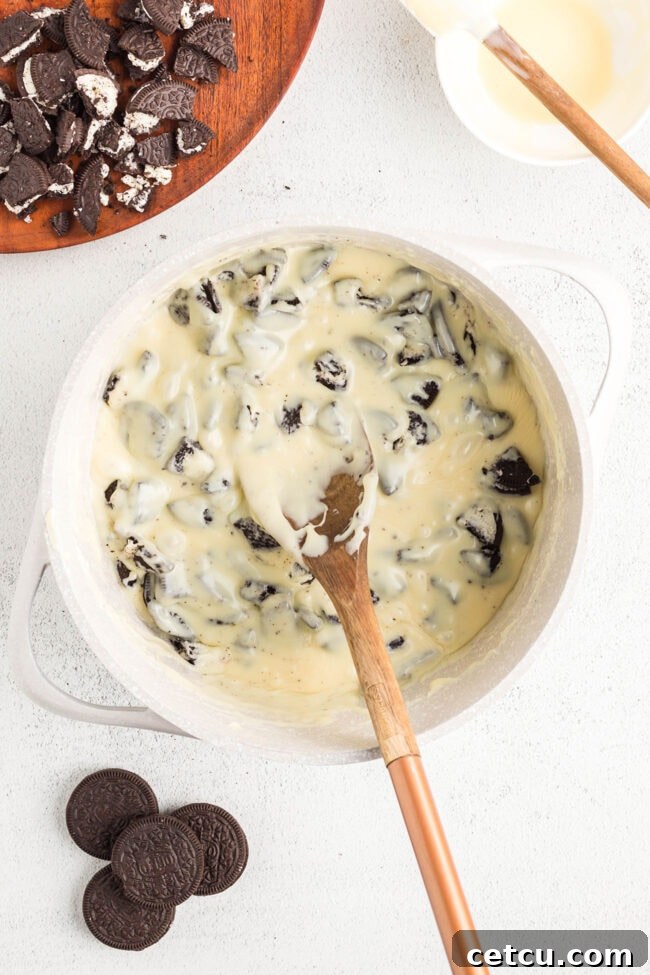
- Fold in the Oreos: Remove the saucepan from the heat. Gently fold in the majority of your broken or chopped Oreo cookies into the melted fudge mixture. Reserve about 1 cup of the chopped Oreos for sprinkling on top later. Stir just until the Oreos are evenly distributed throughout the creamy fudge base.
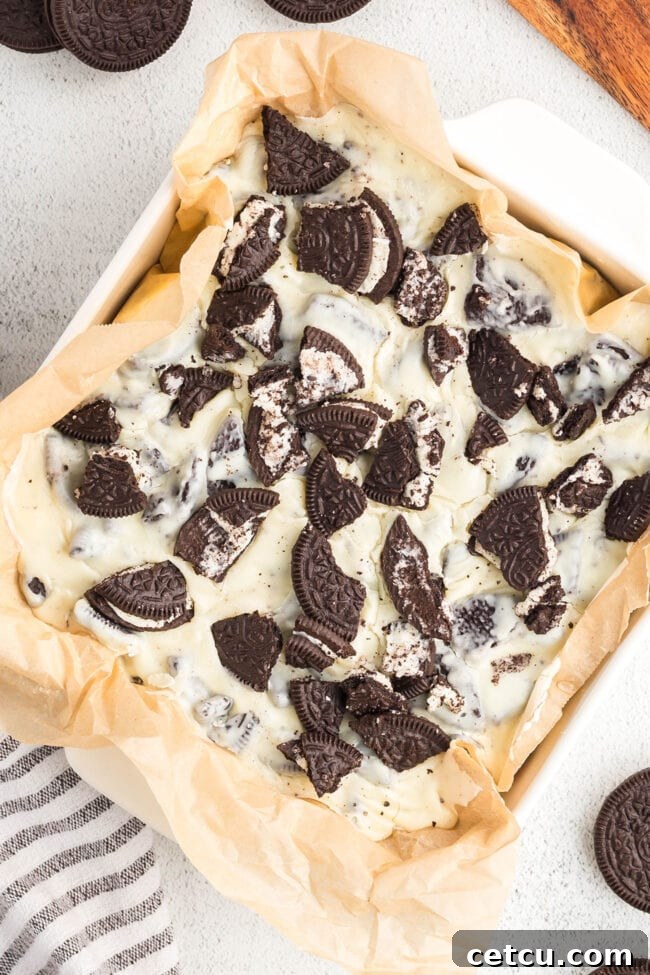
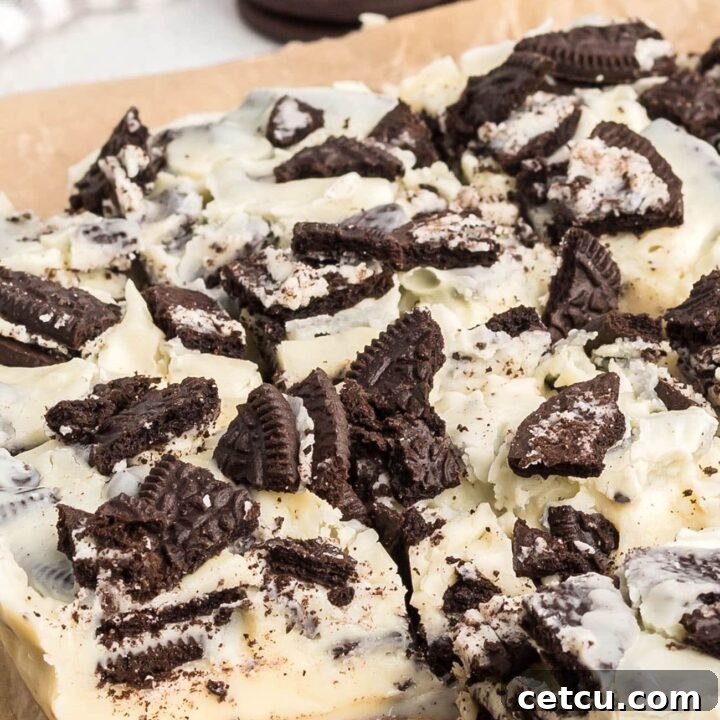
- Pour and Top: Promptly transfer the warm fudge mixture into your prepared baking dish. Use a spatula to spread it evenly into the pan, pressing it down lightly to ensure there are no air pockets. Immediately sprinkle the reserved chopped Oreos over the top, gently pressing them into the fudge for a beautiful finish.
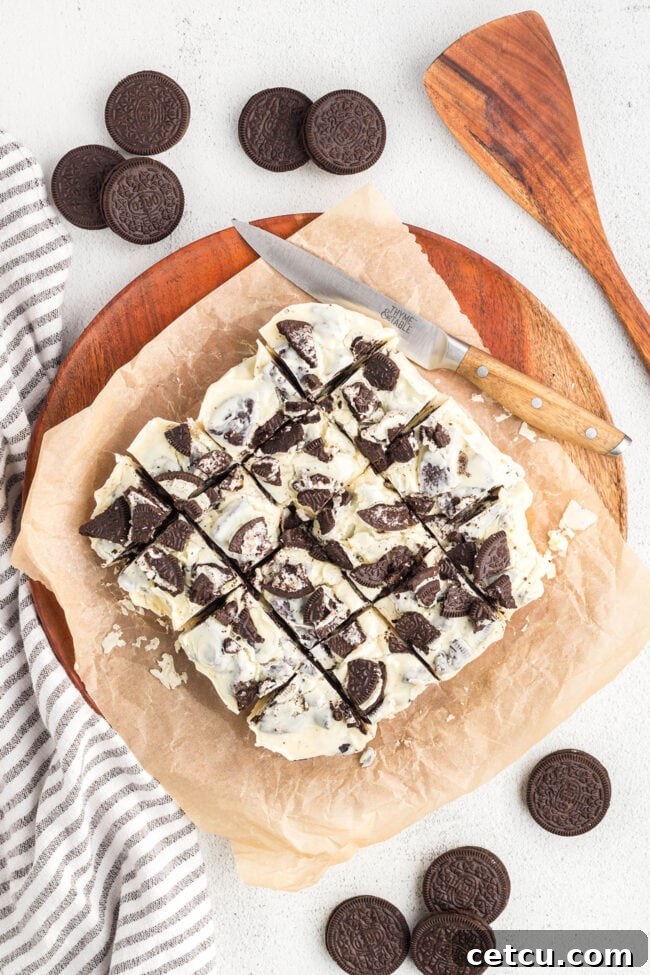
- Chill to Set: Place the baking dish in the refrigerator for at least 1 hour, or until the fudge is completely firm. Alternatively, you can let it sit at room temperature for 2-3 hours if your kitchen isn’t too warm. Once firm, use the parchment paper overhang to lift the fudge out of the pan and cut it into desired squares.
Proper Storage for Your Homemade Oreo Fudge
One of the best things about homemade fudge is how well it stores, allowing you to enjoy this delightful treat for days or even months. Proper storage is key to maintaining its fresh taste and perfect texture.
This Oreo fudge is quite stable and can be stored at room temperature, but for extended freshness, refrigeration or freezing are excellent options.
Room Temperature Storage:
Once your fudge has fully set and been cut into pieces, you can store it in an airtight container on your countertop. It will remain fresh and delicious for up to 1 week. Ensure the container is truly airtight to prevent the fudge from drying out or absorbing other odors.
Refrigerate for Extended Freshness:
To keep your fudge fresh for a longer period, transfer the cooled and cut pieces to an airtight container or a large zip-top bag. Store it in the refrigerator for up to two weeks. For best results and to prevent sticking, it’s ideal to store the fudge in a single layer. If you need to stack layers, place a piece of parchment paper or wax paper between each layer. You can also individually wrap each piece of fudge tightly in plastic wrap or aluminum foil before placing them in a container. This method is particularly useful for gifting or portion control.
Freeze for Long-Term Enjoyment:
For even longer storage, this Oreo fudge freezes beautifully! To freeze, first cut the fudge into individual pieces. For best results, you may want to “flash-freeze” the pieces by placing them on a baking sheet lined with parchment paper in the freezer for about 30 minutes to an hour until firm. This prevents them from sticking together. Once firm, transfer the pieces to a freezer-safe bag or container, layering with parchment paper if needed. It will keep well in the freezer for up to 3 months.
Thawing Frozen Fudge:
When you’re ready to enjoy your frozen fudge, simply transfer it from the freezer to the refrigerator and allow it to thaw overnight. You can also let individual pieces thaw at room temperature for about 30 minutes to an hour before serving.
Top Kitchen Tips for Perfect Fudge Every Time
While this 3-ingredient Oreo fudge recipe is incredibly simple, a few key tips can ensure your batch turns out perfectly rich, creamy, and delightful every single time:
- Troubleshooting Fudge Not Setting: If your fudge isn’t firming up, it’s usually due to one of two reasons: either the mixture wasn’t heated to a high enough temperature on the stovetop, or it wasn’t cooked long enough. Ensure the mixture is stirred continuously for the recommended 5-6 minutes after the bark has completely melted. If after chilling for the suggested time it’s still too soft, try returning it to the pan for a quick re-melt and reheat, then re-chill. Sometimes, it just needs a bit more time to set in the fridge.
- The Importance of Cook Time: A common mistake in fudge making is not paying attention to the clock. Cooking the mixture for too long can result in a grainy, hard, or crumbly fudge, while cooking for too short a time can leave it too soft or sticky. Stick to the suggested 5-6 minutes of continuous stirring after melting for the ideal consistency.
- Optimal Oreo Crushing: When chopping or breaking the Oreos, aim for a variety of textures. Some smaller crumbs will blend into the fudge, while larger chunks will provide a delightful crunch. Avoid pulverizing them into a fine powder, as you want those distinct cookie pieces. A food processor works quickly, or you can place them in a zip-top bag and smash them with a rolling pin.
- For the Whitest Fudge: To achieve a pristine white fudge background with dark Oreo chunks, be mindful when incorporating the crushed cookies. Avoid aggressively scraping the cutting board or mixing bowl to pick up every last speck of dark crumb. A light hand will prevent the entire fudge from taking on a grayish hue.
- Condensed Milk is Key – Not Evaporated Milk: This cannot be stressed enough! Always use *sweetened condensed milk*. Evaporated milk is unsweetened and much thinner; using it will result in a runny mixture that will not set into fudge. Double-check your can before you start!
- Cutting for Your Occasion: This recipe typically yields 16 generous bars when cut into a 4×4 grid. However, for parties, dessert platters, or to stretch the recipe further, you can easily cut them smaller to make 32 bite-sized pieces. Use a sharp, warm knife (run under hot water and wipe dry) for clean cuts.
- Don’t Overcook the Mixture: While proper heating is essential, be careful not to overcook the fudge mixture. Overheating can cause the sugars to crystallize, leading to a grainy texture. Low heat and continuous stirring are your best friends.
- Even Spreading for Even Setting: When transferring the fudge to the baking dish, spread it out as evenly as possible. This ensures consistent thickness across the entire batch, allowing it to chill and set uniformly, preventing some parts from being too soft while others are too hard.
Creative Variations and Additions for Your Fudge
While the classic 3-ingredient Oreo fudge is perfect as is, it also serves as a fantastic base for endless customization. Get creative and try these delicious variations and additions to make it uniquely yours:
- Mint Chocolate Explosion: Elevate the classic flavor by using mint-flavored Oreos. The refreshing mint combined with the rich fudge and chocolate cookie bits is a seasonal favorite, especially around the holidays. You could also add a drop or two of food-grade peppermint extract to the fudge base before adding the cookies.
- Nutty Crunch: For an added layer of texture and flavor, fold in about ½ to 1 cup of your favorite chopped nuts. Walnuts, pecans, or almonds would all be excellent choices, adding a sophisticated counterpoint to the sweet fudge.
- Peanut Butter Lover’s Dream: If peanut butter is your weakness, swap out regular Oreos for peanut butter Oreos. The combination of peanut butter and chocolate is always a winner! You could also swirl in a couple of tablespoons of creamy peanut butter into the melted fudge base before adding the cookies.
- Coffee Infusion: For a more grown-up flavor profile, add a teaspoon of instant espresso powder or finely ground coffee to the melting fudge mixture. This will enhance the chocolate notes and add a subtle, sophisticated coffee aroma without making it taste overwhelmingly like coffee.
- Explore Other Oreo Varieties: Don’t limit yourself to the original! Experiment with different Oreo flavors like Golden Oreos for a vanilla-on-vanilla experience, or Chocolate Creme Oreos for an extra chocolatey kick. Seasonal flavors like Pumpkin Spice or Red Velvet Oreos can also make for unique holiday fudge.
- Chocolate Base Alternatives: While vanilla bark gives a classic white fudge, you can easily change the flavor profile of the fudge base. Swap the vanilla bark for 2 cups of white chocolate chips, semi-sweet chocolate chips, milk chocolate chips, or even peanut butter chips. Ensure you use a good quality chip that melts smoothly.
- Sprinkle Fun: Before the fudge sets, sprinkle some colorful sprinkles on top for a festive and fun look, especially great for birthdays or celebrations.
- Extract Enhancements: A few drops of pure vanilla extract (in addition to the vanilla bark), almond extract, or even rum extract can add another layer of flavor complexity to your fudge. Add these in after the mixture is melted but before folding in the cookies.

Serving and Gifting Suggestions
This 3-Ingredient Oreo Fudge isn’t just easy to make; it’s also incredibly versatile when it comes to serving and makes a fantastic gift. Here are some ideas to make your fudge even more special:
Serving Suggestions:
- Dessert Platter Star: Arrange alongside other small treats like cookies, brownies, and fresh fruit for an impressive and varied dessert platter.
- Coffee or Tea Companion: A small square of rich Oreo fudge is the perfect complement to a hot cup of coffee, tea, or even a glass of cold milk.
- Ice Cream Topping: Crumble some extra pieces over a scoop of vanilla or chocolate ice cream for an instant upgrade to a simple dessert.
- Holiday Treat: Cut into smaller, festive shapes (if possible) or simply arrange them in a holiday-themed dish for an easy addition to your seasonal spread.
- Party Favor: Package a few pieces in small treat bags as a delightful take-home gift for your guests.
Gifting Your Homemade Oreo Fudge:
Homemade fudge makes for a wonderfully personal and appreciated gift. Here’s how to package it beautifully:
- Decorative Boxes or Tins: Arrange a single layer of fudge squares in a festive tin or a small decorative box. Line the bottom with parchment or wax paper.
- Ribbons and Tags: Tie a pretty ribbon around the box or tin and attach a handwritten tag that says “Homemade Oreo Fudge” with a short, sweet message.
- Cellophane Bags: For individual or smaller gifts, place a few pieces of fudge in clear cellophane bags, tie with a twist tie or ribbon, and perhaps add a small label.
- Gift Baskets: Include your fudge as part of a larger gift basket with other homemade goodies, coffee, or tea.
No matter how you choose to present it, your homemade 3-Ingredient Oreo Fudge is sure to be a hit!
Frequently Asked Questions About Oreo Fudge
Here are some common questions about making and enjoying this easy 3-Ingredient Oreo Fudge:
- Can I use chocolate chips instead of vanilla almond bark?
Yes, you can! While vanilla almond bark provides the best setting and smooth texture, you can substitute it with a good quality white chocolate chips, semi-sweet, or milk chocolate chips. Use approximately 2 cups of chips for 18 ounces of bark. The resulting fudge might have a slightly different texture but will still be delicious. - What kind of Oreos are best for this fudge?
Classic original Oreos are always a winner for their iconic flavor. However, feel free to experiment with any flavor of Oreo cookies! Mint Oreos, Golden Oreos, Peanut Butter Oreos, or even seasonal varieties can create unique and delicious fudges. - How long does it take for the fudge to set?
In the refrigerator, this fudge typically sets in about 1 hour. If left at room temperature (in a cool environment), it can take 2-3 hours to fully firm up. For best results, allow adequate chilling time. - Why is my fudge grainy?
Grainy fudge usually occurs when the sugar crystallizes. This can happen if the mixture is cooked too quickly over high heat, or if it’s stirred too vigorously during the cooling process (though less common in no-bake fudge, constant stirring during melting should be gentle and consistent, not frantic). Ensuring low heat and consistent stirring during the melting phase helps prevent this. - Can I make this fudge in the microwave?
Yes, you can! Combine the chopped almond bark and sweetened condensed milk in a large microwave-safe bowl. Heat in 30-second intervals, stirring well after each interval, until the mixture is completely melted and smooth. This typically takes 2-4 minutes depending on your microwave’s power. Then proceed with folding in the Oreos and chilling. - Is this fudge gluten-free or vegan?
This recipe as written is not gluten-free due to the Oreos, nor is it vegan due to the sweetened condensed milk and typically dairy in almond bark. However, you can adapt it by using gluten-free sandwich cookies (like gluten-free Oreos) and exploring vegan white chocolate or candy melts with a dairy-free sweetened condensed milk alternative. Results may vary slightly.
3-Ingredient Oreo Fudge
32 servings
5 minutes
5 minutes
1 hour
1 hour 10 minutes
Easy Oreo Fudge is a creamy, no-bake dessert made with just 3 ingredients—vanilla bark, sweetened condensed milk, and Oreo cookies. Perfect for any occasion!
Ingredients
- 24 Oreos, chopped or broken, divided (set aside one cup chopped Oreos for topping)
- 18 ounces vanilla almond bark, chopped (you want 3 cups)
- 14 ounces of sweetened condensed milk
Instructions
- Line an 8×8 or 9×9 baking dish with parchment paper.
- Melt the bark and milk in a saucepan over low heat, stirring occasionally. Once melted, stir continuously for 5-6 minutes.
- Remove from heat and gently fold in the broken Oreos*, saving 1 cup of chopped Oreos for the topping.
- Transfer the fudge into the baking dish, press it down evenly, and top with the remaining chopped Oreos.
- Chill in the fridge for up to 1 hour, or let it sit at room temperature for 2-3 hours until firm.
Notes
Refrigerate: Store the fudge in an airtight container in the fridge for up to two weeks, layering with parchment paper if needed.
Freeze: For longer storage, freeze the fudge in a bag or container for up to 3 months, layering with parchment paper, and thaw in the fridge overnight.
Nutrition Information:
Yield: 32
Serving Size: 1
Amount Per Serving:
Calories: 142Total Fat: 3gSaturated Fat: 1gTrans Fat: 0gUnsaturated Fat: 2gCholesterol: 6mgSodium: 58mgCarbohydrates: 18gFiber: 0gSugar: 15gProtein: 2g
Nutrition information is estimated based on the ingredients and cooking instructions as described in each recipe and is intended to be used for informational purposes only. Please note that nutrition details may vary based on methods of preparation, origin, and freshness of ingredients used and are just estimates. We encourage, especially if these numbers are important to you, to calculate these on your own for most accurate results.
Did you make this recipe?
Please leave a comment on the blog or share a photo on Instagram