
Transforming the entryway of your home starts with a sparkling clean front door. Regardless of its material – be it classic wood, durable vinyl, robust metal, or versatile fiberglass – a well-maintained front door significantly boosts your home’s curb appeal and creates a welcoming atmosphere. This comprehensive guide provides step-by-step instructions and essential tips on how to clean a front door effectively, ensuring it looks its best and stands the test of time.

There’s nothing quite like a refreshed home exterior, especially when the weather is beautiful. Many homeowners find immense satisfaction in a simple curb appeal project, like thoroughly cleaning their front door and even adding personalized touches such as vinyl house numbers. Did you know that a clean exterior door and a well-maintained porch are often said to invite positive energy and prosperity into the home? Beyond any symbolic meaning, the practical benefits of regular cleaning are undeniable, from extending the life of your door to making a fantastic first impression.
Inspired by popular home improvement trends, transforming your entryway can be a rewarding project. While some might opt for a dramatic repaint, a deep clean is often the most impactful first step. Whether you stick with your door’s original color or decide on a change, starting with a clean slate is crucial for any enhancement. This guide focuses on achieving that pristine clean, preparing your door for whatever aesthetic upgrades you envision.
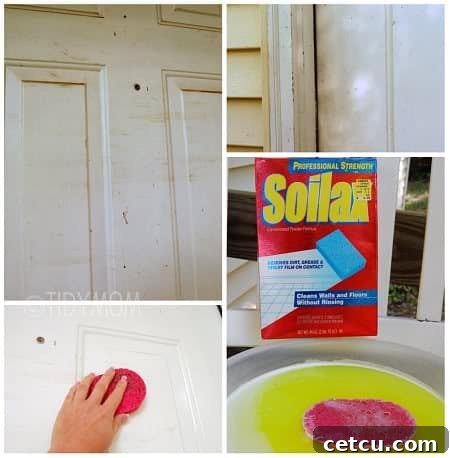
Why a Clean Front Door Matters More Than You Think
Your front door is more than just an entry point; it’s a focal point, the handshake of your home. A clean, well-maintained front door significantly impacts your home’s overall aesthetic and even its perceived value. Here’s why investing time in cleaning it is so important:
- Curb Appeal and First Impressions: For visitors, potential buyers, or even just passersby, your front door is often the first thing they notice. A sparkling clean door sends a message of care, attention to detail, and pride in your home.
- Protecting Your Investment: Dirt, grime, pollen, and environmental pollutants can accumulate over time, leading to premature wear, fading, and even damage to your door’s finish and material. Regular cleaning helps prevent this deterioration, extending the lifespan of your door and protecting your home investment.
- Health and Hygiene: Exterior doors are exposed to various elements and can harbor allergens, mold, and mildew. Cleaning them regularly contributes to a healthier living environment, especially for those with allergies or respiratory sensitivities.
- Symbolism and Positive Energy: As mentioned, many believe that a clean and inviting entryway attracts positive energy and prosperity. While this is a cultural belief, it underscores the psychological impact a welcoming entrance can have on residents and guests alike.
Essential Tools and Supplies for Front Door Cleaning
Before you begin, gather all the necessary tools and supplies. Having everything at hand will make the cleaning process much more efficient and enjoyable:
- Buckets: Two buckets – one for your cleaning solution and one for rinse water.
- Soft Brushes and Sponges: For scrubbing without scratching.
- Microfiber Cloths: Excellent for wiping, drying, and polishing without leaving streaks or lint.
- Spray Bottle: Handy for applying cleaning solutions, especially vinegar and water mixtures.
- Vacuum Cleaner with Attachments: Ideal for removing loose dirt and cobwebs from crevices.
- Garden Hose with Spray Nozzle: For rinsing the door thoroughly.
- Mild All-Purpose Cleaner: Options include dish soap mixed with water, or a homemade vinegar and water solution (equal parts).
- Mineral Spirits: For tough grease or stubborn stains, used with caution and proper ventilation.
- Glass Cleaner: If your door has windows or glass accents.
- Metal Polish: Specifically for your door hardware (brass, steel, etc.).
- Protective Gear: Gloves and eye protection, especially when using stronger cleaners like mineral spirits.
- Old Newspapers or Squeegee: For streak-free glass cleaning.
General Steps for Cleaning Any Front Door (The Universal Approach)
While specific materials require tailored care, these initial steps apply to virtually all front doors, providing a solid foundation for a deep clean.
Step 1: Prepare the Area
Before you start cleaning, clear the immediate area around your front door. Remove any door mats, potted plants, wreaths, or decorative items. If you have delicate plants or shrubs nearby that might be affected by cleaning solutions, cover them with a plastic sheet or tarp. This preparation ensures you have unobstructed access to the entire door and frame, and protects your landscaping.
Step 2: Remove Loose Dirt and Debris
This is a crucial first step, especially if your door hasn’t been cleaned in a while. Grab your vacuum cleaner with a brush or nozzle attachment. Carefully run it around the door trim, frame, along contoured edges, and any recesses on the door face. This effectively removes cobwebs, loose dirt, dust, and any large debris that has accumulated. For areas the vacuum can’t reach, a soft-bristled brush or a dry microfiber cloth can be used to wipe away surface grime.
Step 3: Choose Your Cleaner Wisely
The type of cleaner you use can make a big difference. For a general, eco-friendly, and affordable all-purpose cleaner, a simple mixture of equal parts white vinegar and water in a spray bottle works wonders. Alternatively, a few drops of mild dish soap mixed with warm water in a bucket is also highly effective. Avoid harsh abrasive cleaners, strong chemicals, or scouring pads, as these can damage your door’s finish, especially on painted or stained surfaces. Always test your chosen cleaner on an inconspicuous area of the door first to ensure it doesn’t cause discoloration or damage.
Step 4: Wash the Door and Frame
Open your door slightly to access the edges. Using a wet sponge or your spray bottle, thoroughly wet the entire door and its frame with your chosen cleaning mixture. Start from the top and work your way down, allowing the solution to loosen dirt and grime. Use a clean cloth or sponge to wipe away the loosened dirt, debris, and fingerprints. Pay close attention to high-traffic areas like around the doorknob and kick plate. For intricate details or paneling, a soft brush can help dislodge embedded dirt.
Step 5: Tackle Tough Stains
If you encounter stubborn stains, grease, or sticky residue that won’t come off with your general cleaner, mineral spirits can be an effective solution. Dampen a clean cloth or sponge with mineral spirits and gently scrub the affected area until the stains are loosened and can be wiped away. It’s vital to use mineral spirits sparingly and with extreme caution. Ensure the door is open, or the space is exceptionally well-ventilated, to avoid inhaling fumes. Rinse the area thoroughly with your mild cleaner and water immediately after treating with mineral spirits.
Step 6: Don’t Forget the Glass
If your front door features glass accents, windows, or sidelights, these areas require special attention for a truly sparkling finish. The vinegar/water solution you used for the door itself makes an excellent streak-free glass cleaner. Spray the glass evenly and wipe with a clean microfiber cloth. For larger window panes, a squeegee can provide professional-looking results. Alternatively, using crumpled old newspapers is a time-tested trick for a streak-free shine on glass, as the ink acts as a mild abrasive and leaves no lint.
Step 7: Clean and Polish Hardware
Don’t overlook the smaller details that contribute significantly to your door’s overall appearance. Clean your door hardware—doorknobs, hinges, kick plates, and mail slots—using a damp cloth and your general cleaning solution. For an extra-shiny, polished finish on brass, steel, or other metal hardware, apply a specialized metal polish. Follow the product instructions carefully, applying the polish with one cloth and then buffing it clean with a separate, dry cloth. Ensure all polish residue is removed to prevent discoloration or sticky build-up.
Step 8: Rinse Thoroughly
Once you’ve cleaned the entire door, it’s critical to rinse it thoroughly to remove all traces of cleaning solution. Using a garden hose with a gentle spray setting, start rinsing from the top of the door and work your way down. Ensure no cleaner residue is left behind, as it can attract dirt more quickly or leave streaks once dry.
Step 9: Dry Properly
After rinsing, use a clean, dry microfiber cloth to wipe down the entire door and frame. Drying prevents water spots, especially on glass and darker door finishes. This final step ensures a truly gleaming and spotless finish.
Material-Specific Cleaning Guides
While the general steps are universal, each door material has unique properties that require specific considerations for cleaning and maintenance.
Cleaning Wood Front Doors
Wood doors exude timeless charm but require gentle care.
- Considerations: The finish (painted, stained, varnished, or natural) dictates the best approach. Wood is sensitive to excessive moisture and harsh chemicals, which can cause warping, cracking, or damage to the finish.
- Cleaning Steps:
- Start by dusting with a soft brush or cloth.
- For painted or varnished wood, use a mild solution of dish soap and water. Dip a soft sponge or cloth, wring it out well to remove excess water, and gently wipe the door.
- For stained or natural wood, a wood-specific cleaner might be preferable, or simply a damp cloth with water. Avoid soaking the wood.
- Rinse sparingly with a slightly damp cloth, then immediately dry thoroughly with a separate dry cloth.
- Maintenance: Periodically inspect the finish for signs of wear, especially on the sunny side of the door. Re-apply a protective topcoat, stain, or paint as needed to preserve the wood and prevent moisture damage. Oiled wood doors may need re-oiling to maintain their luster.
Cleaning Vinyl Front Doors
Vinyl doors are known for their low maintenance and durability.
- Considerations: While sturdy, vinyl can still accumulate dirt and mildew. Avoid abrasive scrubbers that can scratch the surface.
- Cleaning Steps:
- A simple solution of warm water and mild dish soap is usually sufficient. For tougher stains or mildew, a solution of 70% water and 30% white vinegar works well.
- Apply the cleaner with a soft brush or cloth, gently scrubbing in circular motions.
- Rinse thoroughly with a garden hose on a low-pressure setting.
- Dry with a clean cloth to prevent water spots.
- Maintenance: For persistent mildew, a non-abrasive household cleaner formulated for vinyl can be used. Regular cleaning prevents extensive mold growth.
Cleaning Metal Front Doors (Steel, Aluminum)
Metal doors, typically steel or aluminum, are durable and often painted or coated.
- Considerations: Steel doors are prone to rust if their protective coating is scratched or damaged. Aluminum doors can oxidize, forming a chalky residue.
- Cleaning Steps:
- Most metal doors, especially painted steel, can be cleaned with a mild detergent and water solution. Use a soft sponge or cloth.
- For minor rust spots on steel, use a rust remover product (following instructions carefully) or a very fine steel wool pad with caution, then touch up the paint immediately to prevent further rust.
- For oxidized aluminum, a specialized aluminum cleaner can restore its shine.
- Rinse well with clean water and dry immediately to prevent water spots and rust.
- Maintenance: Regularly inspect for scratches or chips in the paint, especially on steel doors, and touch them up promptly to prevent rust. Applying a car wax suitable for painted surfaces can offer an additional layer of protection.
Cleaning Fiberglass Front Doors
Fiberglass doors offer the aesthetic appeal of wood with greater durability and resistance to warping, rotting, and insect damage.
- Considerations: Fiberglass doors often have a gel-coat finish which is quite durable, but still benefits from gentle cleaning. They don’t typically rust or warp.
- Cleaning Steps:
- Clean fiberglass doors with a mild all-purpose cleaner or a solution of warm water and dish soap.
- Wipe down the door with a soft cloth or sponge. For textured surfaces that mimic wood grain, a soft brush can help get into crevices.
- Rinse thoroughly with clean water, ensuring all soap residue is removed.
- Dry with a clean, soft cloth to prevent water spots.
- Maintenance: To maintain the door’s sheen and protect its finish, you can apply a coat of automotive wax twice a year. This adds an extra layer of protection against UV rays and makes future cleaning easier.
Beyond Cleaning: Maintaining Your Front Door’s Luster
Cleaning your front door is an excellent start, but ongoing maintenance will keep it looking pristine year-round.
- Frequency: How often you clean depends on your climate and exposure. Doors exposed to harsh weather, direct sunlight, or high traffic areas (e.g., a dusty road) may need cleaning monthly. Doors in sheltered areas might only need a good clean every season or twice a year.
- Preventative Measures: Install a good quality door mat to reduce the amount of dirt tracked in. An overhang or porch can protect your door from direct sun and rain, reducing wear and the accumulation of environmental grime.
- Periodic Inspections: Regularly check your door for small damages like paint chips, scratches, or loose hardware. Addressing these issues promptly can prevent more significant problems down the line.
Common Mistakes to Avoid When Cleaning Your Front Door
To ensure you’re cleaning your door effectively and safely, be mindful of these common pitfalls:
- Using Harsh Chemicals or Abrasive Tools: These can strip finishes, scratch surfaces, and cause irreversible damage to various door materials.
- Ignoring the Frame and Hardware: A clean door looks incomplete if its frame and hardware are neglected. These areas accumulate just as much dirt.
- Not Rinsing Properly: Leaving soap residue behind can lead to unsightly streaks and attract dirt more quickly, defeating the purpose of cleaning.
- Cleaning in Direct Sunlight: The cleaning solution can dry too quickly in direct sun, leaving streaks and water spots before you have a chance to rinse or wipe. Choose a cloudy day or a time when your door is in the shade.
- Not Testing Cleaners: Always test a new cleaner on an inconspicuous area first to prevent accidental damage or discoloration.
Elevate Your Entryway: The Finishing Touches

Once your front door is impeccably clean, you might find yourself inspired to add personal touches. Consider adding stylish vinyl numbers to clearly display your house number, or replacing an old door handle with a shiny new one. A fresh, seasonal wreath can also instantly elevate your entryway’s charm. These small updates, paired with a spotless door, can bring a renewed sense of joy and pride every time you arrive home.

Remember How To Clean a Front Door for later and pin it!
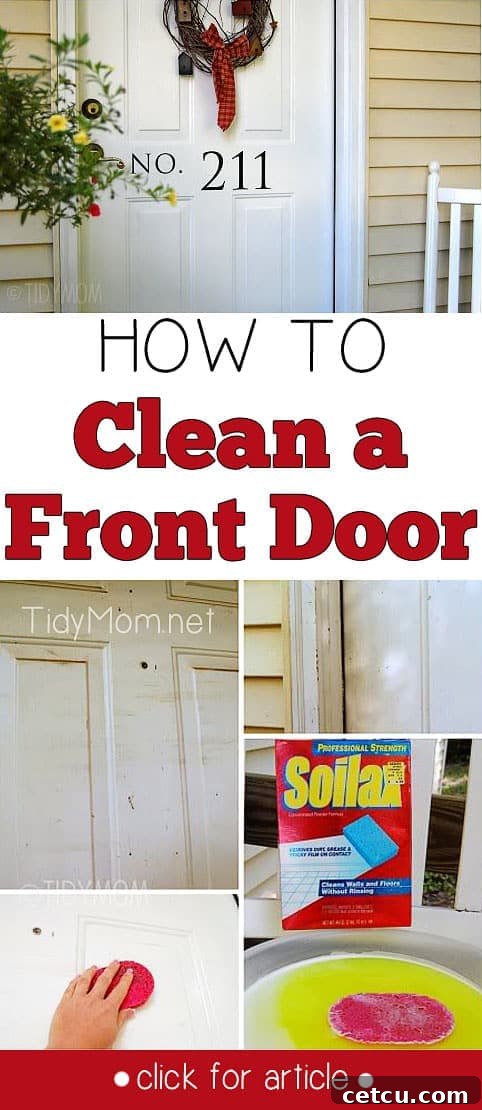
Looking for more ways to spruce up your home? Discover How to Clean up your entryway ready for Fall!