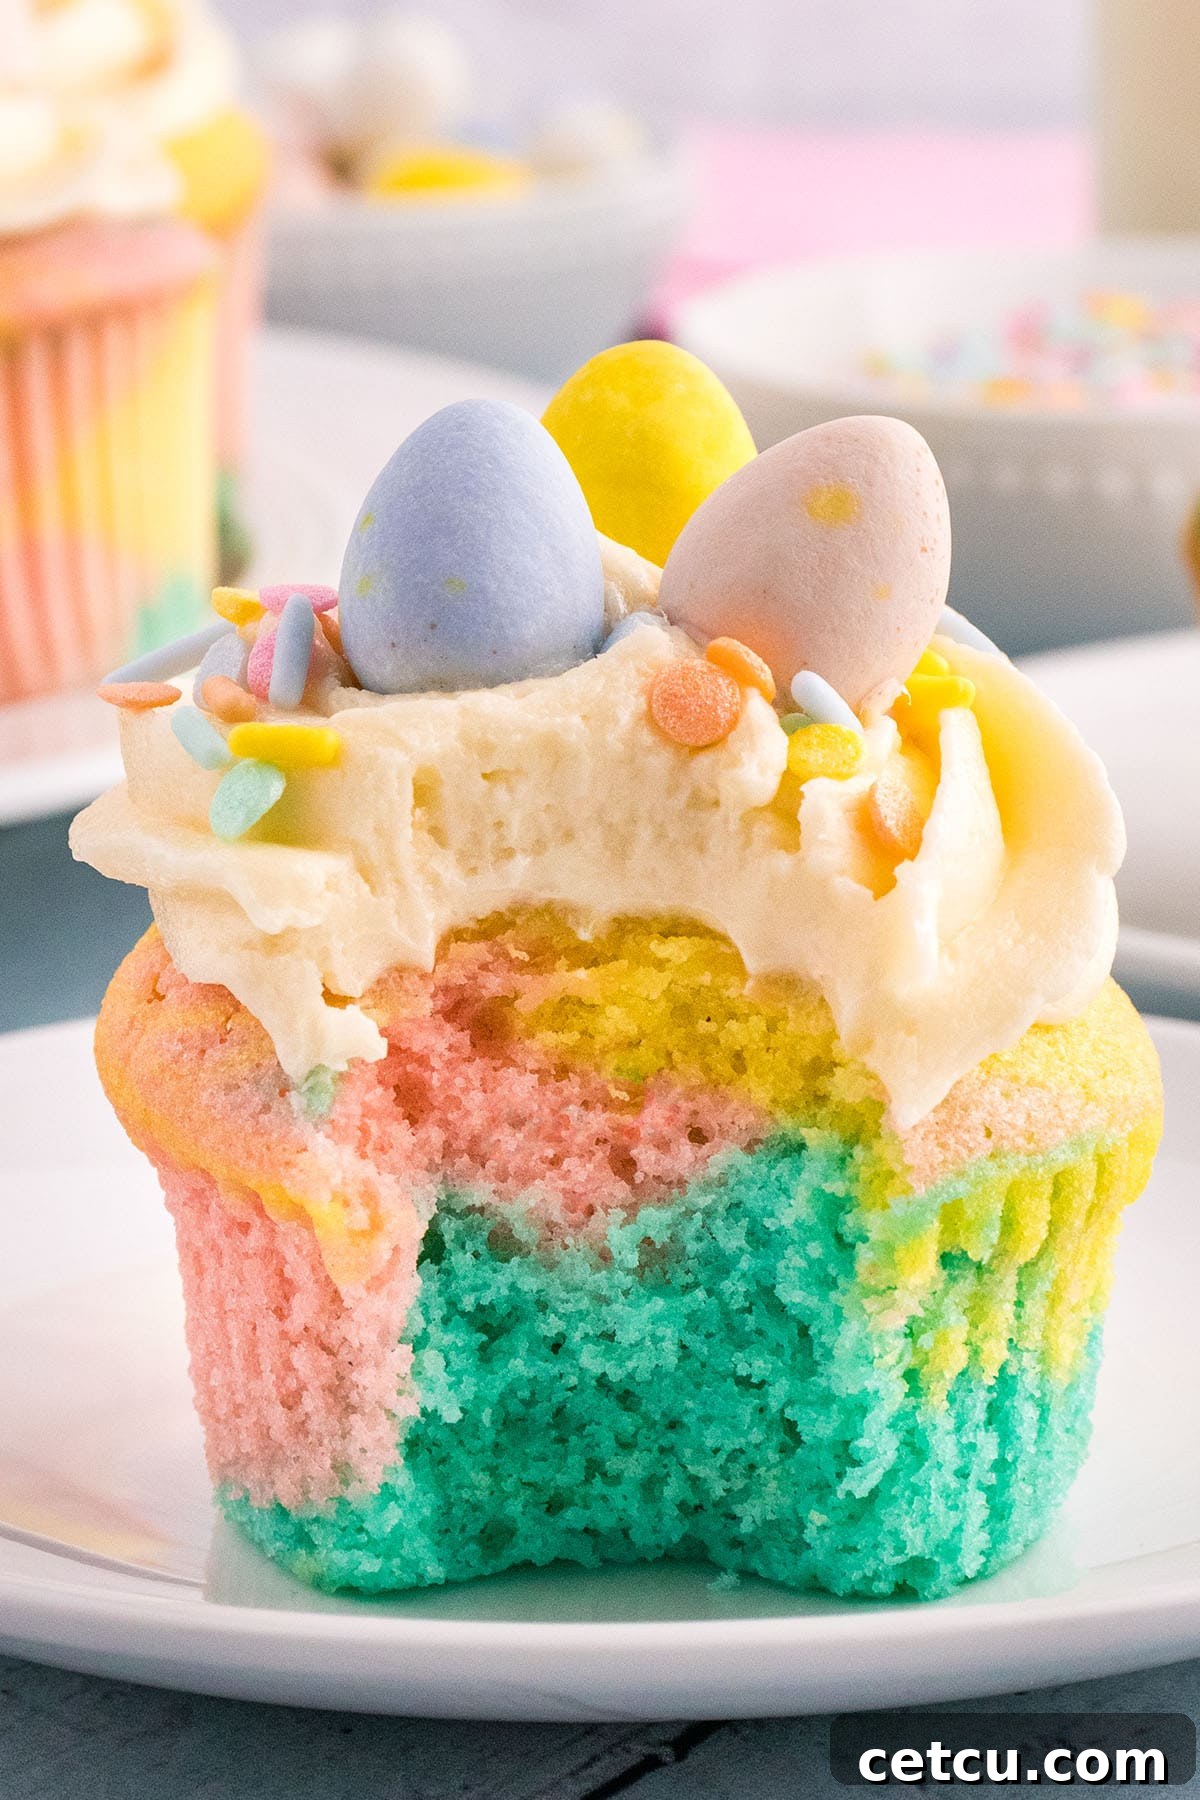
Irresistible Pastel Spring Cupcakes: Your Ultimate Guide to Homemade Vanilla Delights with Silky Buttercream
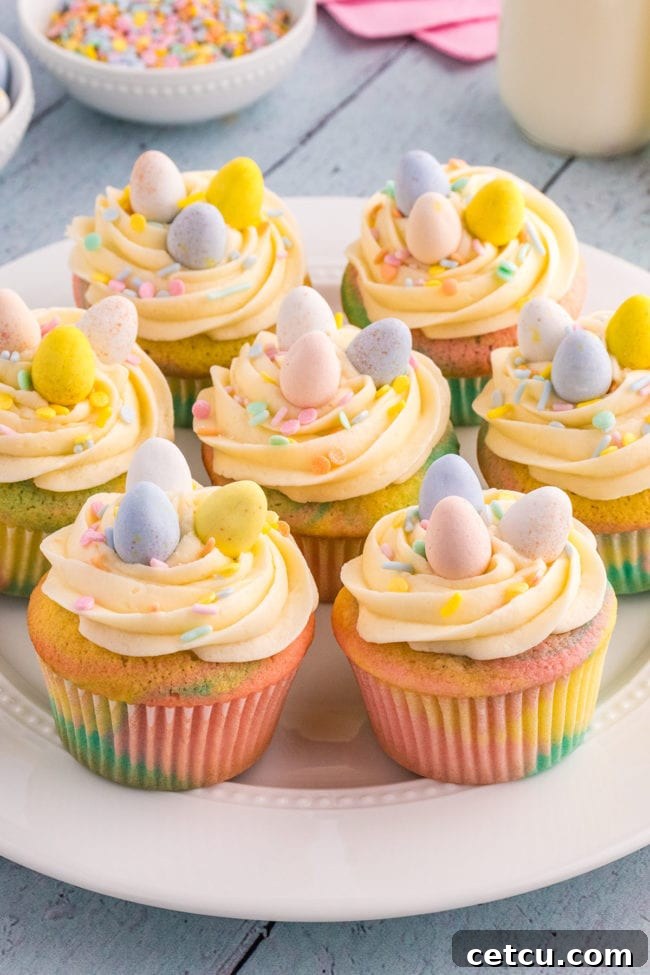
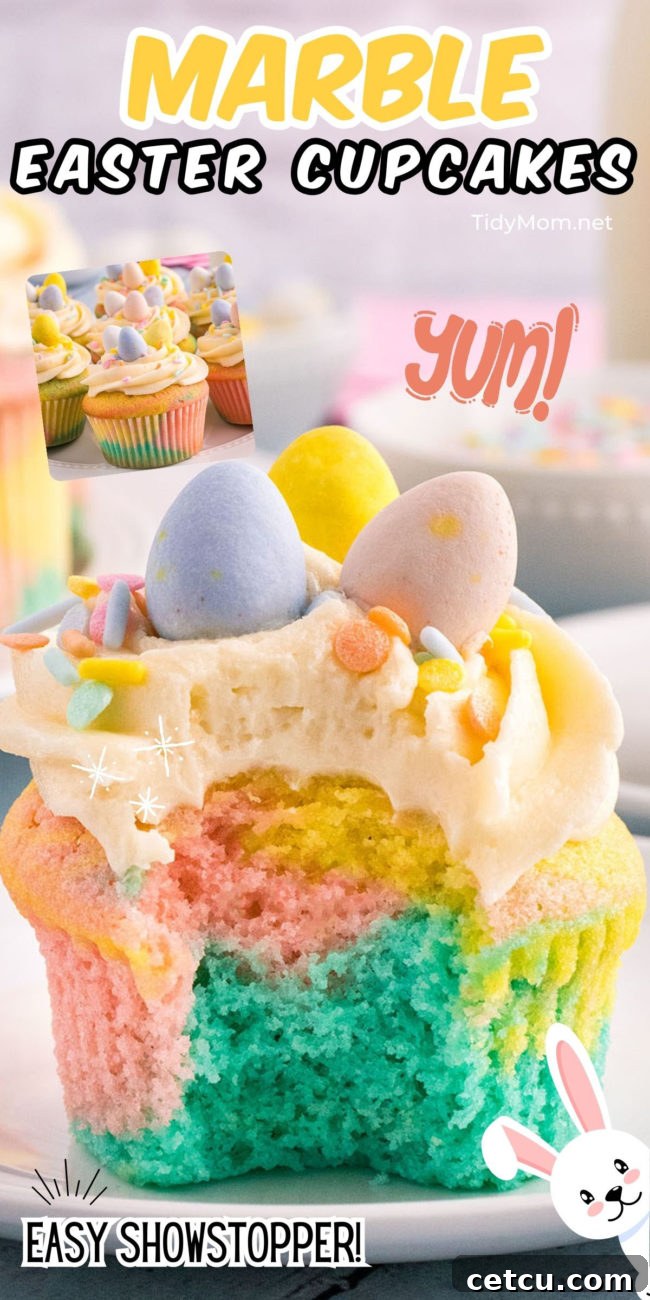
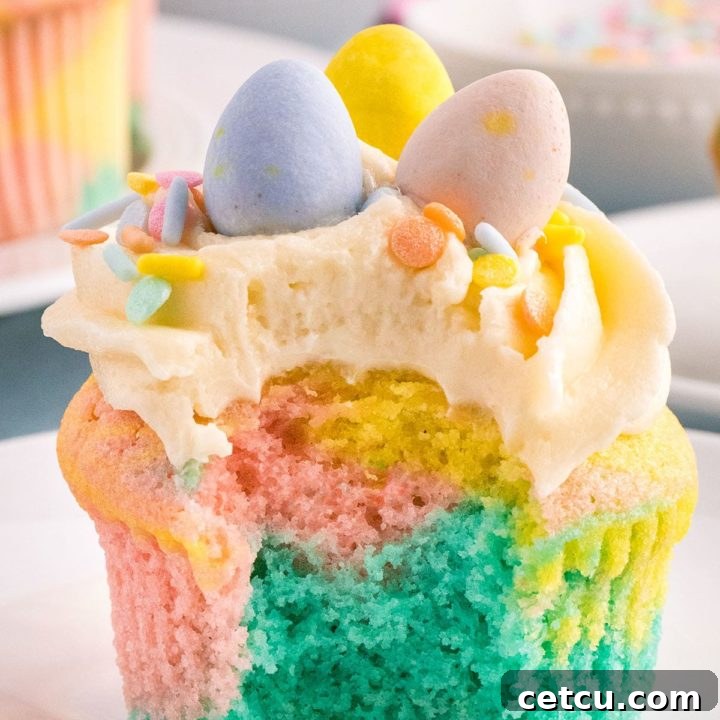
Step into the delightful world of spring baking with these enchanting Spring Cupcakes. Imagine tender, vanilla-infused cupcakes swirled with soft pastel colors, crowned with a cloud of silky, homemade buttercream frosting. These aren’t just desserts; they’re edible works of art, perfect for adding a touch of elegance and fun to any celebration. Whether you’re planning for Easter gatherings, a joyous birthday party, or a charming baby shower, these marble pastel cupcakes are guaranteed to be a showstopper!
If you’re eager to explore more seasonal treats, don’t miss our other springtime favorites designed to bring a smile to every face. Indulge in our Easy Spring Cookies with Easter M&Ms, impress with a stunning Easter Bundt Cake featuring a vibrant tri-colored batter, savor the zesty flavors of our delightful Mandarin Orange Cake, or charm your guests with Lemon-Filled Easter Bunny Cupcakes.
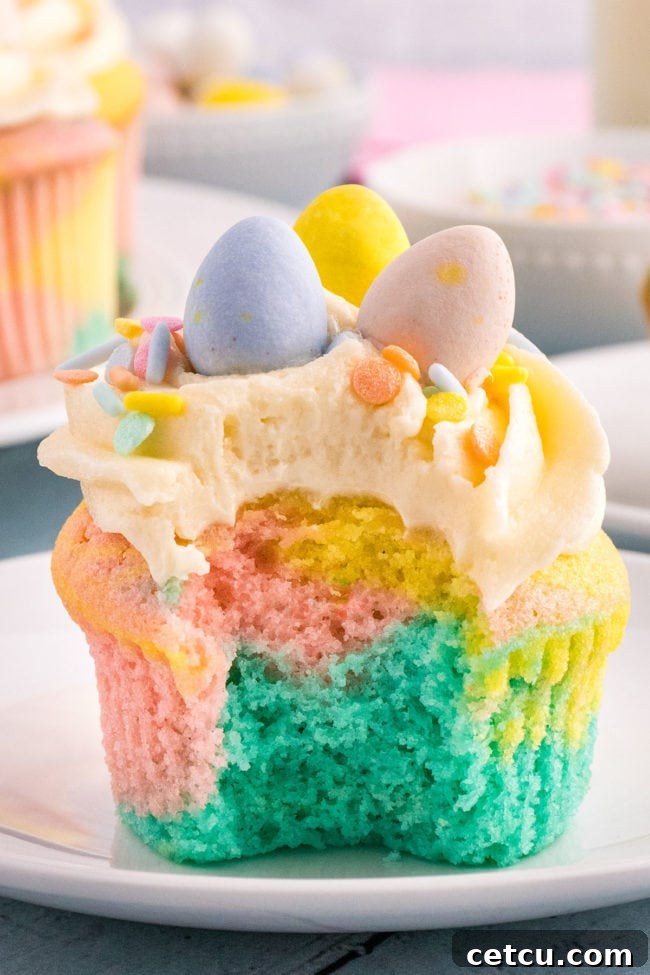
Table of Contents
Why You’ll Adore These Spring Cupcakes
Just like our popular tri-color cupcakes for patriotic events and festive marble Christmas cupcakes, these delightful Spring Cupcakes bring a burst of color and flavor to any occasion. We’ve captured the essence of spring with pretty pink, blue, and yellow hues, making them absolutely perfect for your next celebration. Discover what makes these pastel delights truly special:
- Whimsical Charm: These aren’t just desserts; they’re miniature celebrations! The soft, vibrant colors of these cupcakes add an immediate sense of playfulness and joy, making family gatherings, parties, or even a simple afternoon treat feel extra special. They effortlessly brighten any table.
- Visually Stunning: From the delicate swirl of colors within each cake to the elegant frosting and charming garnishes, these cupcakes are a feast for the eyes. They are incredibly photogenic, ensuring your dessert spread looks as amazing as it tastes, captivating guests before they even take their first bite.
- Pure Homemade Goodness: While visually impressive, the heart of these cupcakes lies in their simple, wholesome ingredients. Using basic baking staples, you create a dessert that tastes genuinely homemade, free from artificial preservatives, offering a superior flavor and texture that store-bought options can’t match.
- Effortless Elegance: Achieving the beautiful marbled effect is surprisingly simple, requiring just a few extra bowls and a dash of gel food coloring. This straightforward technique allows even novice bakers to create stunning, professional-looking cupcakes that are sure to impress without demanding advanced skills.
- Perfect for Any Spring Occasion: The soft, light-hearted pastel hues are inherently versatile, making these cupcakes ideal for a wide array of spring events. They are a quintessential treat for Easter celebrations, a charming addition to baby showers, a cheerful centerpiece for garden parties, or simply a lovely way to add a cheerful touch to your everyday.
- Customizable Color Palette: The beauty of these multi-colored cupcakes is their adaptability. You can easily personalize the colors to perfectly coordinate with any party theme or seasonal palette. Think mint green and lavender for a spring tea party, or bold primary colors for a child’s birthday.
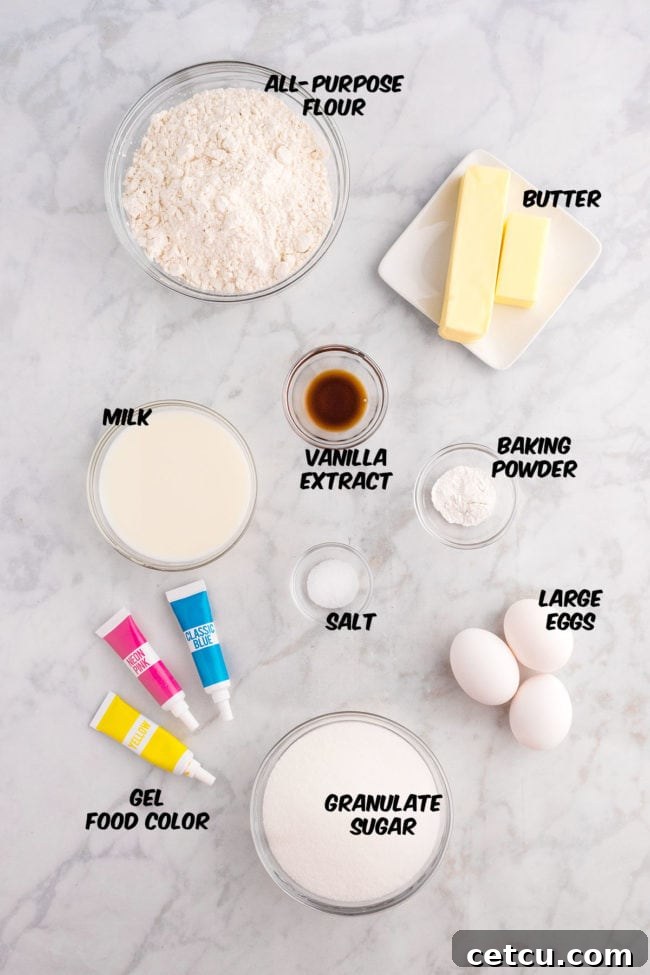
Essential Ingredients for Perfect Pastel Cupcakes
For precise measurements and detailed instructions, please refer to the complete recipe card available at the bottom of this post.
For the Tender Vanilla Cupcakes:
- All-Purpose Flour: The foundation of our cupcakes, providing structure. It’s crucial to measure flour precisely using the fluff, spoon, and level method to avoid a dense cake and ensure the perfect balance of moisture and tenderness.
- Baking Powder: Our leavening agent responsible for giving the cupcakes their light and airy crumb. Always check the expiration date; old baking powder can lead to flat, heavy cupcakes.
- Salt: A small but mighty ingredient that balances the sweetness and enhances all the other flavors in the batter, making them truly pop.
- Unsalted Butter: Softened to room temperature, butter contributes richness, tenderness, and flavor. Room temperature butter creams beautifully with sugar, creating air pockets for a lighter texture.
- Granulated Sugar: Provides sweetness and helps keep the cupcakes moist. It also aids in creaming with butter, adding to the overall structure.
- Large Eggs: At room temperature, eggs bind the ingredients, add richness, and help create a stable emulsion, contributing to the cupcakes’ structure and moistness.
- Vanilla Extract: Pure vanilla extract is highly recommended for the best flavor, offering a warm and aromatic foundation. Avoid imitation vanilla for a truly gourmet taste.
- Whole Milk: Also at room temperature, whole milk adds moisture and richness, resulting in a more tender and flavorful crumb.
- Pastel Gel Food Coloring: (We used yellow, pink, and blue). Gel food coloring provides vibrant colors without adding excess liquid to the batter, which can affect the cupcake’s texture.
How To Measure Flour Properly for Perfect Baking: Did you know the way you measure flour significantly impacts your baked goods? The most accurate method is by weight, using a digital kitchen scale where 1 cup of flour typically weighs 125 to 130 grams. If you don’t have a scale, use the “spoon and level” method: gently spoon flour into your measuring cup until it overflows, then level off the excess with a straight edge like a knife. Avoid scooping directly with the measuring cup, as this compacts the flour, leading to an overly dense and dry finished product.
For the Silky Homemade Buttercream Frosting:
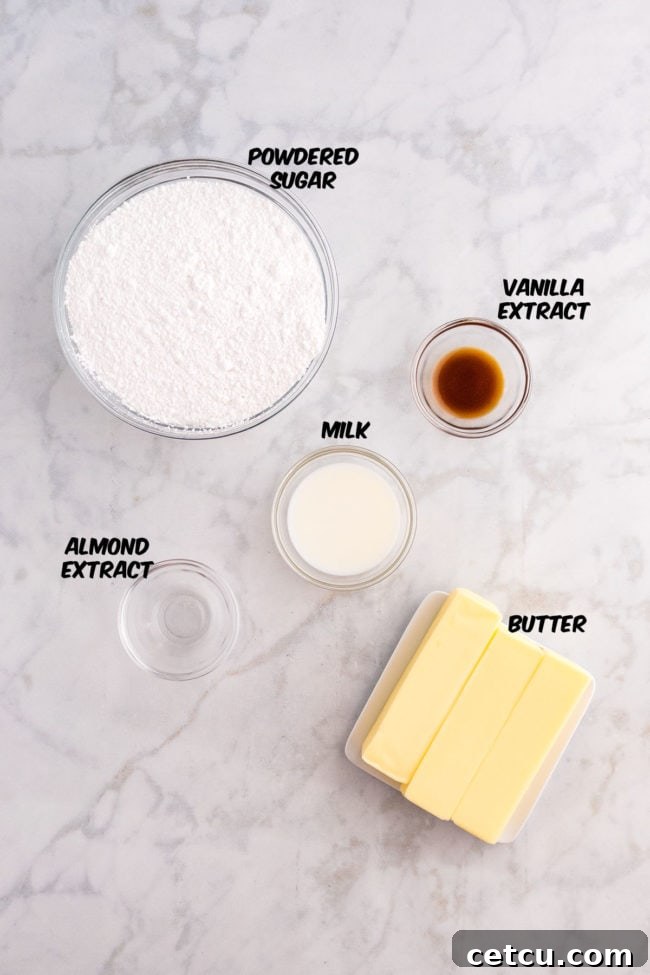
- Unsalted Butter: Softened to room temperature, this is the backbone of a rich, creamy buttercream. Its temperature is key for a smooth, lump-free frosting.
- Powdered Sugar: Also known as confectioners’ sugar, it’s essential for achieving a smooth, melt-in-your-mouth frosting texture without any grittiness.
- Vanilla Extract: Provides the classic, sweet aroma and flavor that perfectly complements the vanilla cupcakes.
- Almond Extract (Optional): A small hint of almond extract can add a wonderful depth and unique flavor profile, elevating the overall taste of your buttercream.
- Whole Milk: Or half & half, heavy cream, or whipping cream. This liquid helps achieve the desired consistency for your frosting, making it smooth and spreadable or pipeable.
Adorable Holiday Garnishes:
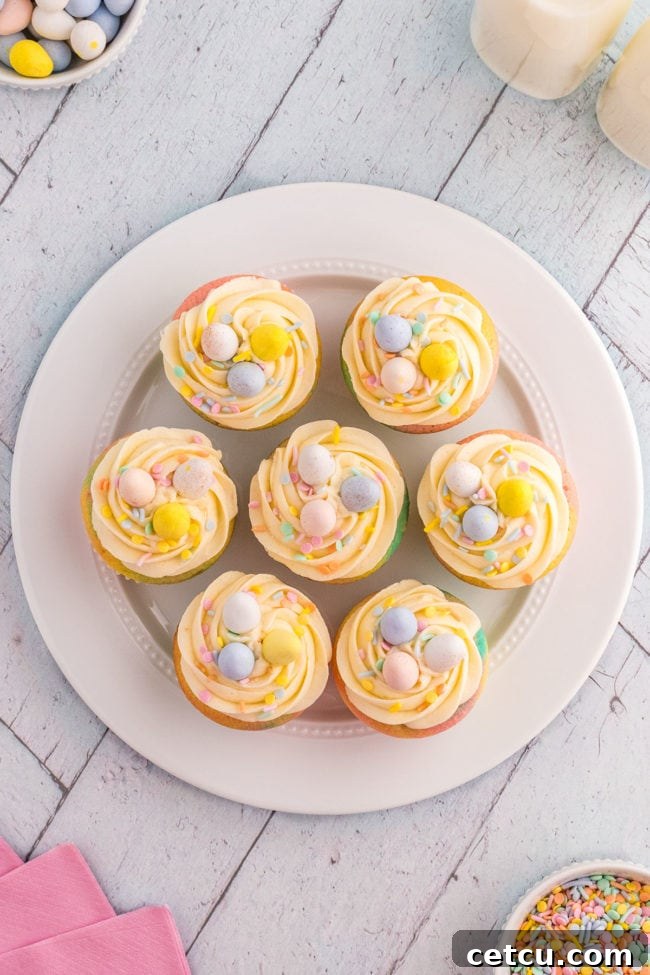
- Easter/Pastel-Colored Sprinkles: These add a festive crunch and a pop of color, making your cupcakes even more appealing.
- Mini Chocolate Eggs: The quintessential Easter decoration, bringing a touch of chocolatey delight and charming visual appeal.
This post may contain affiliate links. Please read my disclosure policy here.
Step-by-Step Guide: Crafting Your Pastel Spring Cupcakes
Bring the vibrant colors of spring to life with every bite of these light, airy vanilla cupcakes, adorned with soft pastel hues and topped with luscious homemade buttercream frosting. To ensure a smooth and enjoyable baking experience, gather these essential kitchen tools before you begin:
Kitchen Tools You’ll Need:
- Mixing Bowls: Several sizes for dry ingredients, wet ingredients, and separating colored batters.
- Electric Mixer: A stand mixer or hand mixer is essential for thoroughly creaming butter and sugar, and whipping the buttercream to perfection.
- 1.5 tablespoon Cookie Scoop or Measuring Spoon: Ensures uniform cupcake sizes, leading to even baking.
- Toothpicks: Perfect for gently swirling the different colored batters to create that beautiful marbled effect.
- Cupcake Pan: A standard 12-cup muffin tin is ideal for baking your cupcakes.
- Cupcake Wrappers (Liners): Prevents sticking and adds a professional finish.
- Cooling Rack: Crucial for allowing air circulation around the cupcakes as they cool, preventing sogginess.
- Rubber Spatula: For scraping bowls and gently folding ingredients.
- Piping Bag and Tips (Optional): For professional-looking frosting swirls, though a knife or offset spatula works just as well for spreading.
When you are ready to bake, remember to use the full, detailed recipe card at the very bottom of this page for specific quantities and precise timing.
Baking the Multi-Colored Vanilla Cupcakes:
- Prepare Your Pans: Begin by preheating your oven to 350°F (175°C). Line your cupcake pans with festive cupcake wrappers, ensuring they are ready for the batter.
- Combine Dry Ingredients: In a medium-sized bowl, thoroughly whisk together the all-purpose flour, baking powder, and salt. Whisking ensures these ingredients are evenly distributed, leading to consistent rising and flavor throughout the cupcakes. Set this bowl aside.
- Cream Butter and Sugar: In a large mixing bowl, using an electric mixer, beat the softened butter and granulated sugar together on medium speed. Continue mixing until the mixture becomes light, pale, and fluffy, which usually takes about 2-3 minutes. This step incorporates air, crucial for tender cupcakes.
- Add Eggs and Vanilla: Introduce the large eggs one at a time, beating well after each addition until fully incorporated. Follow with the vanilla extract, mixing until just combined.
- Alternate Wet and Dry: Gradually add the dry flour mixture to the wet ingredients, alternating with the room temperature whole milk. Begin and end with the flour mixture. Mix on low to medium speed just until the ingredients are combined. Be careful not to overmix, as this can develop the gluten in the flour, resulting in tough cupcakes.
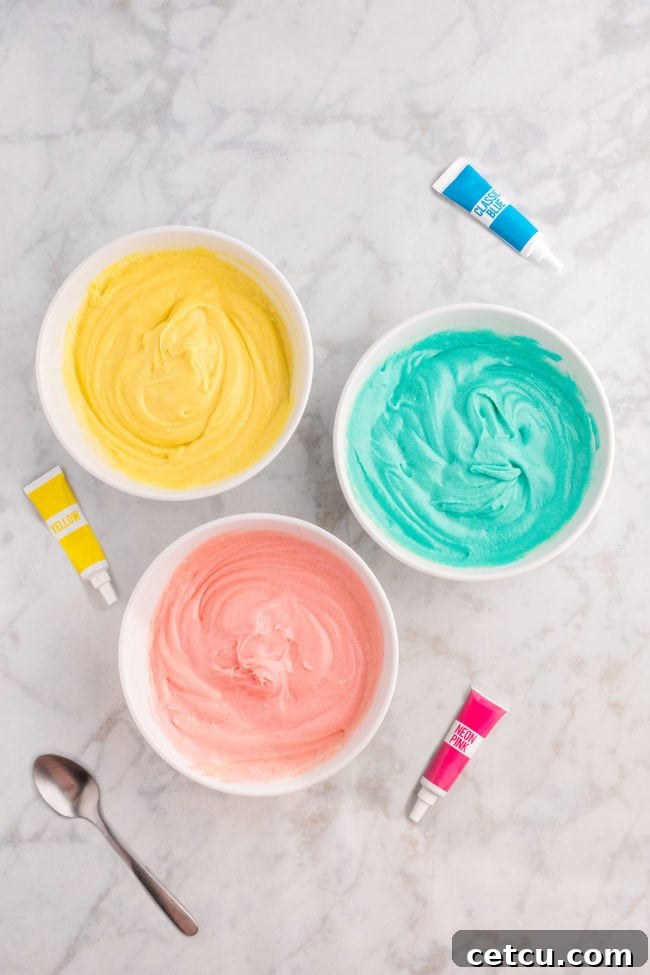
- Divide and Color Batter: Divide the vanilla cupcake batter evenly into three separate bowls, aiming for approximately 1⅔ cups of batter in each. Add a few drops of your chosen pastel gel food coloring (yellow, pink, and blue are lovely choices for spring) to each bowl. Mix gently until the desired vibrant pastel shades are achieved.
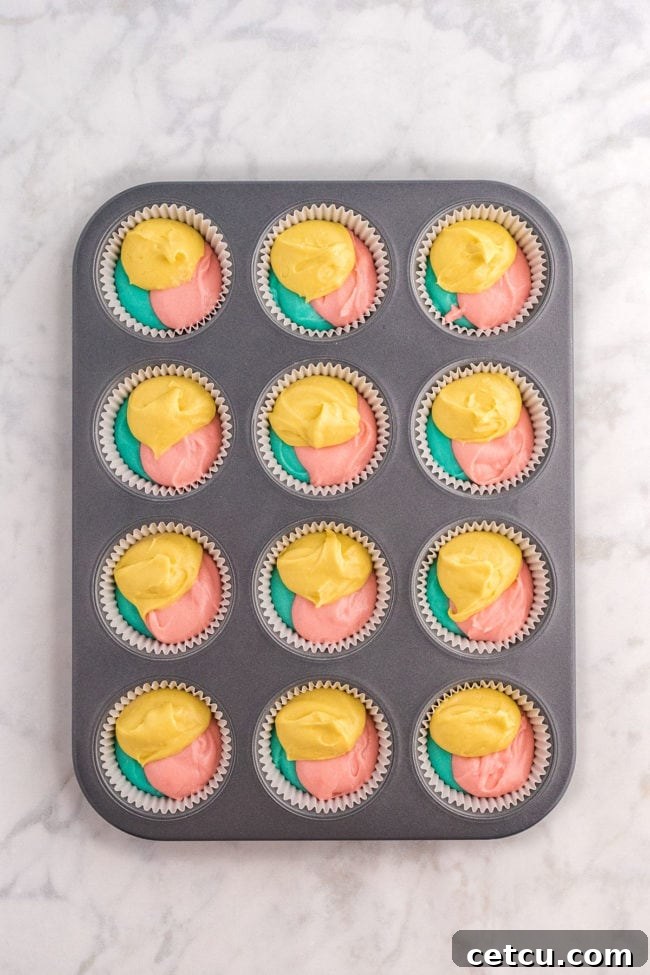
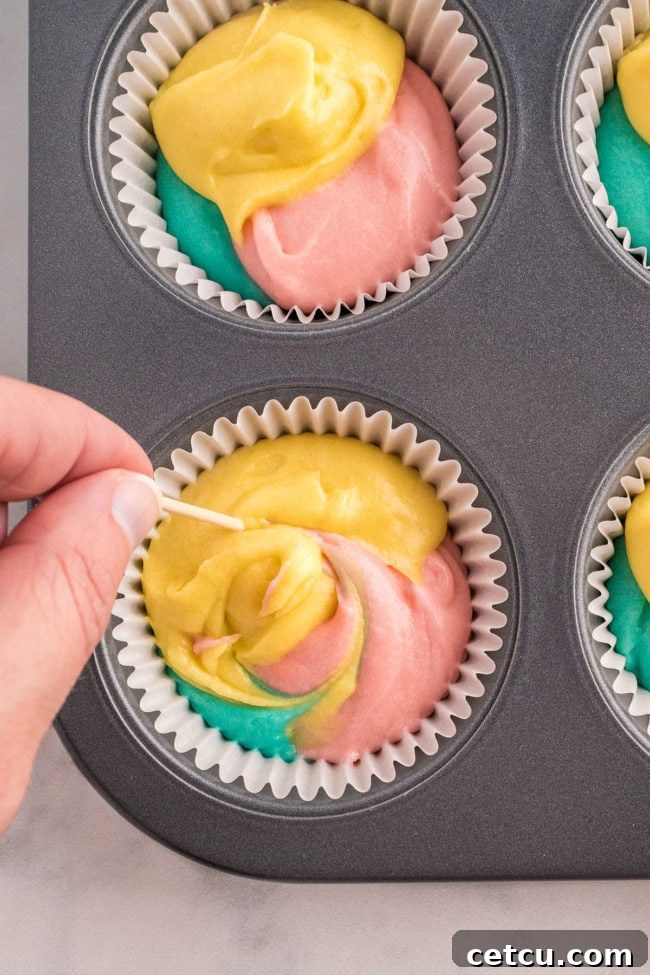
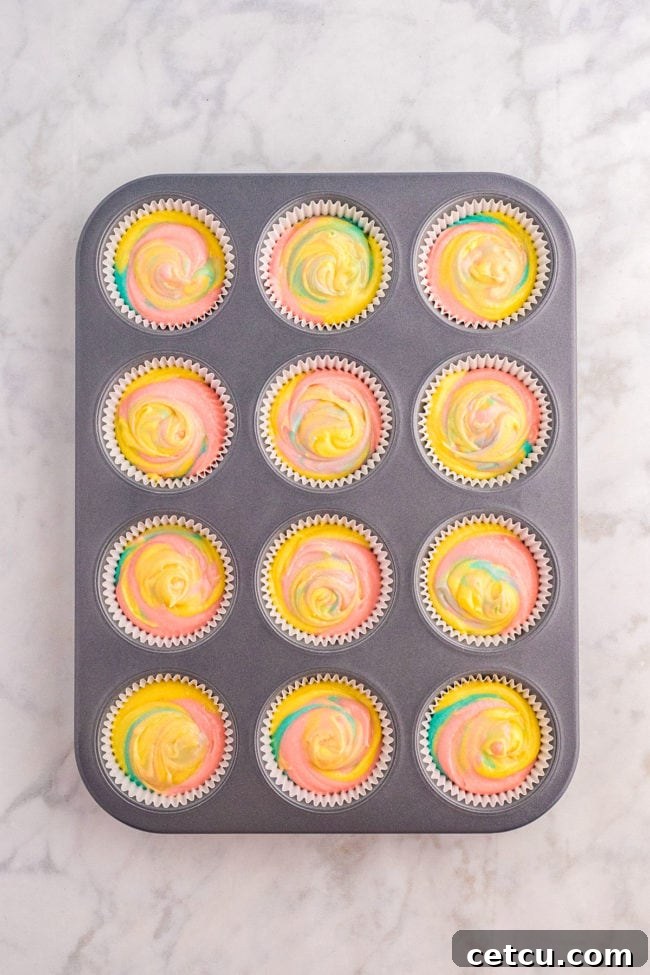
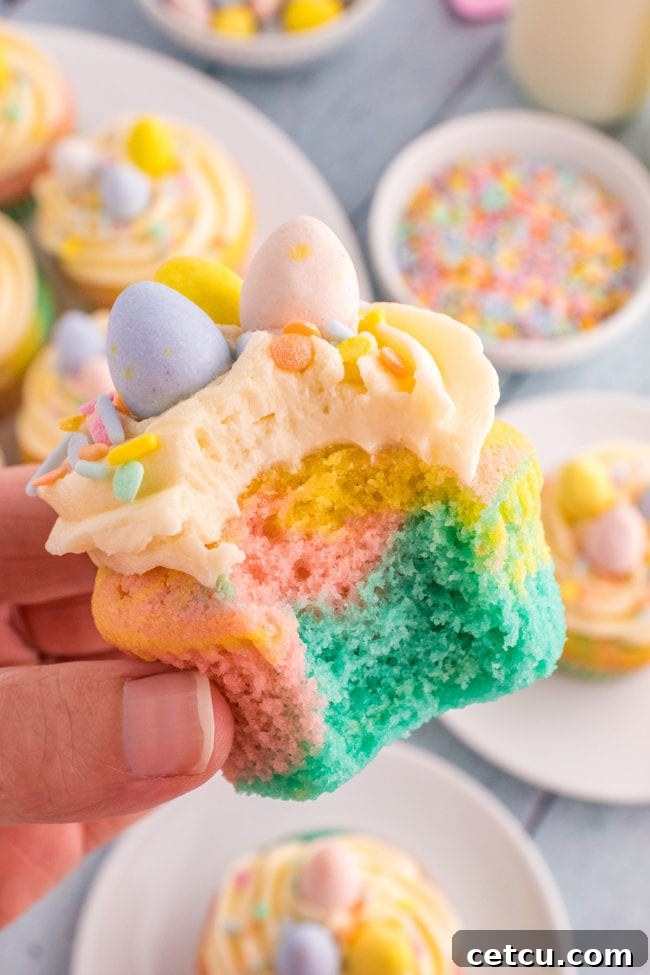
- Create the Marble Effect: Using a 1½ tablespoon cookie scoop or a regular measuring spoon, alternately add scoops of each colored batter into the prepared cupcake wrappers. For instance, add a scoop of yellow, then pink, then blue. Once all colors are added, gently swirl the batters together with a toothpick or a butter knife. Perform only a few swirls to create a beautiful marbled pattern, being careful not to overmix the colors.
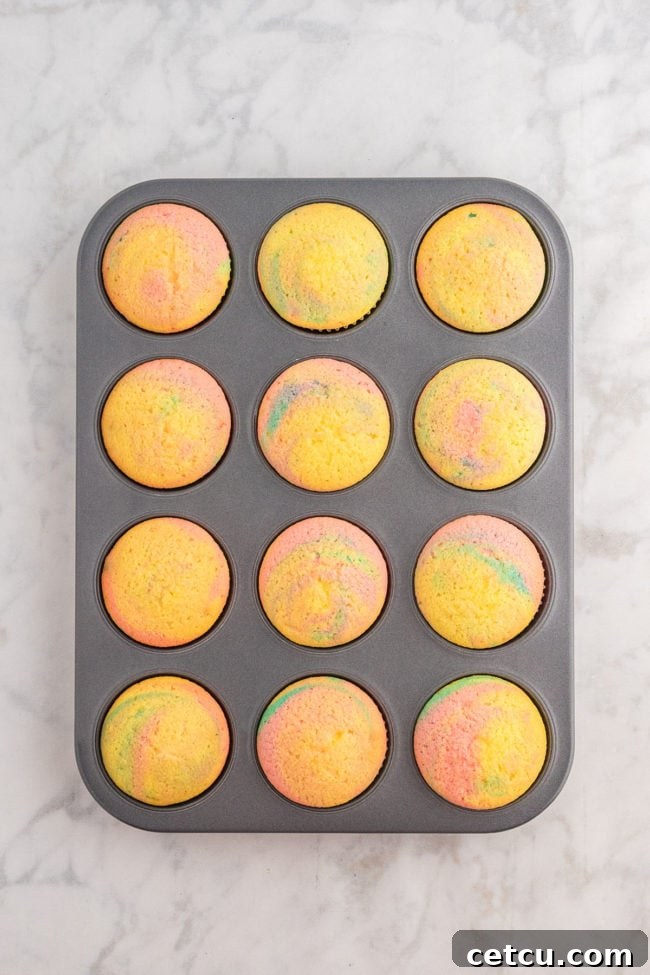
- Bake to Perfection: Transfer the filled cupcake pans to your preheated oven. Bake for 18-20 minutes, or until a toothpick inserted into the center of a cupcake comes out clean, indicating they are fully cooked.
- Cool Properly: As soon as the cupcakes are baked, carefully remove them from the pan. Place the hot cupcakes onto a wire rack to cool completely. This critical step prevents steam from building up and making the cupcake bottoms soggy or gummy.
*Baker’s Insight: The Importance of a Wire Rack for Cooling
One of the most common pitfalls in cupcake baking is not cooling them correctly. To prevent gummy or soggy-bottomed pastel cupcakes, always transfer them to a wire rack immediately after they come out of the oven. Cupcakes left to cool in the hot pan or on a flat, solid surface will trap steam underneath, causing moisture to condense and saturate the liners and bottoms of your delicate treats. A wire rack allows air to circulate freely around the entire surface of each cupcake, ensuring they cool evenly, maintain their light texture, and preventing any steam-induced sogginess. This simple step is vital for achieving perfectly textured, pristine cupcakes every time.
Preparing the Velvety Buttercream Frosting:
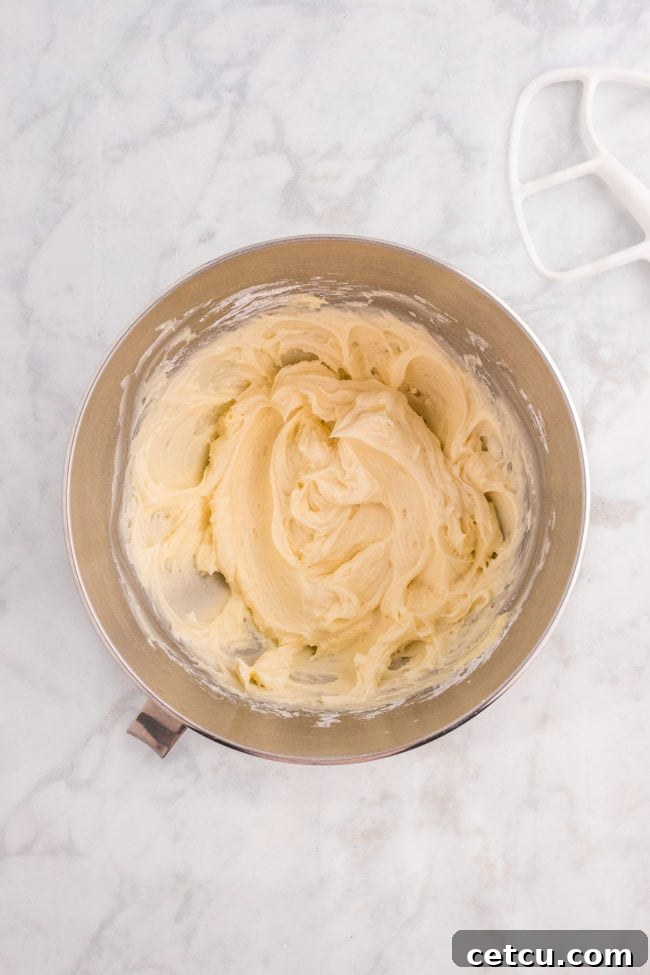
- Cream the Butter: In a clean mixing bowl with an electric mixer (paddle attachment preferred), beat the softened unsalted butter on medium speed until it’s light and creamy, about 2 minutes. It should be noticeably paler and fluffy.
- Incorporate Remaining Ingredients: Gradually add the powdered sugar, milk (or cream), and both vanilla and almond extracts (if using). Start beating on low speed to prevent a sugar cloud, then increase to medium-high.
- Whip Until Smooth: Continue beating on high speed for at least 3 minutes until the buttercream is perfectly creamy, smooth, and fluffy. If it seems too thick, add a tiny bit more milk, one teaspoon at a time. If it’s too thin, add more powdered sugar until the desired consistency is achieved.
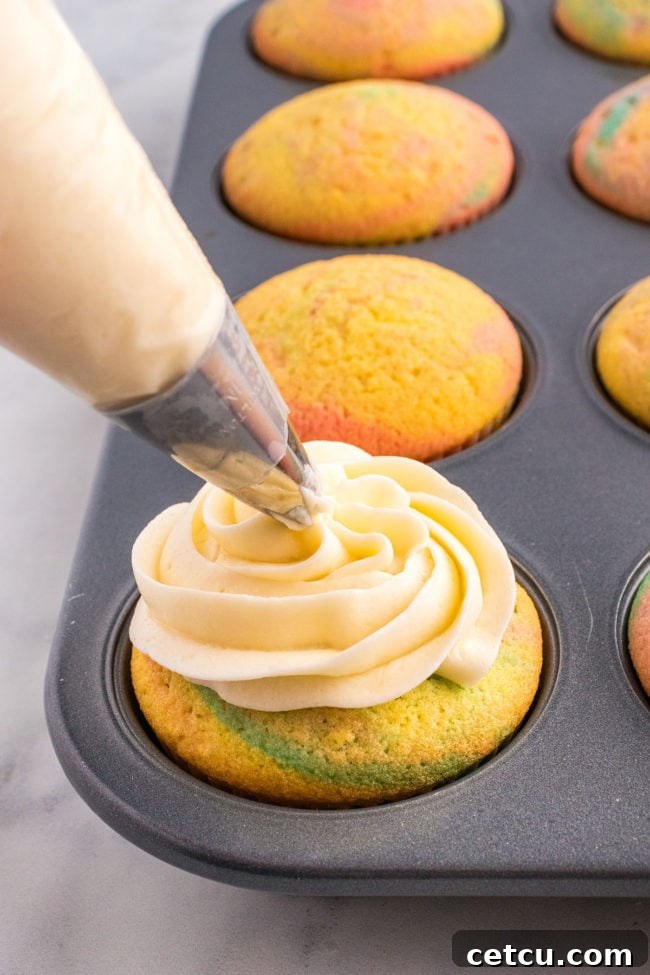
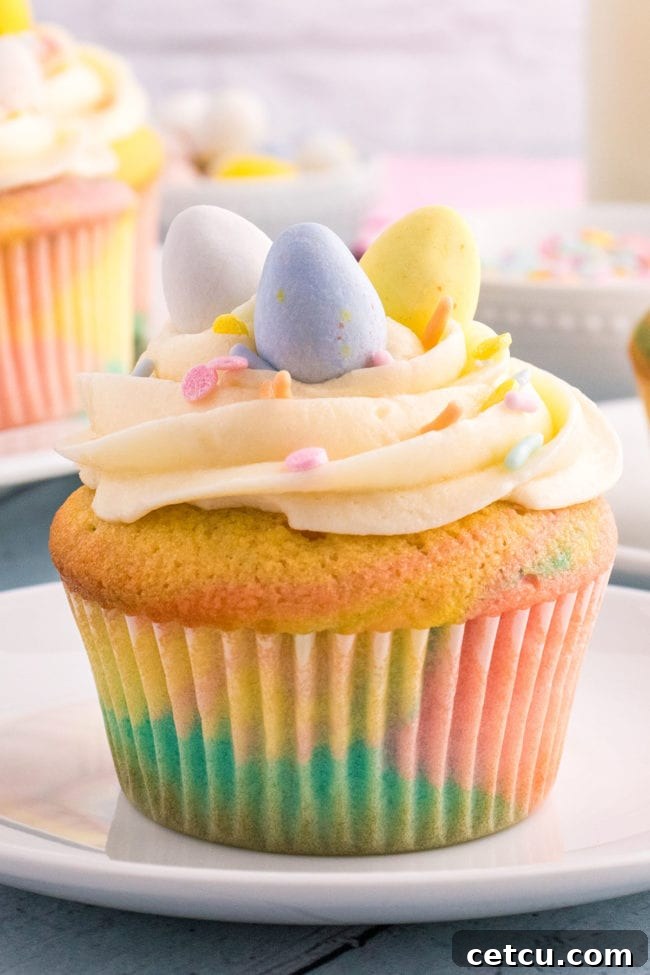
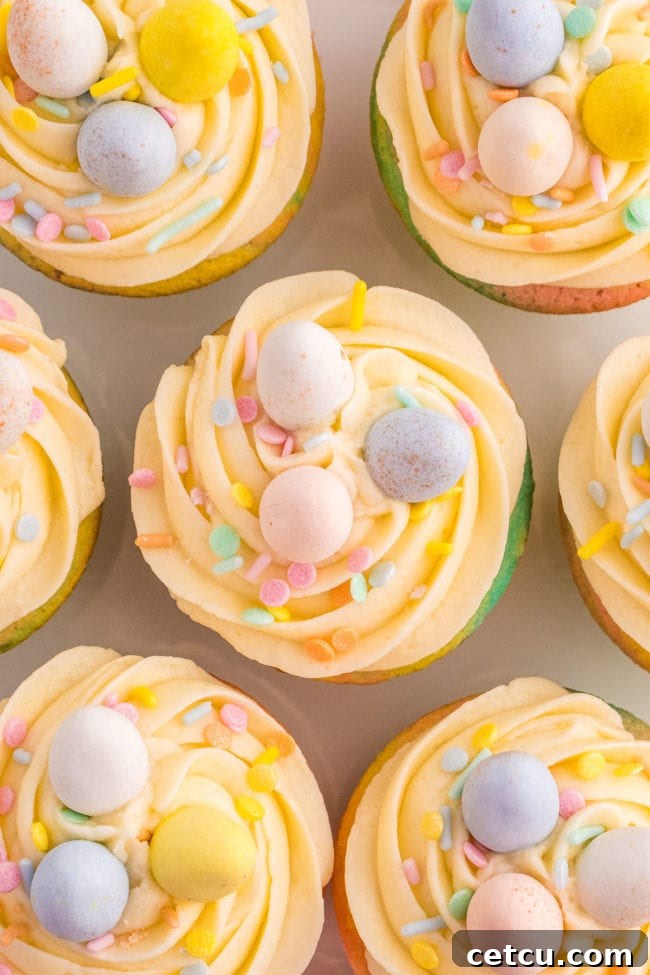
- Frost the Cupcakes: Once your cupcakes are completely cool, frost them generously. You can use an offset spatula or knife for a rustic spread, or a piping bag fitted with your favorite tip (like a large star or round tip) for elegant swirls.
- Garnish and Serve: Finish your beautiful creations by scattering pastel-colored sprinkles and placing a few mini chocolate Easter eggs on top of each cupcake for an adorable and festive decoration.
Expert Tips & Tricks for Perfect Cupcakes
- Avoid Overmixing the Batter: This is a golden rule in baking! Once you add the flour mixture, mix only until the ingredients are just combined. Overmixing develops the gluten in the flour, which can lead to tough, chewy cupcakes instead of tender, fluffy ones.
- Embrace Creative Color Blending: Don’t be afraid to experiment with your pastel hues. For brighter, more vivid colors, add a touch more gel food coloring. For softer, barely-there shades, use just a tiny amount. You can even mix primary colors to create unique pastel tones like mint green or lavender.
- Master the Marble Swirl: For that delightful marbled effect, swirl the tri-colored cupcake batters in the liners very gently with a toothpick or a skewer. A few deliberate swirls are all it takes to create beautiful patterns; excessive swirling will blend the colors too much, resulting in a muddy appearance. Alternatively, you can layer the colored batters without swirling for a striped effect.
- Prompt Cooling Prevents Problems: As soon as your cupcakes are baked and removed from the hot pan, transfer them to a wire rack without delay. This is especially important in humid conditions. Rapid cooling on a wire rack allows steam to escape, preventing moisture build-up that can make the cupcake wrappers gummy or oily, and the bottoms soggy.
- Achieving Perfect Buttercream Consistency: If your homemade buttercream feels too stiff or thick to pipe or spread smoothly, gradually add a little more milk (or cream), one teaspoon at a time, until it reaches your desired consistency. Conversely, if it’s too thin or runny, mix in additional powdered sugar, a tablespoon at a time, until it thickens up.
- Balance the Sweetness: Sometimes, buttercream can taste overwhelmingly sweet. A small pinch of salt (about ¼ teaspoon) added to the frosting can miraculously cut through the richness and balance the sweetness, enhancing the overall flavor without making it salty.
- Room Temperature Ingredients are Key: For both the cupcakes and the buttercream, ensure your butter, eggs, and milk are all at room temperature. This allows them to emulsify properly, creating a smoother, more uniform batter and frosting that traps air effectively, resulting in a lighter texture.
Storing Your Beautiful Spring Cupcakes
Proper storage is key to keeping your delicate Spring Cupcakes fresh and delicious. Follow these guidelines to ensure they remain delightful for as long as possible:
- The Golden Rule of Cooling: Cupcakes can only be stored effectively AFTER they are completely and utterly cooled. Attempting to store warm cupcakes will result in steam condensation, leading to gummy tops, soggy bottoms, and melted frosting. Allow them to cool fully on a wire rack first.
- Room Temperature Storage: For the best flavor and texture, especially if frosted with buttercream, store your pastel cupcakes at room temperature. Place them in an airtight container to prevent them from drying out. They will maintain their quality for up to 2 days.
- Refrigeration for Extended Freshness: If you need to store them for a longer period, you can refrigerate them in an airtight container for up to 5 days. However, be aware that cupcakes stored in the fridge can sometimes dry out more quickly than frozen ones, and the frosting might firm up considerably. Allow them to come to room temperature before serving for the best texture.
- Freezing for Long-Term Storage: For optimal freshness beyond a few days, freezing is an excellent option. To freeze cupcakes, first ensure they are completely cool. Then, wrap each cupcake individually in plastic wrap, followed by aluminum foil. Place the wrapped cupcakes on a baking sheet and freeze until solid. Once frozen, transfer them to an airtight freezer-safe container or a heavy-duty freezer zip-top bag. They can be stored for up to 3 months.
- Handle with Care in the Freezer: Cupcakes won’t hard freeze to the point of being indestructible. Avoid placing heavy items on top of them or trying to squeeze them into a cramped freezer space, as this can crush the delicate frosting and cake.
- Thawing Frozen Cupcakes: When you’re ready to enjoy your frozen cupcakes, simply transfer them to the refrigerator overnight or allow them to thaw at room temperature for a few hours. Ensure they are fully defrosted before frosting (if unfrosted) or serving.
*NOTE: For the absolute best eating experience, Spring cupcakes are most enjoyable and taste best when served within 1-2 days of baking. If you need to prepare them more than two days in advance for convenience, it’s highly recommended to bake and freeze them (unfrosted if possible) until the day before or the day of your event. Always allow them to completely defrost before applying any frosting.
Frequently Asked Questions (FAQs) About Spring Cupcakes
For truly exceptional flavor, we highly recommend using a high-quality pure vanilla extract. Our favorites include homemade vanilla extract or Nielsen-Massey Madagascar Bourbon Pure Vanilla Extract. Pure vanilla extract, though a bit more of an investment, lasts for years and delivers a depth of flavor that imitation extracts simply can’t match, making it worthwhile for all your baked goods, not just cupcakes.
For consistent baking and perfectly domed tops, fill your cupcake liners about two-thirds to three-quarters full. This allows sufficient room for the cupcakes to rise evenly without overflowing during baking. Overfilling can lead to mushroom-top cupcakes or sticky messes in your pan, while underfilling might result in flat or sunken centers.
Absolutely! Feel free to experiment with a variety of flavored extracts to create unique pastel cupcakes. Instead of just vanilla, try lemon, almond, or even a hint of strawberry extract. You can also start with a white or yellow boxed cake mix, divide the batter, and dye it in your preferred colors, following the rest of the instructions for baking and frosting.
Yes, these Spring cupcakes are excellent for making ahead! You can bake the cupcakes up to 2 days in advance and store them unfrosted in an airtight container at room temperature. For longer freshness, refrigerate them for up to 5 days, or even freeze them for up to 3 months (see our storage tips above for best results). Just ensure they are completely cooled before storing, and frost them closer to serving time.
Several factors can cause cupcakes to sink. Common culprits include opening the oven door too early (causing a sudden temperature drop), overmixing the batter (which creates too much air that collapses), using expired leavening agents like baking powder, or underbaking them. Ensure your oven temperature is accurate and resist the urge to peek until the baking time is almost complete.
The key is to use gel food coloring instead of liquid food coloring. Gel colors are highly concentrated, meaning you need only a small amount to achieve vivid hues, thus avoiding adding excess liquid to your batter. Mix the gel color into separate portions of batter gently, just until the color is uniform, then proceed with the swirling technique without overworking the batter.
For a beautiful, classic swirl, a large star tip (like Wilton 1M or Ateco 826) is a popular choice. A large round tip (like Wilton 1A) will give you smooth, domed swirls. If you prefer a simpler look, an offset spatula or even a butter knife can be used to spread the buttercream evenly across the cupcake tops.
Creative Easter & Spring Cupcake Decorating Ideas:
Unleash your inner artist and make these pastel spring cupcakes even more enchanting with these fun decorating ideas:
- Multi-Colored Frosting Fun: Divide your homemade buttercream into thirds (or more, if you like!) and tint each portion with different pastel food colors. You can then frost individual cupcakes with a single color, or load all colors into one piping bag for a stunning rainbow swirl effect.
- DIY Easter Grass: Create edible Easter grass by tinting shredded coconut with a few drops of green food coloring. Simply place shredded coconut in a zip-top bag, add a few drops of green food coloring, seal, and shake until evenly colored. Scatter over your frosted cupcakes for a charming nest-like look.
- Chocolate Branch Nests: For a rustic touch, fill a plastic bag with brown-tinted buttercream frosting. Snip a tiny corner off the bag to create a small opening. Pipe delicate “branches” in a circular pattern on top of the frosted cupcakes to form a small nest. Place a few mini chocolate eggs inside each nest.
- Toasted Coconut Nests: If you prefer to forgo food coloring, lightly toast shredded coconut in a dry pan over medium-low heat until golden. This creates a beautifully textured, naturally colored “bird’s nest” for your mini Easter eggs without any dye.
- Edible Spring Flowers: Adorn your cupcakes with delicate edible wafer paper flowers, sugar flowers, or even small fresh, food-safe flowers like violas or pansies for an elegant garden feel.
- Mini Candy Decorations: Look for tiny candy butterflies, bees, or ladybugs to place on your frosted cupcakes for an extra whimsical touch that children will adore.
- Sparkle and Shine: A dusting of edible glitter or iridescent sanding sugar can add a magical shimmer to your pastel cupcakes, perfect for special occasions.
Pastel Spring Cupcakes
16 cupcakes
30 minutes
18 minutes
48 minutes
Ingredients
For the Tender Vanilla Cupcakes:
- 2 ¼ cups all-purpose flour (270 g)
- 2 ¼ teaspoons baking powder
- ½ teaspoon salt
- ¾ cup (12 tablespoons or 1 ½ sticks) unsalted butter, softened
- 1 ½ cups granulated sugar
- 3 large eggs, room temperature
- 1 ½ teaspoons pure vanilla extract
- 1 cup whole milk, room temperature
- Pastel gel food coloring (e.g., yellow, pink, and blue)
For the Silky Homemade Buttercream Frosting:
- 1 ½ cups unsalted butter, softened
- 3 cups powdered sugar
- 1 ½ teaspoons pure vanilla extract
- ¼ teaspoon almond extract (optional)
- 3-4 tablespoons whole milk (or heavy cream)
Adorable Holiday Garnishes:
- Easter/pastel-colored sprinkles
- Mini chocolate eggs
Instructions
- Preheat and Prepare: Preheat your oven to 350°F (175°C) and line a standard cupcake pan with cupcake wrappers.
- Whisk Dry Ingredients: In a medium bowl, whisk together the flour, baking powder, and salt. Set aside.
- Cream Butter & Sugar: In a large mixing bowl, beat the softened butter and granulated sugar with an electric mixer until light and fluffy (about 2-3 minutes).
- Add Eggs & Vanilla: Add the eggs one at a time, beating well after each. Stir in the vanilla extract until just combined.
- Combine Wet & Dry: Gradually add the flour mixture to the wet ingredients, alternating with the milk. Mix on medium speed until just combined. Do not overmix.
- Color the Batter: Divide the batter evenly into three separate bowls (approx. 1 ⅔ cups each). Add a few drops of gel food coloring to each bowl and mix gently until the desired pastel color is achieved.
- Create Marble Swirls: Using a 1½ tablespoon cookie scoop or measuring spoon, add equal scoops of each colored batter into the cupcake liners. Gently swirl the colors together once or twice with a toothpick or butter knife to create a marbled effect.
- Bake Cupcakes: Bake for 18-20 minutes, or until a toothpick inserted into the center of a cupcake comes out clean.
- Cool Completely: Immediately remove the cupcakes from the pan and transfer them to a wire rack to cool completely before frosting.
- Prepare Buttercream: For the icing, beat the softened butter with an electric mixer until creamy (about 2 minutes).
- Whip Frosting: Gradually add the powdered sugar, milk, and extracts, beating on low speed initially, then increasing to high speed. Beat for at least 3 minutes until the buttercream is creamy, smooth, and fluffy.
- Frost & Decorate: Frost the completely cooled cupcakes with a generous layer of icing using a knife or a piping bag fitted with your favorite tip.
- Garnish: Decorate with pastel sprinkles and mini chocolate eggs for a cute and festive finish!
Notes
- For optimal freshness, store frosted cupcakes at room temperature in an airtight container for up to 2 days, or in the refrigerator for up to 5 days. Unfrosted cupcakes can be frozen for up to 3 months.
- Have fun experimenting with different color combinations using gel food coloring to perfectly match your occasion or theme.
- Adjust buttercream consistency as needed: add a little more milk if it’s too thick, or more powdered sugar if it’s too thin. A pinch of salt can help balance excessive sweetness.
Nutrition Information:
Yield: 16
Serving Size: 1
Amount Per Serving:
Calories: 433Total Fat: 21gSaturated Fat: 12gTrans Fat: 0gUnsaturated Fat: 8gCholesterol: 85mgSodium: 203mgCarbohydrates: 58gFiber: 1gSugar: 42gProtein: 5g
Nutrition information is estimated based on the ingredients and cooking instructions as described in each recipe and is intended to be used for informational purposes only. Please note that nutrition details may vary based on methods of preparation, origin, and freshness of ingredients used and are just estimates. We encourage, especially if these numbers are important to you, to calculate these on your own for most accurate results.
Did you make this recipe?
Please leave a comment on the blog or share a photo on Instagram