No-Bake Oreo Delight: The Ultimate Chocolate Lasagna Dessert
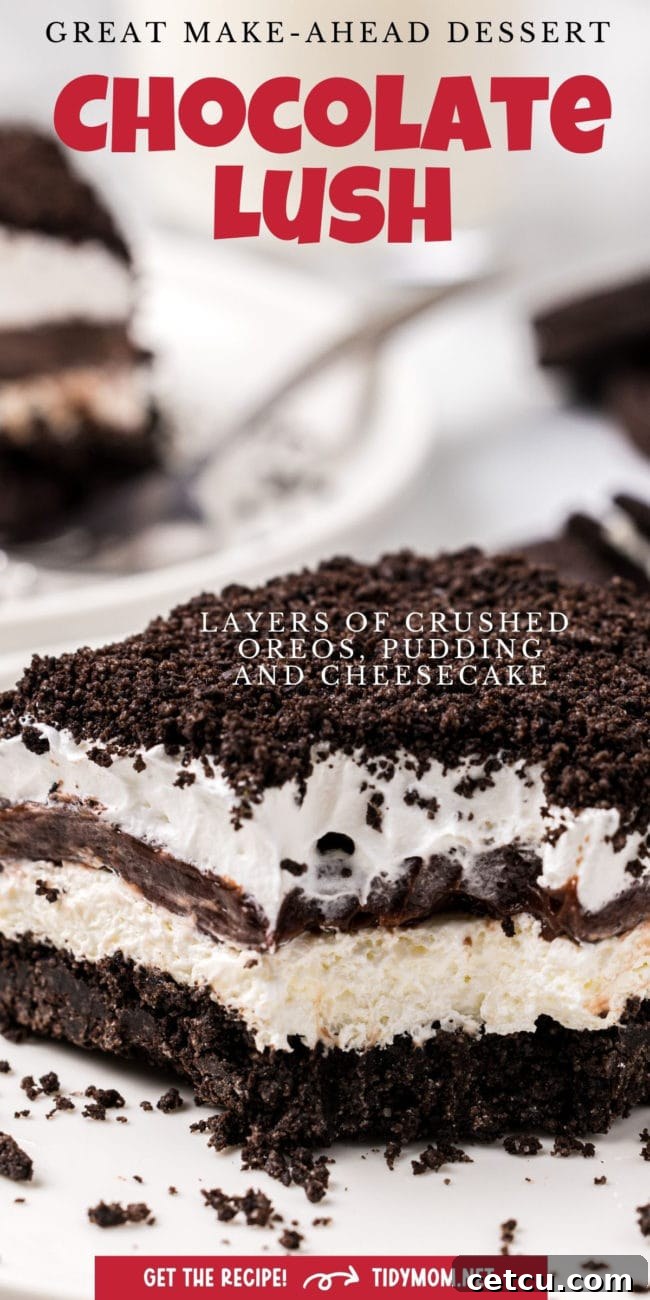
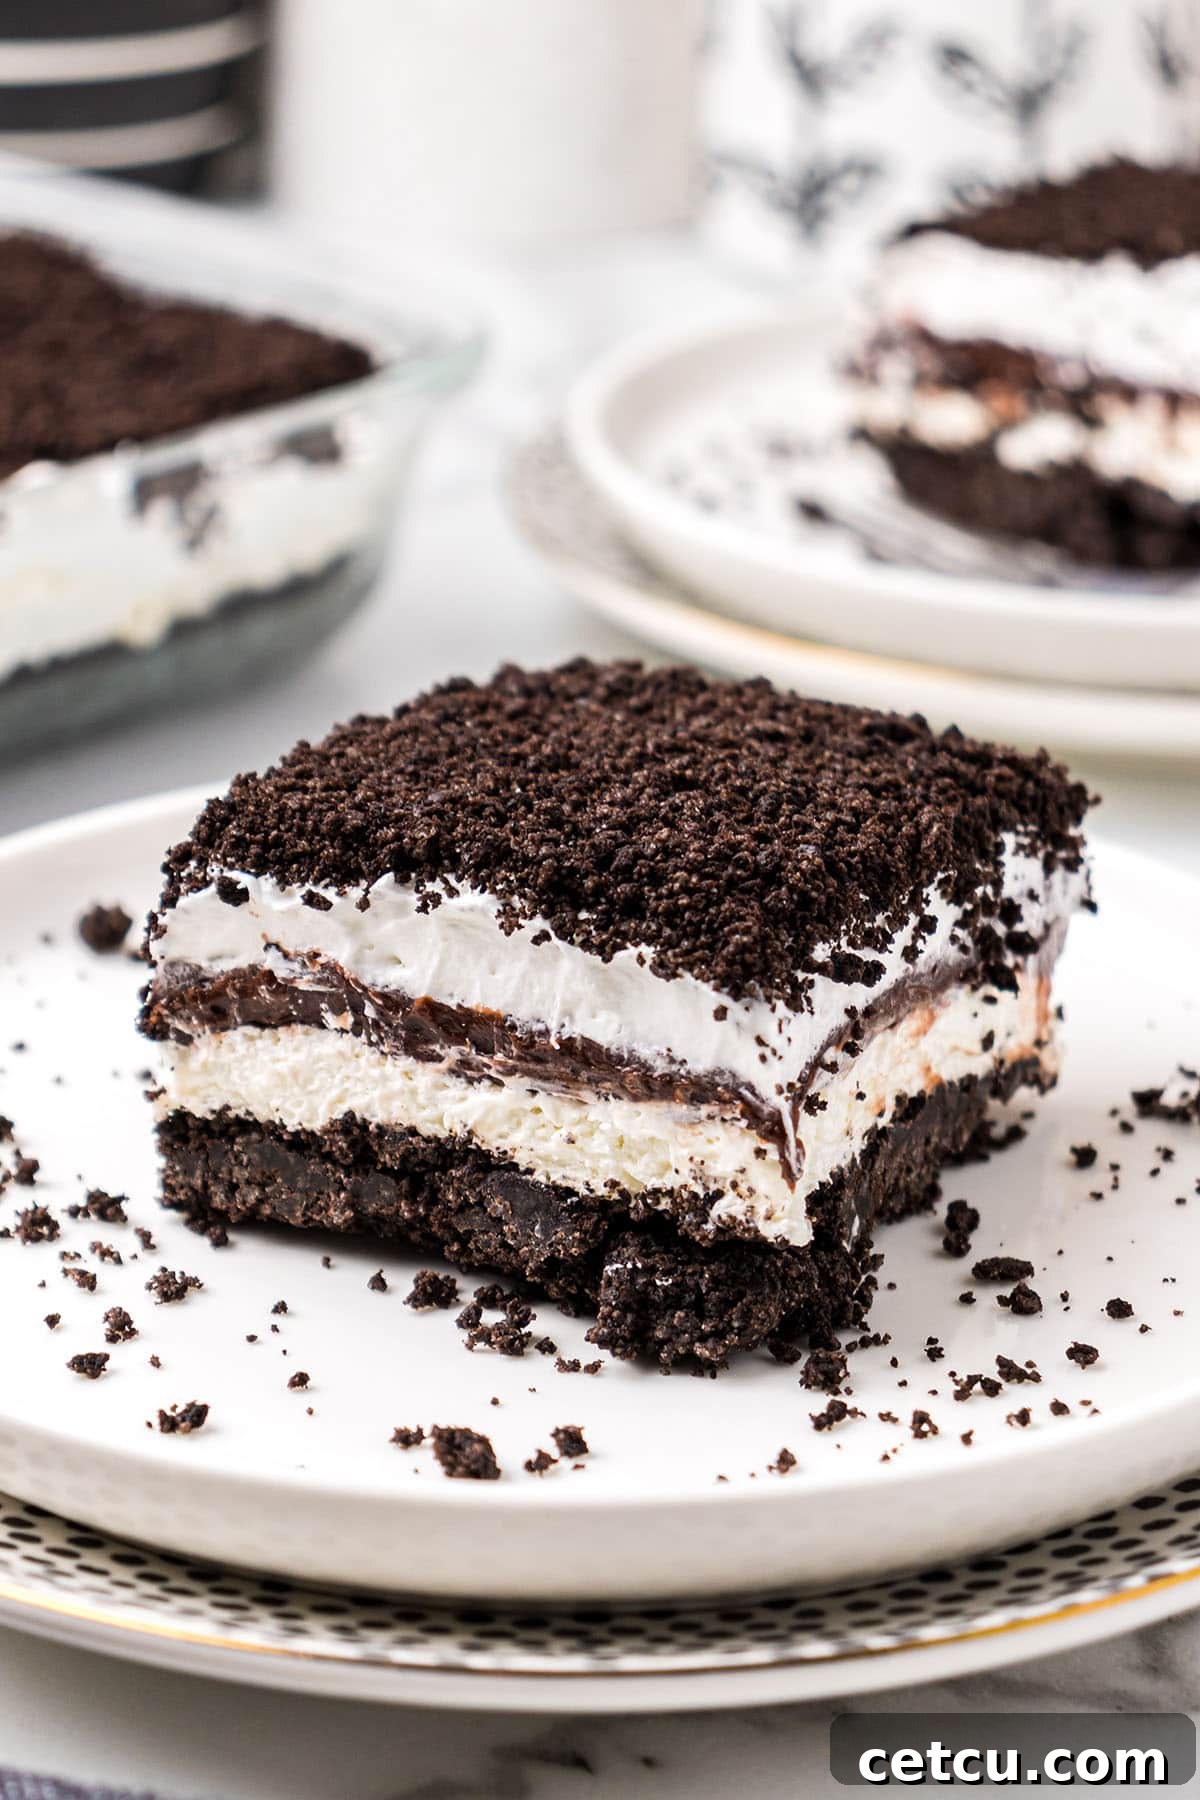
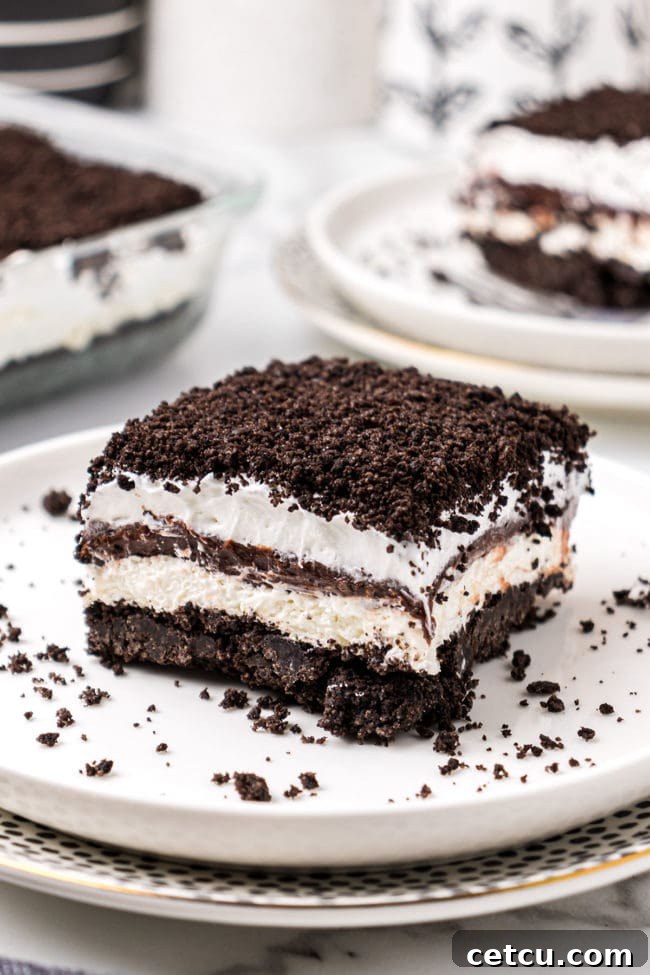
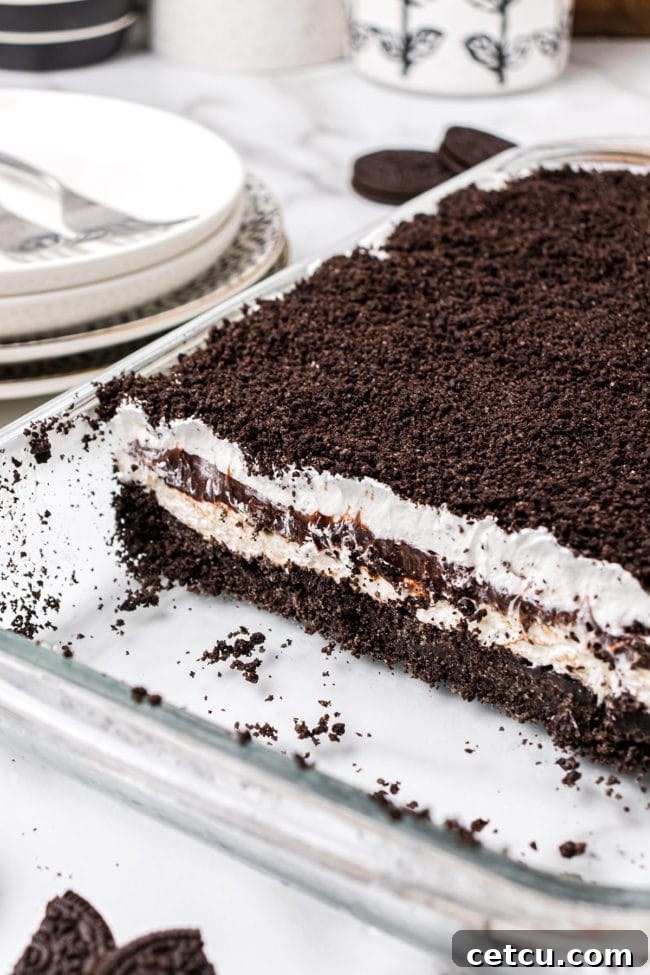
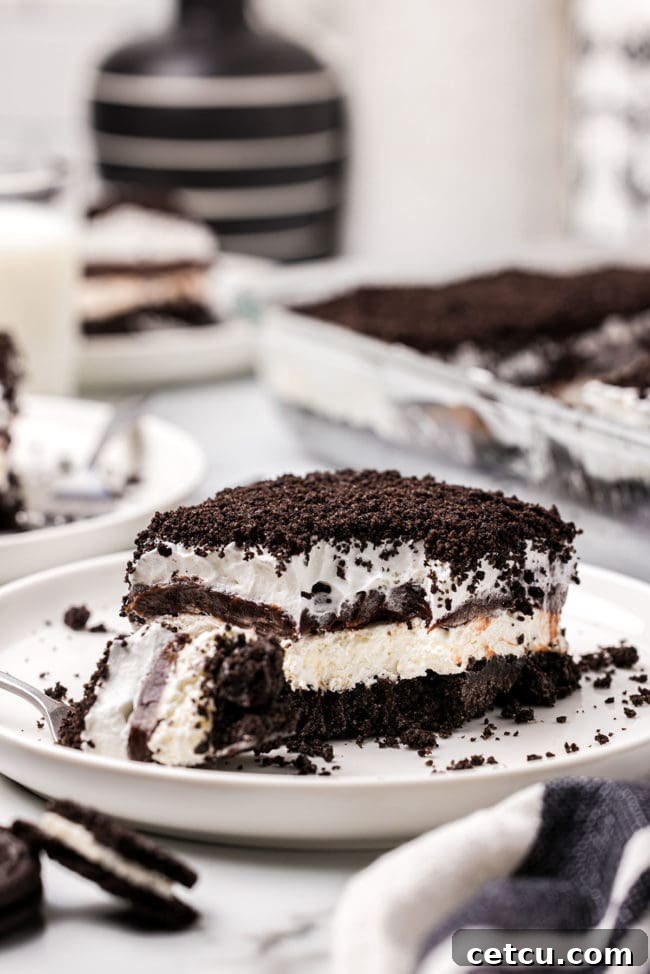
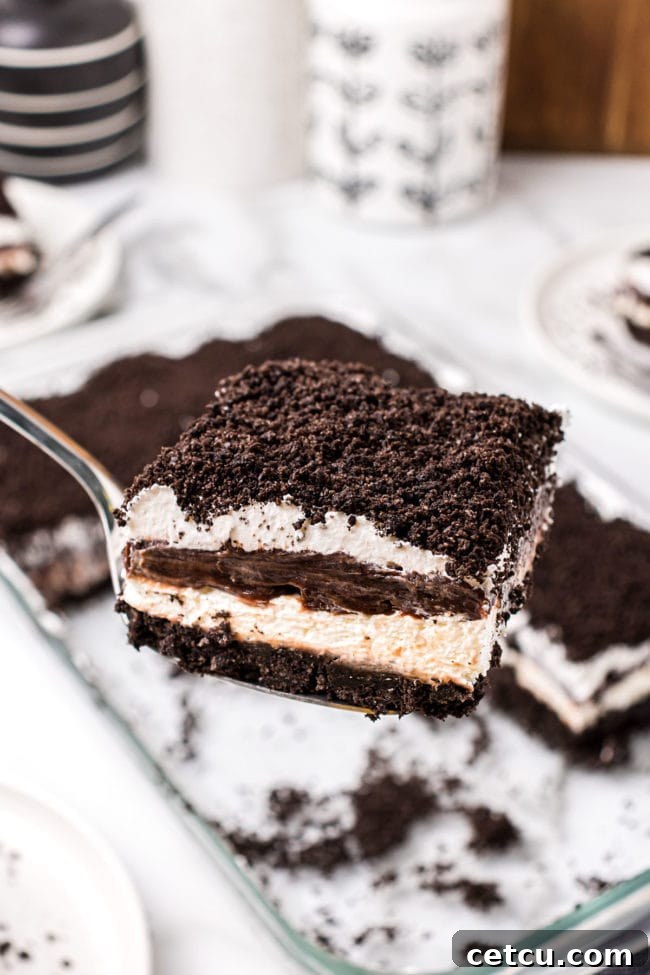
Elevate your dessert game with this irresistible No-Bake Oreo Delight, often celebrated as a heavenly chocolate lasagna. This show-stopping dessert is a symphony of textures and flavors, featuring decadent layers of crunchy Oreo cookie crust, smooth cream cheese, rich chocolate pudding, and a cloud of fluffy whipped topping. A beloved family classic, this easy-to-make treat is guaranteed to be a hit at any gathering, leaving everyone craving another slice of its creamy, chocolatey goodness.
If you’re a fan of Oreo desserts, you’re in for a treat! Explore more delightful ideas for using America’s favorite cookie: Discover luscious Oreo Banana Cream Pie Cups, try our unique Strawberry Gooey Butter Cake with an Oreo Cookie Layer, indulge in the refreshing, no-bake Oreo Mint Icebox Cake, bake up some chewy Cookies & Cream Oreo Pudding Cookies, or have fun with these adorable Mummy Oreo Truffles. There’s an Oreo recipe for every craving and occasion!
Why You’ll Adore This No-Bake Oreo Delight
This classic, retro-inspired no-bake dessert recipe, famously known as Chocolate Lasagna, captures the hearts of all ages. Prepare to indulge in your new favorite no-bake creation that’s as easy to make as it is delightful to eat.
- Irresistible Texture Contrast: The foundation of this dessert is a robust, crushed Oreo cookie crust. It provides a satisfying crunch that beautifully contrasts with the soft, creamy layers above, creating a truly dynamic eating experience with every bite.
- Effortless Preparation: Say goodbye to baking! This simple and easy no-bake Oreo dessert requires only seven core ingredients and approximately 15 minutes of active prep time. It’s perfect for busy schedules or when you want a show-stopping dessert without the fuss.
- Endless Customization Options: Unleash your creativity! This recipe is incredibly versatile. You can experiment with different flavors of instant pudding mix (think vanilla, butterscotch, or even mint), various toppings (chocolate shavings, sprinkles, fresh berries), or explore a wide array of specialty Oreo cookie flavors for a unique twist.
- Ideal for Make-Ahead Planning: Planning a party or potluck? This Oreo Delight is your perfect solution. Designed to be made ahead of time and chilled, it allows the flavors to meld beautifully and the layers to set perfectly, freeing you up to enjoy your event without last-minute dessert stress.
- A Feast for the Eyes and Palate: Beyond its mouthwatering taste, this dessert is visually stunning. Its perfectly defined layers make it an impressive centerpiece. Serving up to 24 people, it’s an excellent choice for large gatherings, ensuring there’s enough to share and delight everyone.
- Perfect for Any Occasion: From casual family dinners to holiday celebrations, summer BBQs, or festive potlucks, this chocolate lasagna is always a welcome addition. Its universal appeal makes it a go-to dessert for any event.
- No Oven Required: Especially during warmer months, the thought of turning on the oven can be daunting. This no-bake recipe keeps your kitchen cool and your dessert cravings satisfied without heating up your home.
Essential Ingredients for Your Oreo Delight
For precise measurements and detailed instructions, please consult the complete printable recipe card located at the conclusion of this article.
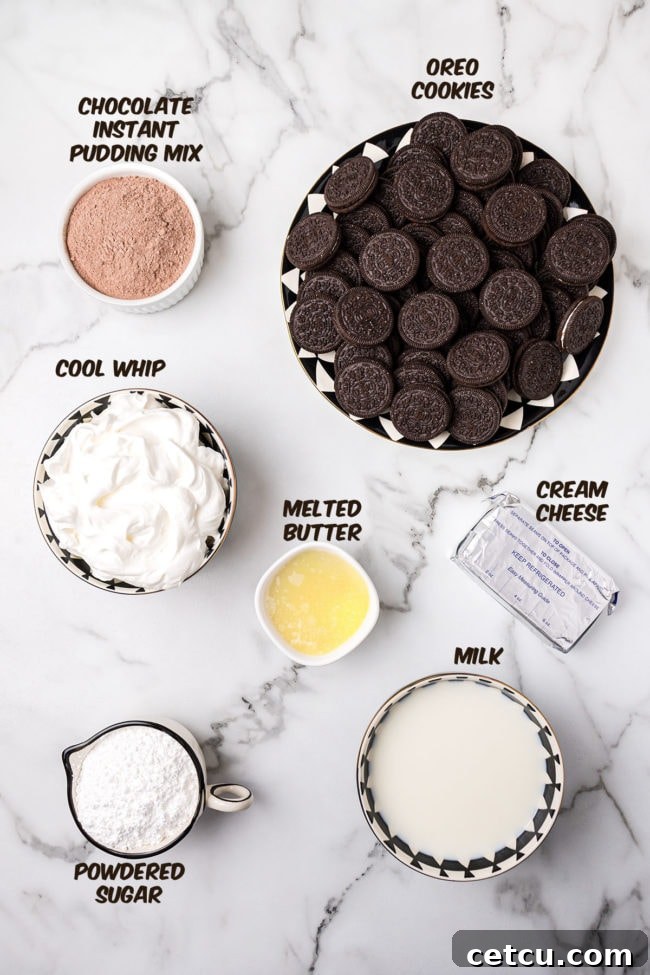
- Oreo Cookies: The star of our show! A family-sized package, typically containing around 50 cookies, is essential. These iconic chocolate sandwich cookies are transformed into the satisfyingly crunchy, rich chocolatey crust and the decorative topping that gives this dessert its signature appeal. Don’t discard the cream filling; it adds to the flavor and binding of the crust.
- Unsalted Butter, Melted: The melted butter acts as the binding agent for our Oreo crust, ensuring it holds together beautifully when pressed into the dish and preventing it from crumbling upon serving. Using unsalted butter allows you to control the overall saltiness of the dessert.
- Cream Cheese, Softened: This forms the luxurious, cheesecake-style middle layer, providing a delightful tang and creamy texture that balances the sweetness of the other components. Ensuring it’s softened to room temperature is crucial for achieving a smooth, lump-free mixture.
- Powdered Sugar (Confectioners’ Sugar): Added to the cream cheese layer, powdered sugar not only sweetens it but also contributes to its silky-smooth texture, dissolving easily without creating a gritty mouthfeel.
- Cool Whip, Thawed: This frozen, stabilized whipped cream substitute is a key component, offering a light, fluffy texture and a rich, creamy vanilla flavor to both the cheesecake layer and the generous topping. Thawing it in the refrigerator ensures it’s easy to fold and spread. For a homemade alternative, see our substitutions section.
- Instant Chocolate Pudding Mix: We use instant pudding for its convenience and ability to set quickly, creating a thick, creamy, and intensely chocolatey layer that is central to the “chocolate lasagna” experience. Choose your favorite brand for optimal flavor.
- Milk (we use 2%): Essential for preparing the instant chocolate pudding layer. While 2% milk works wonderfully, for an even more decadent and richer flavor profile, consider using whole milk or half-and-half. The higher fat content will yield a creamier, more luxurious pudding.
*Did You Know? Interestingly, Oreo cookies weren’t the original chocolate sandwich cookie. They were actually a “knock-off” of the Hydrox Cookie! Oreo Cookies first appeared on the market in 1912, a full four years after Hydrox Cookies made their debut. Despite being second to market, Oreos quickly rose to become the world’s best-selling cookie!
This post may contain affiliate links. Please read my disclosure policy here for more information.
Crafting Your No-Bake Oreo Delight with Instant Pudding
This decadently creamy, make-ahead chocolate lush dessert is perfect for satisfying a crowd at large gatherings! To create this masterpiece, you’ll need a 9×13-inch baking dish, a food processor (or a rolling pin and a sturdy plastic bag), an electric mixer for ultimate creaminess, a set of mixing bowls, and a whisk. Let’s dive into the simple steps to create this unforgettable treat!
For optimal results and specific ingredient quantities, always refer to the full recipe card available at the very end of this page.
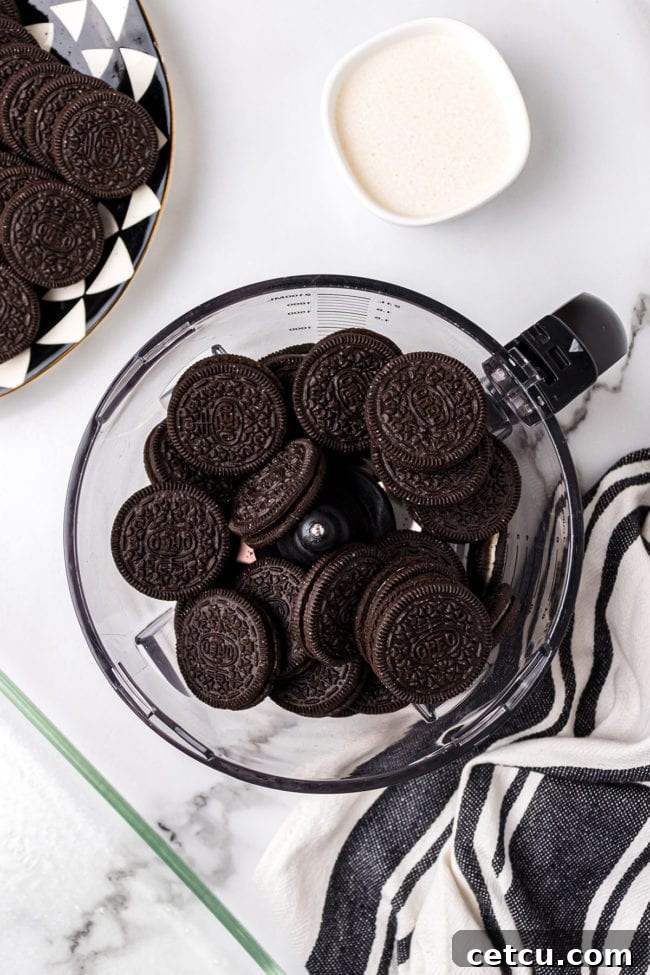
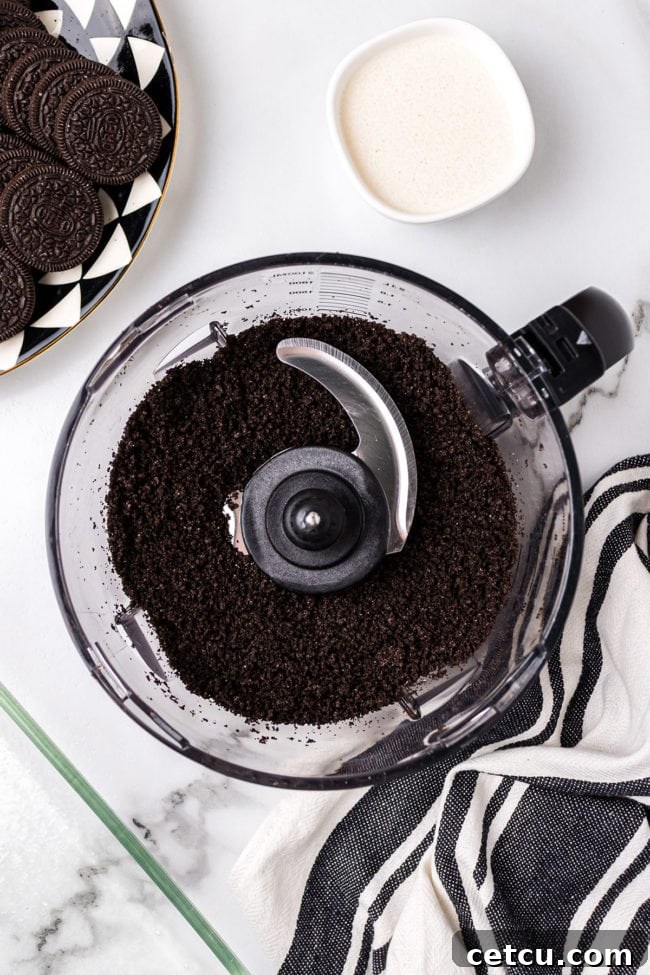
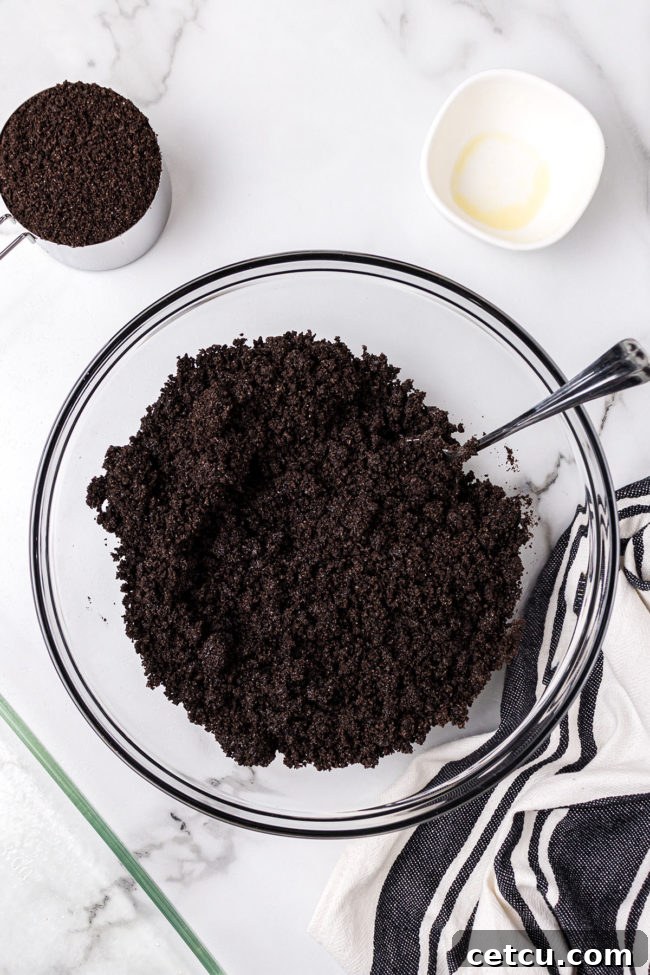
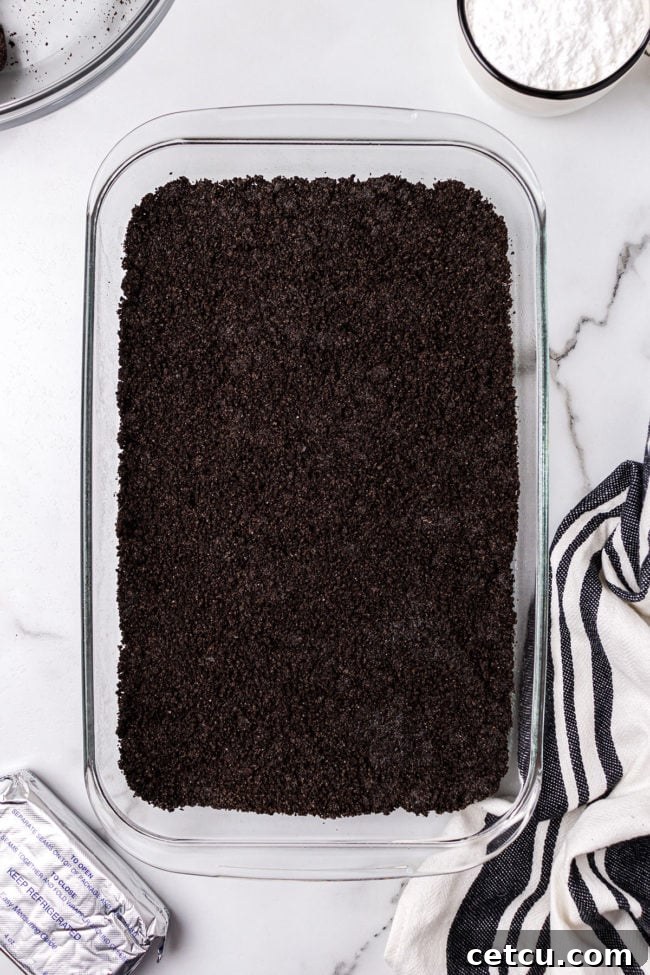
- Prepare the Oreo Cookie Crust: Begin by lightly greasing your 9×13-inch baking dish with cooking spray. Crush the entire package of Oreo cookies, including their creamy filling, into fine crumbs using a food processor. If you don’t have a food processor, place the cookies in a heavy-duty zip-top bag and crush them with a rolling pin until uniformly fine. Reserve about one cup of these crushed Oreos for the topping later. In a bowl, combine the remaining Oreo crumbs with the melted butter until well mixed. Press this mixture firmly and evenly into the bottom of the prepared baking dish. Place the dish in the freezer while you move on to the next step, allowing the crust to firm up.
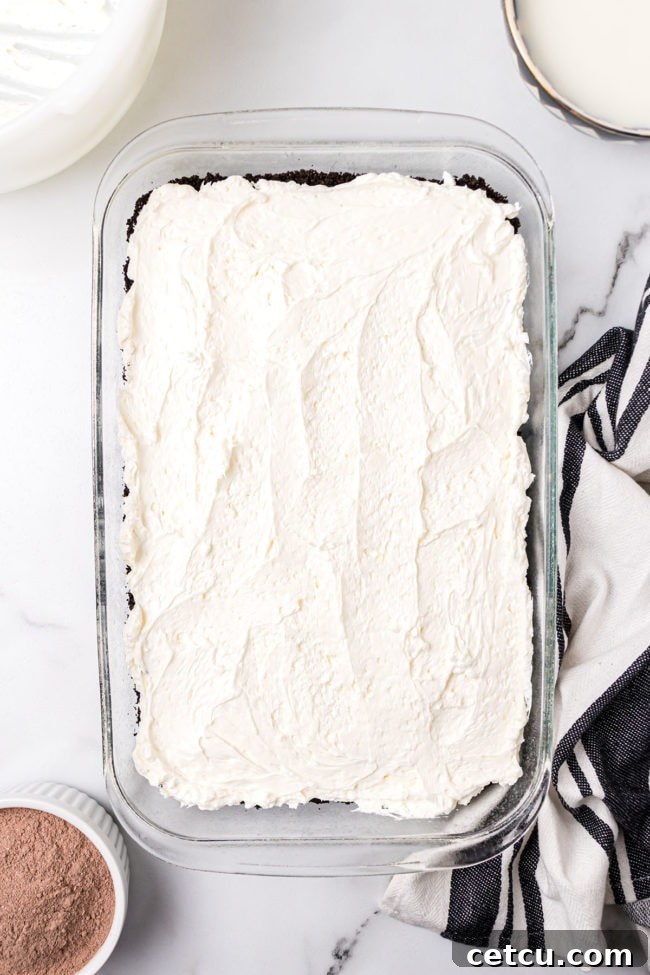
- Create the Cream Cheese Layer: In a large mixing bowl, use an electric mixer to beat the softened cream cheese and powdered sugar together until the mixture is completely smooth, light, and airy, with no lumps remaining. Gently fold in one thawed tub of Cool Whip until just combined – be careful not to overmix. Carefully dollop spoonfuls of this creamy mixture over the chilled Oreo crust, then gently spread it evenly across the entire surface using an offset spatula or the back of a lightly sprayed spoon. Return the dish to the refrigerator to chill while you prepare the pudding layer.
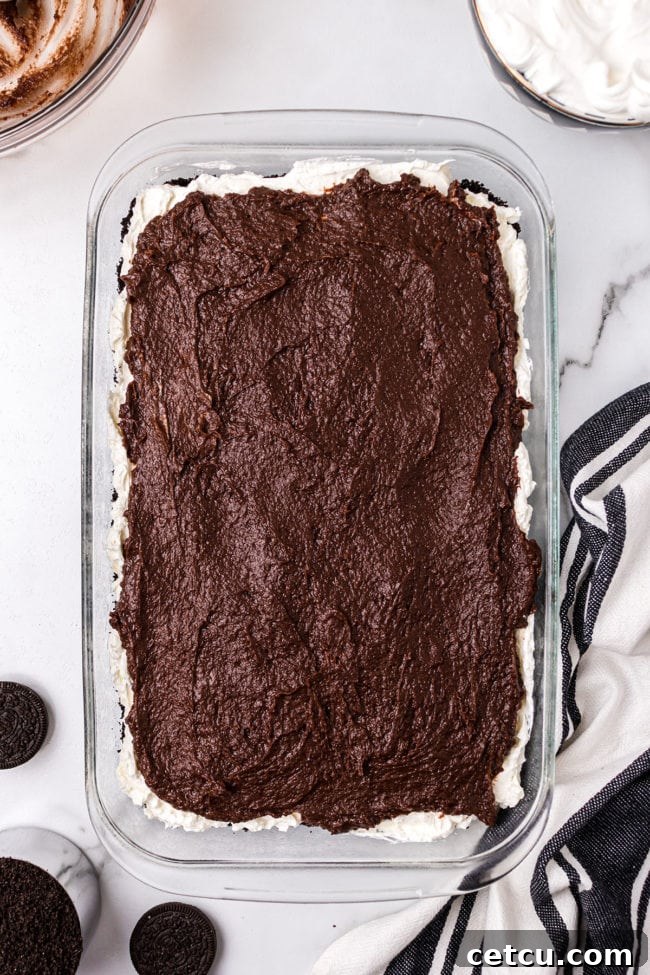
- Whip Up the Instant Pudding Layer: In another large, chilled mixing bowl, whisk together the instant chocolate pudding mixes and cold milk. Continue whisking vigorously for about 2-3 minutes until the mixture thickens considerably. It should be firm enough to hold its shape. Allow it to rest for a few minutes to thicken further. Once thick, carefully spread this rich chocolate pudding layer evenly over the cream cheese layer in your baking dish.
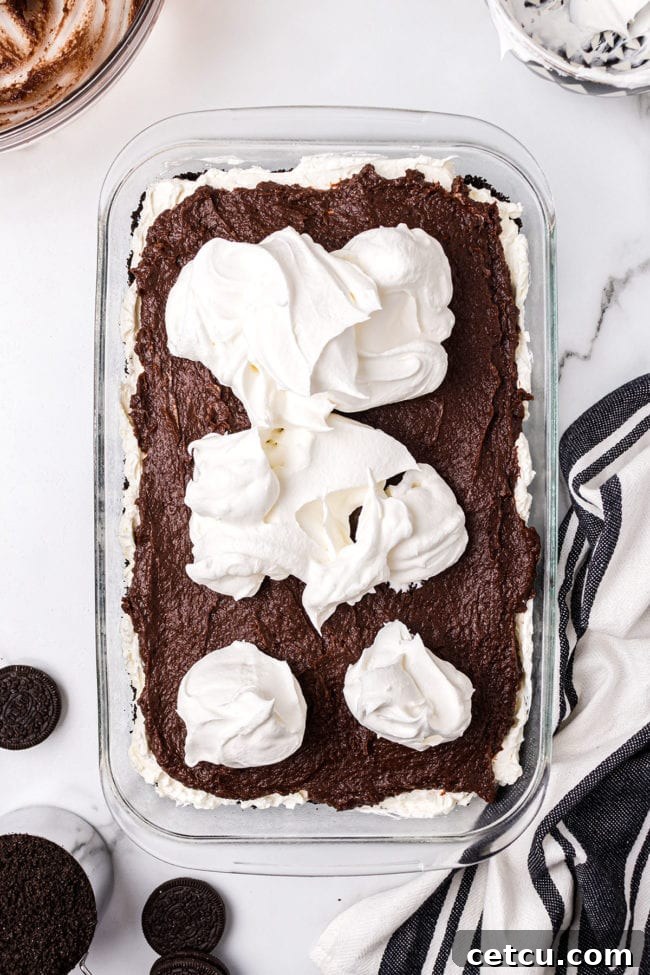
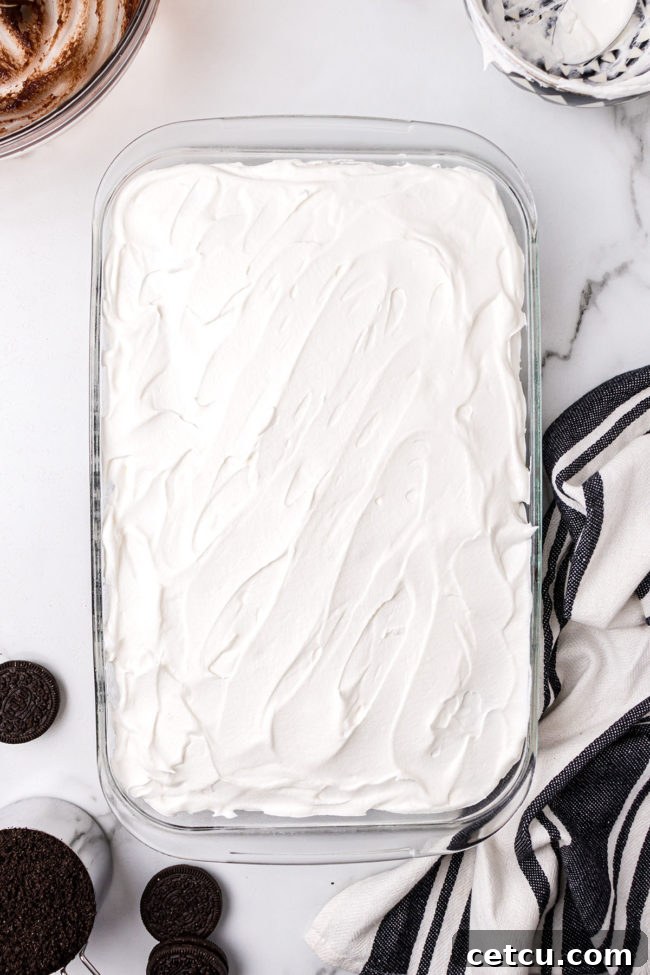
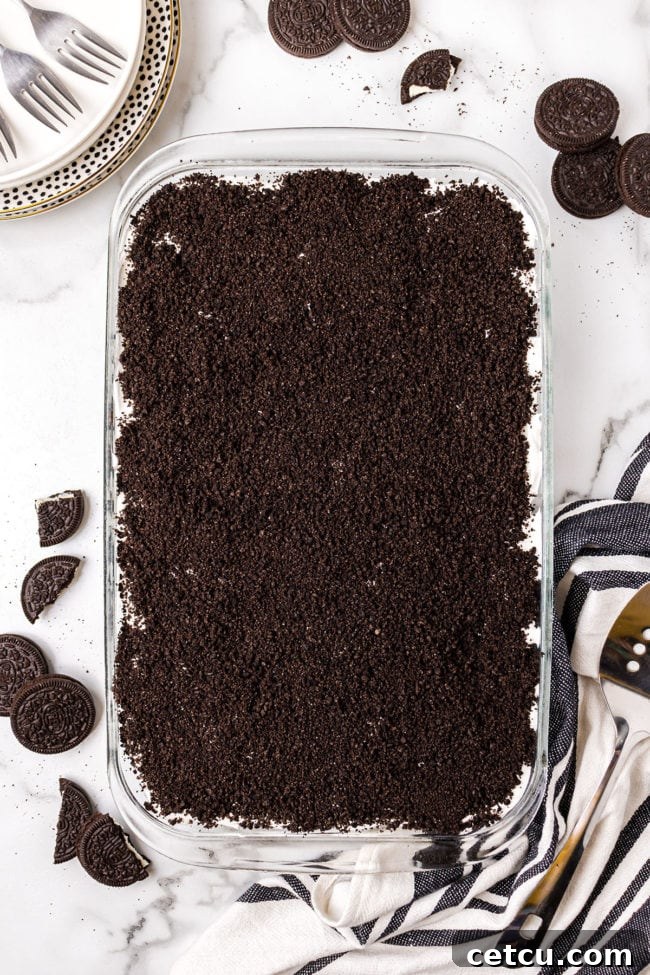
- Final Touches and Chilling: Carefully spread the remaining thawed tub of Cool Whip over the chocolate pudding layer, creating a fluffy, cloud-like topping. Sprinkle the reserved cup of crushed Oreo crumbs evenly over the Cool Whip for both decoration and an extra textural element. Cover the dish tightly with plastic wrap and refrigerate for a minimum of 6 hours, or ideally, overnight. This crucial chilling time allows all the layers to set firmly and the flavors to fully meld, creating that magical, melt-in-your-mouth experience.
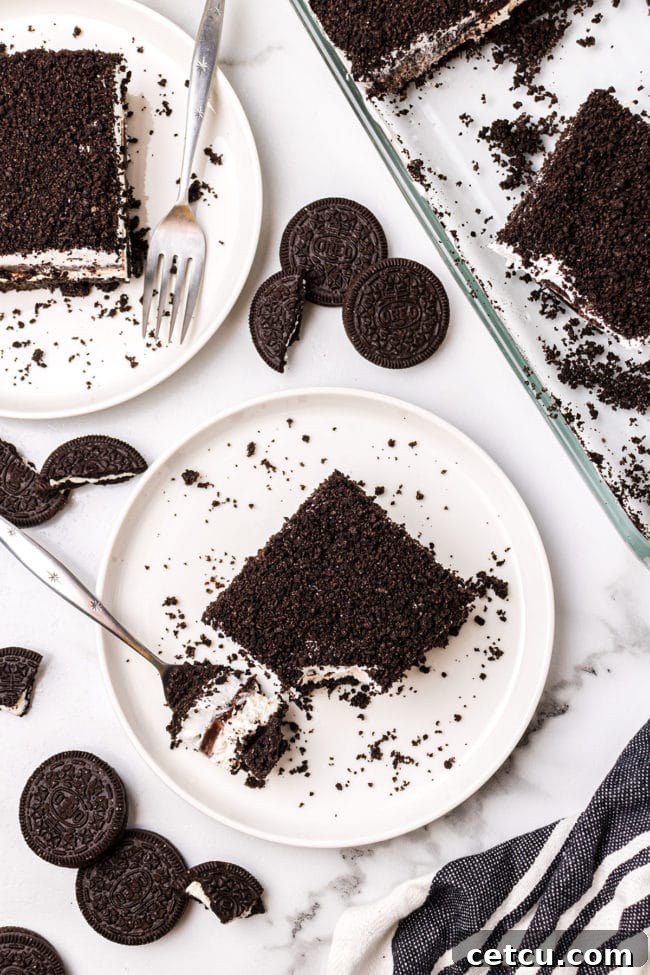
- Cut, Serve, and Savor: Once thoroughly chilled, remove the dessert from the refrigerator. Use a sharp knife to cut it into squares, ensuring clean cuts by wiping the knife between slices if necessary. Serve immediately and enjoy the delightful layers of your homemade No-Bake Oreo Delight!
Expert Recipe Notes and Tips for Perfection
Achieving the perfect no-bake Chocolate Lasagna is all about attention to detail. This dessert truly shines when made a day ahead, allowing the harmonious blend of delightful layers ample time to transform into a truly magical experience for your tastebuds!
- Utilize the Whole Oreo: When crushing your Oreo cookies for both the crust and the decorative topping, make sure to use the entire cookie, including the creamy white filling. This ensures a richer flavor and helps the crust bind together more effectively.
- Avoid Double-Stuff Oreos: While tempting, “Double-Stuff” Oreos are not recommended for this recipe. Their thicker, fattier filling can make them difficult to crush into fine crumbs and may result in an overly oily or gummy crust that doesn’t set properly. Stick to regular Oreos for the best results.
- Firm Crust is Key: After combining the crushed Oreos and melted butter, it’s crucial to press the mixture firmly and evenly into the bottom of your baking dish. A well-compacted crust is less likely to crumble when you cut and serve the dessert, ensuring beautifully intact slices.
- Chill Between Layers: This is a golden rule for layered no-bake desserts! Chilling each layer briefly before adding the next is essential. This step allows each component to firm up adequately, preventing them from mixing together and ensuring you achieve those beautifully defined and visually enticing layers that make this dessert so appealing.
- Room Temperature Cream Cheese: Always ensure your cream cheese is softened to room temperature before attempting to beat it. Cold cream cheese will be incredibly difficult to mix smoothly and will likely result in a lumpy texture in your cheesecake layer.
- Quick Cream Cheese Softening Hack: If you’ve forgotten to take your cream cheese out in advance, you can speed up the softening process. Cut the cold block of cream cheese into smaller chunks, spread them apart on a plate, and cover loosely with plastic wrap. Let it sit on the counter for about 15-30 minutes, or microwave for 10-15 seconds on low power.
- Effortless Cream Cheese Spreading: To prevent disrupting your perfectly set Oreo crust, spread the cream cheese mixture by dolloping small mounds evenly over the crust. Then, gently use an offset spatula or the back of a spoon (lightly sprayed with cooking spray for less sticking) to spread the mixture smoothly to the edges.
- Perfect Pudding Consistency: The instant chocolate pudding layer will be much easier to spread if it’s allowed to thicken slightly after whisking. For an extra boost in thickness, prepare it in a chilled stainless steel or glass mixing bowl using very cold milk. After whisking until it thickens, let it rest for 5-10 minutes before spreading over the cream cheese layer.
- Clean Slices: For the most pristine slices, run your knife under hot water, wipe it clean, and then make your cut. Repeat this process for each slice to prevent dragging layers and ensure a beautiful presentation.
Storage Guidelines for Your Oreo Delight
This delectable chocolate pudding dessert is at its best when prepared at least six hours, or ideally a full day, before serving. Proper storage is key to maintaining its freshness and texture. Keep the dessert tightly covered with plastic wrap or aluminum foil in the refrigerator. When stored correctly, you can enjoy this delightful treat for up to 3 days. While this dessert is best enjoyed fresh, if you have leftovers, ensure they are promptly returned to the fridge. Freezing is generally not recommended for this recipe, as the whipped topping and pudding layers can become watery and lose their ideal texture upon thawing.
Frequently Asked Questions (FAQs)
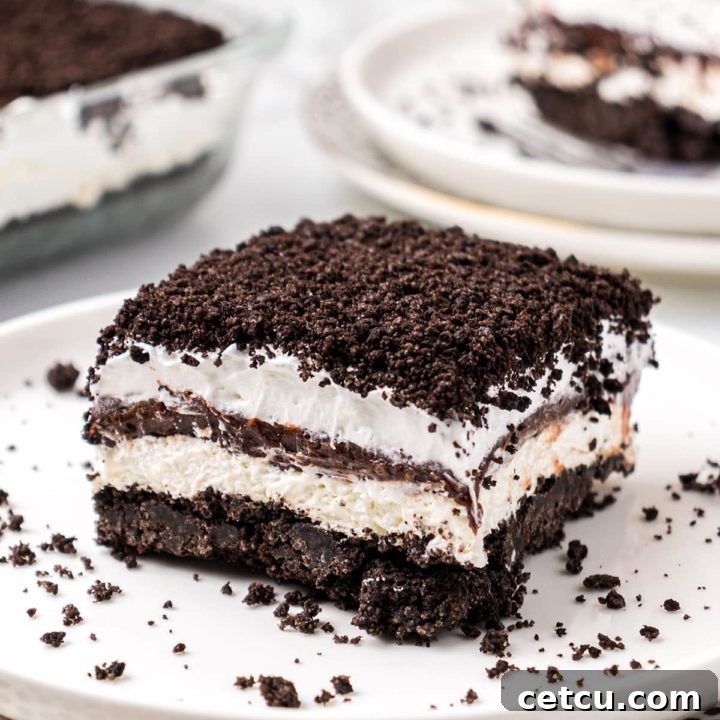
Oreo Delight is a wonderfully delicious and incredibly easy no-bake dessert, also widely recognized as chocolate lasagna. It’s a harmonious stack of layers: starting with a crunchy crushed Oreo cookie crust, followed by a creamy, cheesecake-like layer made with softened cream cheese and powdered sugar, then a rich instant chocolate pudding layer, all topped with a generous amount of fluffy whipped topping and finished with more crushed Oreos. It’s a truly decadent, creamy dessert designed to serve a crowd and leave everyone wanting more!
Absolutely! This chocolate lasagna recipe is highly adaptable for smaller batches. Simply halve all the ingredient quantities mentioned in the recipe card. Instead of a 9×13-inch baking dish, opt for an 8×8-inch or 9×9-inch square baking dish. This way, you can still relish this delightful dessert without an abundance of leftovers, making it perfect for smaller family meals or intimate gatherings.
Yes, you absolutely can – and in fact, it’s highly recommended! For the best texture and flavor, you should prepare your Oreo Delight at least 6 hours ahead of time, or even better, overnight. This extended chilling period is crucial as it allows all the distinct layers to properly set and firm up, ensuring each forkful offers the perfect blend of creamy and crunchy textures, and giving the flavors ample time to meld into a cohesive, delicious whole.
Certainly! While Oreos are classic, you can get creative with your crust. Graham crackers, Nilla wafers, chocolate chip cookies, or even gingersnaps could make excellent substitutes, depending on the flavor profile you’re aiming for. Just ensure you crush them finely and mix with melted butter as per the recipe ratio for the crust.
Instant pudding is key for its quick setting. If you only have cook-and-serve pudding, you would need to cook it according to package directions, then chill it thoroughly until it’s very thick before adding it to your dessert layers. This will add significant preparation and chilling time. Instant pudding is highly recommended for convenience.
Mastering the Art of Crushing Oreo Cookies
The perfect Oreo crust is the foundation of a phenomenal No-Bake Oreo Delight. It’s surprising how much technique goes into properly crushing these iconic cookies! While some hacks come and go, just like fashion trends, a well-prepared cookie crust ensures your dessert holds together perfectly when cut and served. Here are some invaluable tips and insights to help you achieve that ideal “Oreo dirt” crumb:
Common Crushing Methods:
- The Food Processor Method: Most modern home cooks recognize the food processor as the quickest and most efficient tool for crushing Oreo cookies into fine crumbs. It provides consistent results with minimal effort. Simply pulse until the desired consistency is reached.
- The Blender Alternative: A few generations back, before food processors became ubiquitous, savvy cooks frequently used a simple blender to achieve fine cookie crumbs. While it might require a bit more attention to avoid over-processing, it’s a perfectly viable option.
- The Old-Fashioned Way: For those without electrical appliances, or who prefer a more hands-on approach, the classic method involves a rolling pin or even a sturdy cast-iron skillet. Place cookies in a robust plastic food bag, seal it, and then roll or smash away until you have fine crumbs.
- Containing the Mess: Historically, crushing cookies by hand could be quite messy. In the modern era, using a sturdy plastic food bag (like a zip-top freezer bag) is essential to contain all those precious “Oreo dirt” crumbs and prevent a powdery kitchen disaster.
Advanced Crushing Techniques for Optimal Results:
- Preventing Gumming in Appliances: If you’re using a deep food processor or blender, the cookies can sometimes get stuck or “gummed down” under the blades due to their creamy filling. After 3-4 pulses, stop the machine, use a spatula to redistribute the cookies, and then continue pulsing. This ensures even crushing and prevents overheating.
- Crush in Batches: For superior control over the crumb consistency, especially if you desire a very fine, uniform texture, process your Oreo cookies in smaller batches. This prevents overcrowding the appliance and allows for a more consistent grind.
- Freeze Oreos Before Crushing: This is a game-changing tip! Place your Oreo cookies in the freezer for at least 30 minutes (or even longer) before crushing them in an electrical appliance. Freezing helps to solidify the fatty icing center, preventing it from gumming up the blades and making it much easier to achieve beautifully fine, separate crumbs. This is particularly useful when the kitchen is warm.
Creative Oreo Delight Recipe Substitutions & Variations
One of the joys of this No-Bake Oreo Delight recipe is its versatility. Feel free to get creative and tailor it to your personal taste or the occasion with these delightful substitutions and variations:
- Explore Oreo Flavors: The world of Oreos is vast and exciting! Beyond the classic, many seasonal and specialty Oreo flavors are available, perfect for holiday parties or themed gatherings. Since freezing Oreos aids in crushing, consider stocking up on varieties like Mint Oreos, Peanut Butter Oreos, Golden Oreos, Red Velvet Oreos, or even Lemon Oreos when they’re in season. Keeping a couple of packages in your freezer means you can whip up different flavored desserts anytime!
- Pudding Layer Adventures: While chocolate pudding is a timeless choice, don’t hesitate to experiment with different instant pudding mix flavors for the pudding layer. Vanilla, French vanilla, cheesecake, butterscotch, banana cream, or even a delightful pistachio pudding can completely transform the dessert’s profile. You could also use a combination of two flavors for a marble effect or distinct layers.
- Homemade Whipped Topping: If Cool Whip isn’t available or you prefer a homemade touch, making your own stabilized whipped cream topping is simple and delicious. To create a stable topping that holds up well, beat 2 cups of heavy whipping cream with 1 tablespoon of cornstarch (this helps stabilize it) and ½ cup of powdered sugar using an electric mixer until stiff peaks form and the mixture is light and fluffy. This will yield enough for both the cream cheese layer and the topping.
- Garnish Galore: The finishing touches can elevate your Oreo Delight even further. Garnish your chocolate lush dessert with whole, halved, or quartered Oreos for a dramatic look. Other fantastic options include chocolate chips (mini or regular), colorful sprinkles, a drizzle of rich chocolate syrup or caramel sauce, fresh berries (strawberries, raspberries), or a few bright maraschino cherries for a pop of color.
- Add a Fruity Twist: For a refreshing addition, layer thinly sliced bananas or strawberries over the cream cheese or pudding layer. Ensure they are well-drained to prevent excess moisture.
- Nutty Crunch: Sprinkle a layer of finely chopped toasted pecans or walnuts over the crust or as a topping for an added depth of flavor and texture.
- Espresso Kick: For coffee lovers, a teaspoon of instant espresso powder can be whisked into the chocolate pudding mix to deepen its flavor and add a subtle coffee note.
Loved This Recipe?
We’d be thrilled to hear your thoughts! Share your experience by leaving a review below and let us know how much you enjoyed making and tasting this delightful recipe!
No-Bake Oreo Delight Recipe
24 servings
15 minutes
6 hours
6 hours 15 minutes
Elevate your dessert game with this irresistible Oreo Delight. This no-bake chocolate lasagna is a showstopper, featuring layers of creamy chocolate pudding, crushed Oreo cookies, a cheesecake-style layer, and fluffy whipped topping. A truly beloved family classic that’s always a hit and perfect for any occasion.
Ingredients
- 1 family-size (21 oz) package of Oreos (approximately 50 cookies)
- ½ cup unsalted butter, melted
- 8 ounces cream cheese, softened
- 1 cup powdered sugar
- 2 (8-ounce tubs) of Cool Whip frozen whipped topping, thawed
- 2 (3.4-ounce packages) instant chocolate pudding mix
- 1 ¾ cup cold milk (2% or whole milk for richer flavor)
Instructions
- Prepare Dish: Lightly spray the bottom of a 9×13-inch baking dish with cooking spray and set aside.
- Crush Oreos: Using a food processor, crush the entire package of Oreo cookies (including the filling) into fine crumbs. (No food processor? Place cookies in a heavy-duty zip-top bag and crush with a rolling pin.)
- Form Crust: Remove about 1 cup of the crushed Oreo crumbs and set aside for the topping. Mix the remaining cookie crumbs with the melted butter until well combined. Press this mixture firmly and evenly into the bottom of the prepared baking dish. Place the dish with the Oreo crust in the freezer to chill while you prepare the cream cheese layer.
- Make Cream Cheese Layer: In a large bowl, using an electric mixer, beat the softened cream cheese and powdered sugar until completely smooth and free of lumps. Gently fold in one container of thawed Cool Whip until just combined. Carefully spread this mixture over the chilled Oreo crust. Place the dish back in the refrigerator while you prepare the pudding layer.
- Prepare Pudding Layer: In a large, chilled bowl, whisk together the two instant chocolate pudding mixes and the cold milk for 2-3 minutes, or until the mixture becomes thick. Allow it to rest for a few minutes to thicken further.
- Spread Pudding: Carefully spread the thickened chocolate pudding evenly over the cream cheese layer.
- Top and Chill: Spread the remaining tub of thawed Cool Whip over the chocolate pudding layer using a spatula. Then, sprinkle the reserved Oreo crumbs evenly over the Cool Whip topping. Cover the dish tightly with plastic wrap and chill in the refrigerator for at least 6 hours, or preferably overnight, to allow all layers to set completely and flavors to meld.
- Serve: Once thoroughly chilled, cut into squares, serve, and enjoy your delicious No-Bake Oreo Delight!
Notes
- Do not use Double-Stuff Oreos, as their excess filling can make the crust too oily and hard to set properly.
- Do not skip chilling each layer! This is crucial for ensuring beautifully defined layers and a firm dessert that holds its shape.
- To easily spread the cream cheese mixture without disturbing the crust, dollop it in small mounds over the crust before gently spreading it out.
- If you cannot find Cool Whip or prefer a homemade option, you can make your own stabilized whipped topping: Beat 2 cups heavy whipping cream, 1 tablespoon cornstarch, and ½ cup powdered sugar with an electric mixer until stiff and fluffy peaks form.
- This dessert is truly best when made a day ahead, allowing all the flavors to fully develop and the layers to set perfectly.
Nutrition Information (Estimated):
Yield: 24 servings
Serving Size: 1 slice
Amount Per Serving:
Calories: 234
Total Fat: 13g
Saturated Fat: 6g
Trans Fat: 0g
Unsaturated Fat: 6g
Cholesterol: 21mg
Sodium: 243mg
Carbohydrates: 28g
Fiber: 1g
Sugar: 19g
Protein: 3g
Nutrition information is estimated based on the ingredients and cooking instructions as described in each recipe and is intended for informational purposes only. Please note that nutrition details may vary based on methods of preparation, origin, and freshness of ingredients used, and are just estimates. We encourage, especially if these numbers are important to you, to calculate these on your own for most accurate results.
Did you make this recipe?
Please leave a comment on the blog or share a photo on Instagram using #OreoDelight!