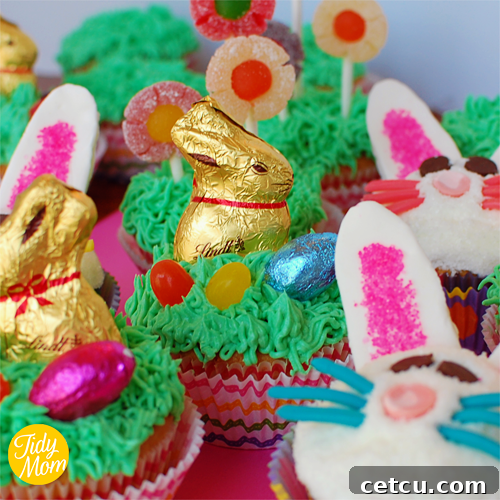
Delightful Easter & Spring Cupcakes: Easy Decorating Ideas for Your Holiday Table
As Easter approaches, bringing with it the vibrant energy of spring, our thoughts naturally turn to celebratory treats! This time of year is undeniably one of the most enchanting for baking, rivaling even the festive season of Christmas. The gentle warmth, blooming flowers, and playful symbols of spring lend themselves beautifully to creating adorable and delicious desserts without the intense pressure that often accompanies bigger holidays.
Cupcakes, in particular, offer a canvas for creativity, allowing us to craft individual portions of joy perfect for family gatherings, school parties, or simply a sweet moment at home. Whether you’re a seasoned baker or just starting, these delightful Easter and Spring cupcake ideas are designed to be fun, achievable, and utterly charming. We’ll guide you through making everything from fluffy, moist cupcakes from a simple box mix to whipping up luscious buttercream, and then decorating them into whimsical bunnies, colorful spring flower gardens, and adorable Easter baskets.
Get ready to infuse your kitchen with the sweet aroma of baking and your table with the irresistible charm of homemade treats. Let’s dive into these delightful decorating adventures!
Table of Contents
Easter Cupcakes: An Overview
Easter is the perfect occasion to unleash your inner baker and create treats that are as visually appealing as they are delicious. Our journey begins with the foundation: a perfectly baked cupcake. While many assume homemade from scratch is the only way, a high-quality cake mix can be transformed into incredibly moist and flavorful cupcakes with a few simple tweaks. We recommend a method that enhances the texture and taste of a standard mix, making it indistinguishable from a scratch-made version. Once your cupcakes are baked and cooled, the real fun begins with the frosting! A rich, creamy buttercream provides the ideal base for all our creative designs. Its smooth texture and ability to hold shape make it an essential component for any cupcake decorator.
Preparing your base cupcakes is quick and easy. Simply follow your preferred cupcake recipe – whether it’s a trusty box mix enhanced for extra moisture and flavor, or your favorite homemade vanilla or chocolate recipe. Once baked and completely cooled, they are ready for their festive makeovers. The key to successful decorating is patience and letting your cupcakes cool completely before applying any frosting or decorations, ensuring your beautiful designs stay intact.
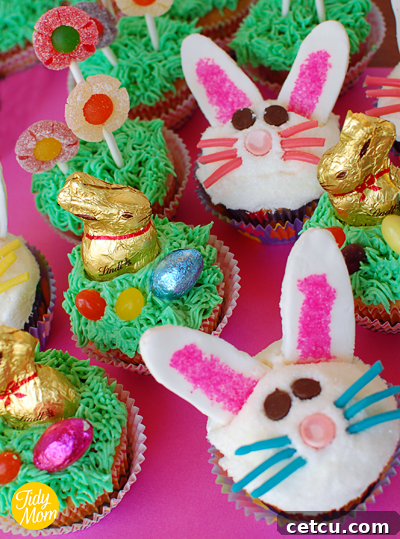
This vibrant display showcases the variety of springtime cupcake decorations possible. From whimsical bunnies to delicate flowers, each cupcake tells a story of renewal and joy, making them the perfect centerpiece for your Easter celebration.
Adorable Easter Bunny Cupcakes
These charming Easter bunny cupcakes are guaranteed to bring smiles! They are incredibly cute and surprisingly simple to create, making them a fantastic project for bakers of all skill levels. The secret lies in a few key ingredients and a bit of playful assembly.
Supplies Needed for Bunny Cupcakes
- Buttercream Frosting: A generous layer of smooth, fluffy buttercream on top of each cupcake serves as the bunny’s soft fur. We recommend a classic vanilla buttercream that’s easy to tint if desired.
- White Sanding Sugar: For that extra touch of sparkle and a fuzzy texture, roll the frosted cupcake tops gently in white sanding sugar. This gives the bunny a glistening, snowy coat.
- Chocolate Chips: Miniature chocolate chips are perfect for creating the bunny’s expressive eyes. Place two small chips, point-down, for a sweet, curious gaze.
- Smarties Candies: These colorful, disc-shaped candies make ideal little noses. Choose pink or red for a classic bunny look, or get creative with other colors!
- Rainbow Twizzlers: Unraveling these vibrant licorice twists provides perfect, flexible whiskers. Cut them into short segments and gently insert them around the nose.
- Fondant and Pink Sprinkles (or Pink Sanding Sugar): These are essential for crafting the iconic bunny ears. Fondant offers the malleability needed for shaping, and pink sprinkles or sanding sugar add the delicate pink inner ear. (See detailed instructions below for crafting the ears.)
- Optional: Tinted Buttercream for Mouth: For an added touch, you could tint a small amount of buttercream pink and pipe on a tiny, happy mouth for your bunnies using a small round piping tip.
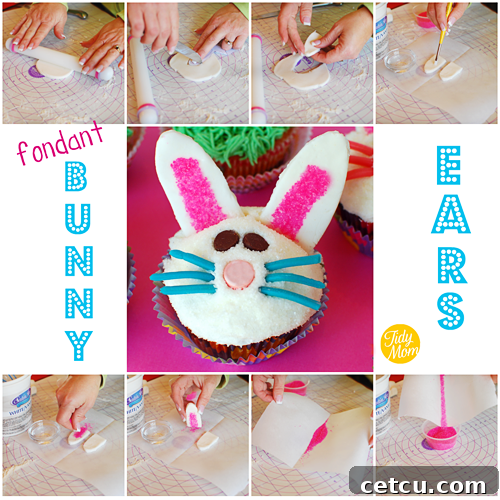
Step-by-Step Bunny Ear Fondant Guide
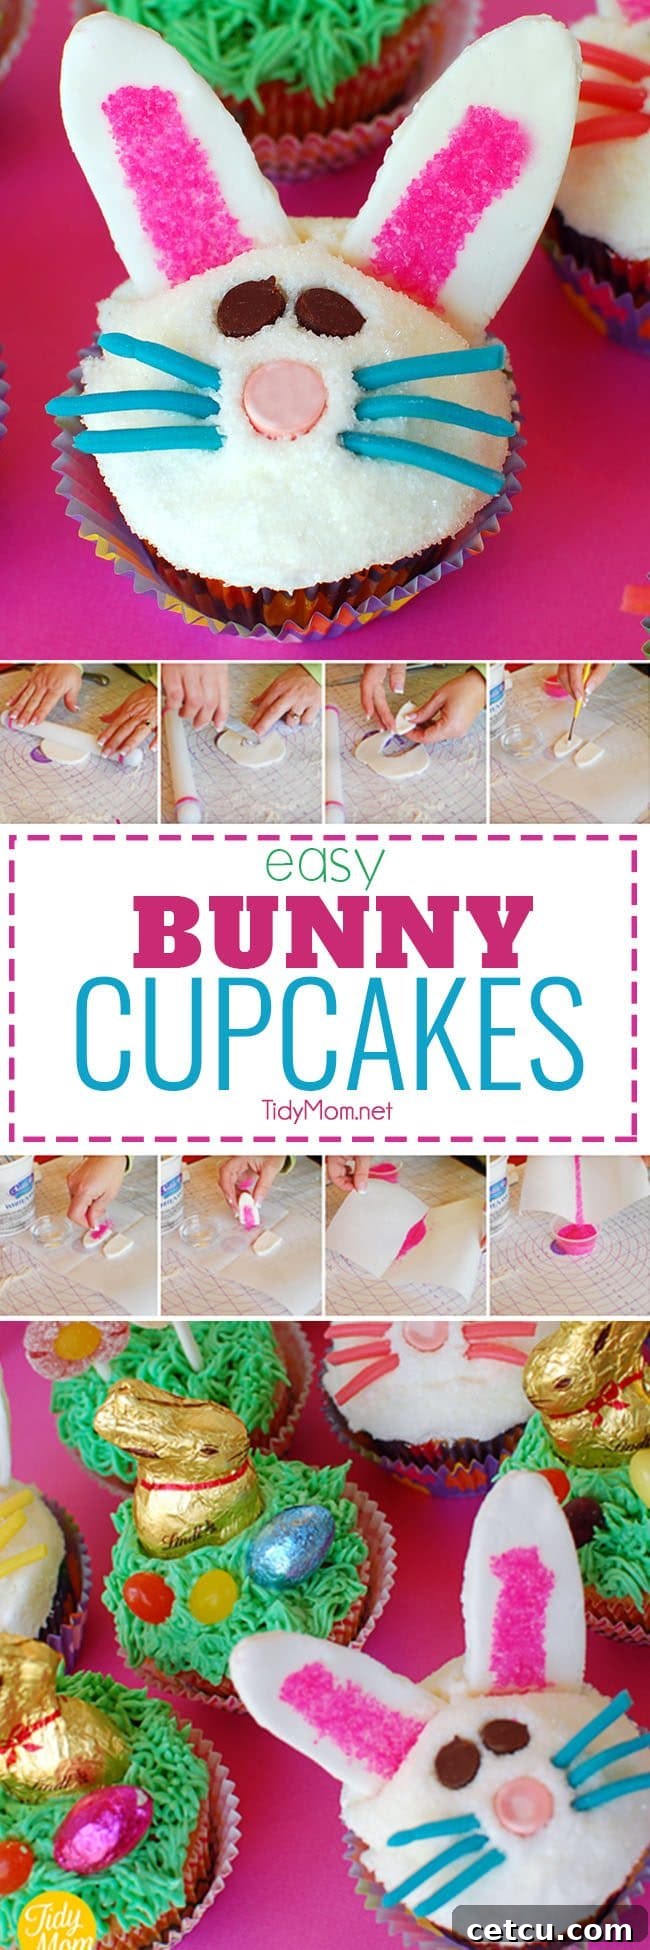
Creating these adorable fondant bunny ears is simpler than you might think. Follow these steps for perfectly shaped and decorated ears that will make your cupcakes truly special:
- Roll out Fondant: On a clean, lightly dusted surface or a silicone baking mat (which is excellent for preventing sticking), roll your white fondant to about 1/4-inch thick. This thickness provides enough stability for the ears to stand upright.
- Cut out Bunny Ears: If you don’t have a specific bunny ear cookie cutter, don’t worry! You can easily make a template. Print out some printable bunny ears, cut them out, and use them as a guide to trace and cut your ears from the fondant. Place the fondant ears on a piece of parchment or wax paper that has been creased slightly down the middle. This slight crease will help give the ears a gentle curve as they dry, making them look more realistic.
- Smooth the Edges: Gently smooth out any rough edges on your fondant ears using your fingertips. This gives them a polished, professional look.
- Add Pink Centers: Using a clean, small brush (dedicated only for food use), lightly brush a thin layer of water onto the fondant ear in the area where you want the pink inner ear to be. This acts as a ‘glue’ for your sprinkles.
- Apply Pink Sprinkles: Generously sprinkle the moistened area with pink sanding sugar or fine pink sprinkles.
- Remove Excess Sugar: Carefully pick up the ear and gently tap it to shake off any excess sanding sugar. Set the decorated ears aside to dry.
- Recycle Excess Sugar: After you’ve decorated all your ears, gather the parchment or wax paper and gently fold it to create a funnel. Pour any unused sanding sugar back into its container – no waste!
- Allow Fondant to Dry: Let the fondant ears dry and harden for approximately 30 minutes to an hour. This will ensure they maintain their shape when placed on the cupcakes.
- Assemble on Cupcakes: Once dry, gently insert the bottom of each ear into the frosted cupcake. For extra support, especially if your fondant isn’t completely firm or the ears are large, you can place a half or whole toothpick directly behind each ear, pushing it gently into the cupcake frosting to provide a hidden brace.
Once the ears are in place, add the chocolate chip eyes, Smarties nose, and Twizzler whiskers to complete your adorable bunny faces. These cupcakes are sure to be the star of your Easter dessert spread!
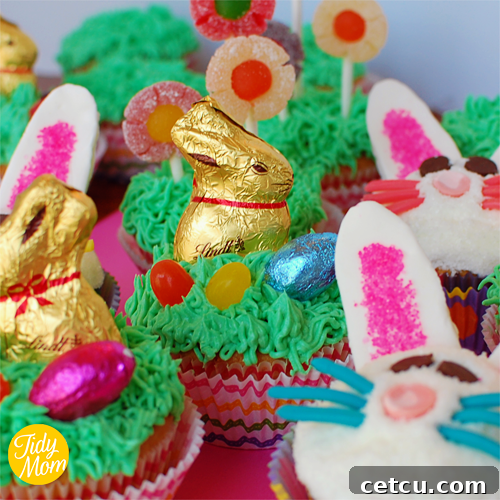
Easter is a holiday brimming with playful traditions – from coloring eggs and indulging in chocolate bunnies to enjoying jelly beans and marshmallow Peeps, all while gathering with loved ones. Why not combine these festive elements and top your cupcakes with some beloved Easter candies? It’s a simple yet effective way to add holiday cheer!
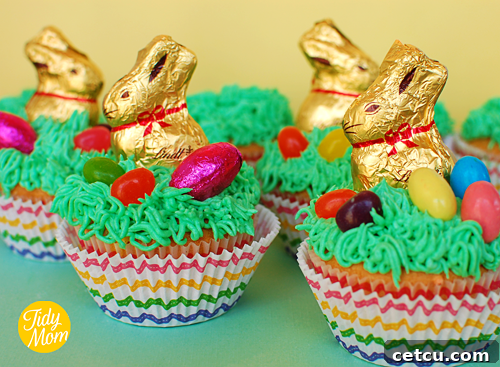
Crafting Charming Easter Basket Cupcakes
Transform your cupcakes into miniature Easter baskets overflowing with treats! This design is not only visually delightful but also incredibly fun to make. It’s perfect for capturing the spirit of an Easter egg hunt right on your dessert table.
Easter Basket Cupcake Essentials
- Baked Cupcakes: Any flavor will do, but a classic vanilla or chocolate base allows the decorations to truly shine.
- Buttercream Frosting: You’ll want a generous batch of your favorite buttercream, tinted a vibrant CK Leaf Green. This will form the lush “grass” inside your baskets.
- Spring Cupcake Liners: Choose colorful liners with spring patterns (florals, pastels, polka dots) to enhance the festive basket feel. Spring-themed liners add an extra touch of charm.
- Wilton #233 Decorating Tip: This multi-opening tip is your secret weapon for creating realistic grass-like frosting. It pipes numerous thin strands simultaneously, perfect for a grassy effect.
- 16″ Disposable Icing Bag: A large, sturdy disposable piping bag makes it easy to handle your frosting and provides good control.
- Small Chocolate Easter Bunnies: Tiny chocolate bunnies are adorable additions, peeking out from the grass.
- Assorted Candies: A mix of miniature jelly beans, malted milk eggs, or other small colorful Easter candies to fill your baskets.
Decorating Your Easter Basket Cupcakes
Once your cupcakes are baked and cooled, and your green buttercream is ready, you can begin assembling your edible Easter baskets. These simple steps will guide you to create a festive treat:
- Prepare the Frosting: Fill your 16″ disposable icing bag with the green buttercream, fitted with the Wilton #233 grass tip.
- Pipe the Grass: Hold the piping bag perpendicular to the cupcake, just above the surface. Squeeze gently and lift the bag straight up as the “grass” strands emerge. Release pressure as you pull away to create a natural, cut-grass look. Cover the entire surface of the cupcake with this grassy texture. You can create a little mound in the center to give the candies a nice base.
- Arrange the Bunny: Carefully place a small chocolate Easter bunny onto the “grass,” perhaps leaning against the side or peeking up from the center.
- Fill with Candies: Scatter an assortment of colorful jelly beans and malted eggs (or your chosen Easter candies) around the bunny and over the grass. Arrange them to look like mini Easter eggs hidden in a basket.
- Optional Basket Handle: For an authentic basket look, you can add a handle. This can be made from a thin strip of licorice, a pretzel stick, or a strip of fondant allowed to harden slightly. Gently insert the ends into the frosted sides of the cupcake.
These Easter basket cupcakes are incredibly charming and invite guests to pick their favorite ‘basket’ of goodies. They are a delightful activity for kids and adults alike, perfect for adding a touch of playful elegance to your holiday table.
Vibrant Spring Flower Cupcakes
Bring the beauty of a blooming spring garden to your dessert table with these wonderfully simple and colorful flower cupcakes. Using a clever candy hack, you can create delightful floral designs that are both edible and eye-catching.
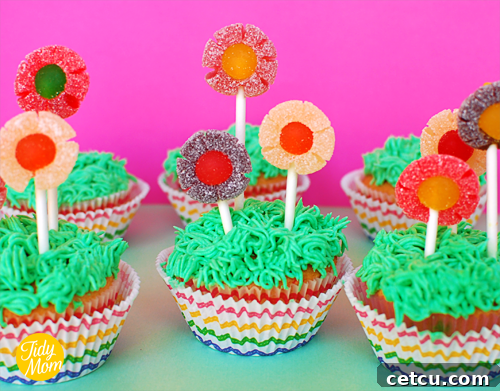
Materials for Flower Cupcakes
- Baked Cupcakes: Prepare your favorite flavor of cupcakes as the base for these floral delights.
- Buttercream Frosting: A batch of creamy buttercream tinted with CK Leaf Green will create the perfect grassy backdrop for your flowers.
- Spring Cupcake Liners: Choose bright and cheerful spring-themed cupcake liners to complement your floral designs. Patterned liners add an extra layer of visual interest.
- Wilton #233 Decorating Tip: This tip is essential for piping the realistic grass-like frosting that your candy flowers will sit upon.
- 16″ Disposable Icing Bag: A large, sturdy piping bag provides ease of use for frosting multiple cupcakes.
- Sucker Sticks (or Lollipop Sticks): These sturdy sticks will serve as the stems for your candy flowers, allowing them to stand tall on the cupcakes.
- Gummy LifeSavers: These colorful, chewy ring candies form the petals of your flowers.
- Dots Candies: These soft, round candies will be the perfect center for your gummy flowers.
- Small Scissors: A clean pair of small, sharp scissors (dedicated for food use) will be needed for snipping the gummy LifeSavers.
Flower Cupcake Assembly Instructions
Creating these vibrant flower cupcakes is a fun and straightforward process. Here’s how to bring your garden to life:
- Prepare Cupcakes and Frosting: Ensure your cupcakes are completely cooled. Frost each cupcake with the green buttercream using the Wilton #233 grass tip, creating a lovely grassy base as described for the Easter Basket Cupcakes.
- Craft the Flowers:
- Take a gummy LifeSaver candy. Using your small, clean scissors, carefully snip the outer edge of the LifeSaver multiple times around the ring. Make these snips about halfway into the ring to create distinct ‘petals’ that will give your flower a ruffled, realistic appearance.
- Gently press a Dot candy into the center hole of the snipped LifeSaver ring. The stickiness of the Dots will help it adhere.
- Carefully insert one end of a sucker stick into the back of the Dot candy, ensuring it goes through the Dot and secures the LifeSaver. The stick will act as your flower stem.
- Arrange on Cupcakes: Once your candy flowers are assembled on their sticks, gently insert the other end of each sucker stick into the frosted cupcakes. Arrange them artfully to create a mini flower garden on each cupcake. You can group several flowers together or space them out for different effects.
These Spring Flower Cupcakes are wonderfully adaptable – experiment with different colored LifeSavers and Dots to create a diverse garden. They are a charming addition to any spring celebration, bringing a burst of color and sweetness to your table.
General Tips for Perfect Cupcakes & Decorating
Achieving bakery-quality cupcakes at home is easier than you think with a few essential tips:
- Start with Quality: Whether using a box mix or baking from scratch, good quality ingredients make a difference. For box mixes, consider substituting milk for water and adding an extra egg yolk for richness and moisture.
- Don’t Overmix: Overmixing cupcake batter develops gluten, leading to tough cupcakes. Mix until just combined.
- Fill Evenly: Use an ice cream scoop to fill cupcake liners evenly. This ensures consistent baking and uniform size.
- Cool Completely: This cannot be stressed enough! Frosting warm cupcakes will result in a melted, messy disaster. Allow cupcakes to cool entirely on a wire rack before decorating.
- Buttercream Consistency: Your buttercream should be smooth, fluffy, and hold its shape. If it’s too stiff, add milk or cream a teaspoon at a time. If too soft, add more powdered sugar or chill slightly.
- Piping Practice: If new to piping, practice on a piece of parchment paper. You can scrape the frosting back into the bag and reuse it.
- Food Coloring: Use gel food coloring for vibrant colors without altering the frosting consistency too much. Add a little at a time until you reach your desired shade.
- Working with Fondant: Keep your work surface lightly dusted with powdered sugar or cornstarch to prevent sticking. If fondant becomes too sticky, knead in a little more powdered sugar. If it’s too stiff, knead it gently until pliable.
- Storage: Store decorated cupcakes in an airtight container at room temperature for up to 2-3 days. If your frosting or decorations are sensitive to heat, refrigerate and bring to room temperature before serving.
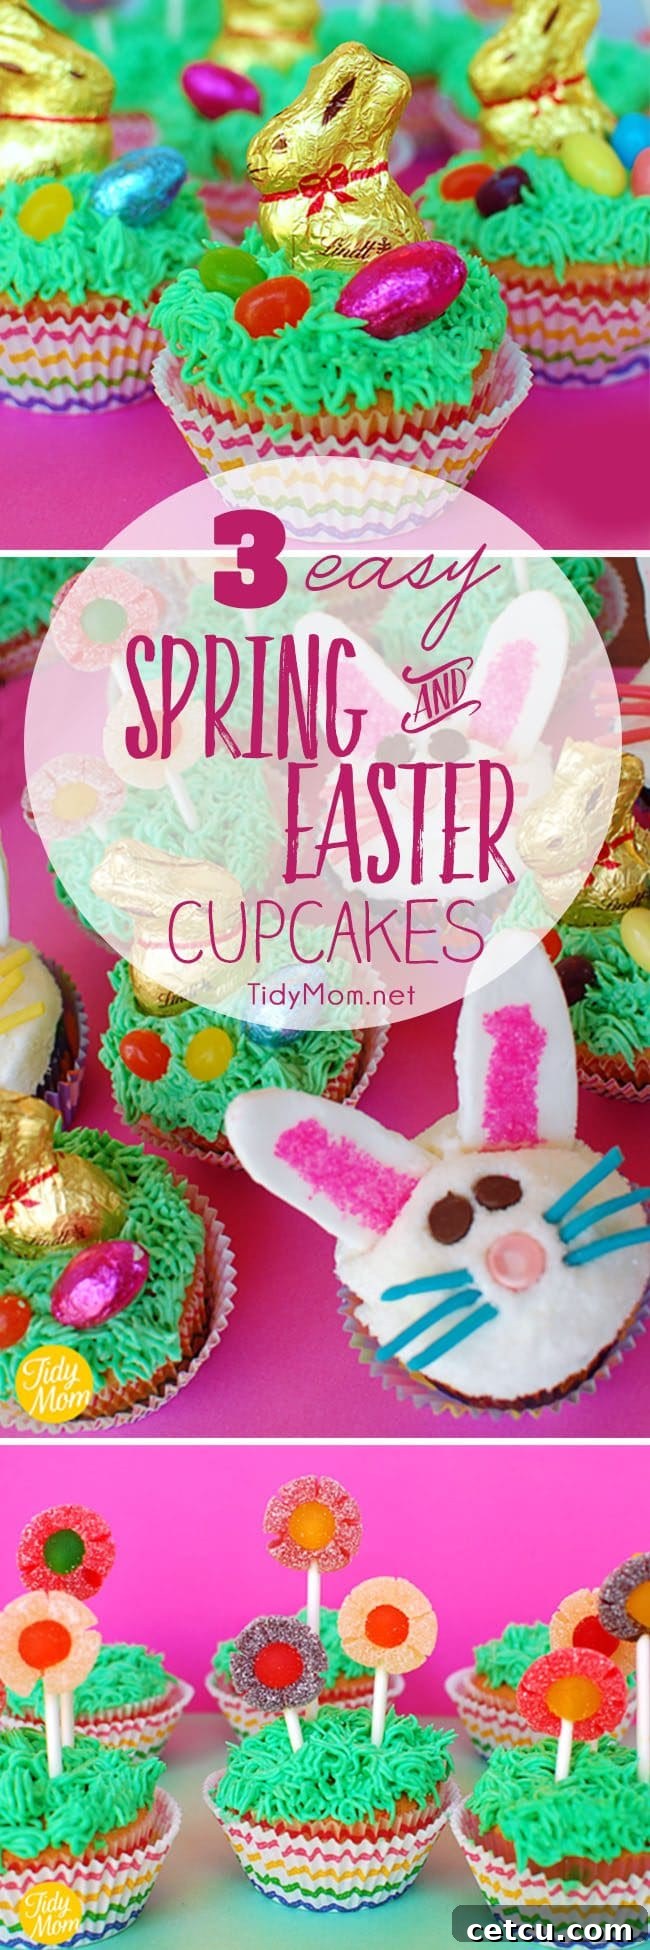
We hope these ideas inspire you to create your own masterpieces this Easter and Spring season! Baking and decorating are wonderful ways to express creativity and share joy with those you love.
Don’t hesitate to experiment with different candies, colors, and designs. The most important ingredient is always fun!
More Easter & Spring Cupcake Inspiration
Looking for even more ideas to fill your spring and Easter dessert platters? Here are a few other delightful cupcake creations you might enjoy, ranging from zesty lemon flavors to adorable nest designs:
Lemon Filled Easter Bunny Cupcakes
Raspberry Filled Vanilla Cupcakes
- Birds Nest Cupcakes with Speckled Eggs: A classic springtime design, these cupcakes mimic a cozy bird’s nest, often topped with candy eggs.
- Bunny Butt Cupcakes: Hilariously cute, these feature a fondant bunny’s bottom and tiny feet sticking out of “grass” frosting.
- Bunny Ear Cupcakes (Toppers): Focus on simple, elegant bunny ear toppers for a minimalist yet festive look.
- Peeps Cupcakes: Utilize the iconic marshmallow Peeps candies for a quick and recognizable Easter treat.
- Sweet Lion & Lamb Cupcakes: A symbolic design representing the transition from winter to spring.
Hurry and get baking… Easter is on its way!
We truly hope you have a Happy Easter filled with joy, family, and delicious treats. Feel free to share your own Easter baking adventures in the comments below, or upload a picture to the TidyMom Facebook Page! We’d love to see what you’re creating.