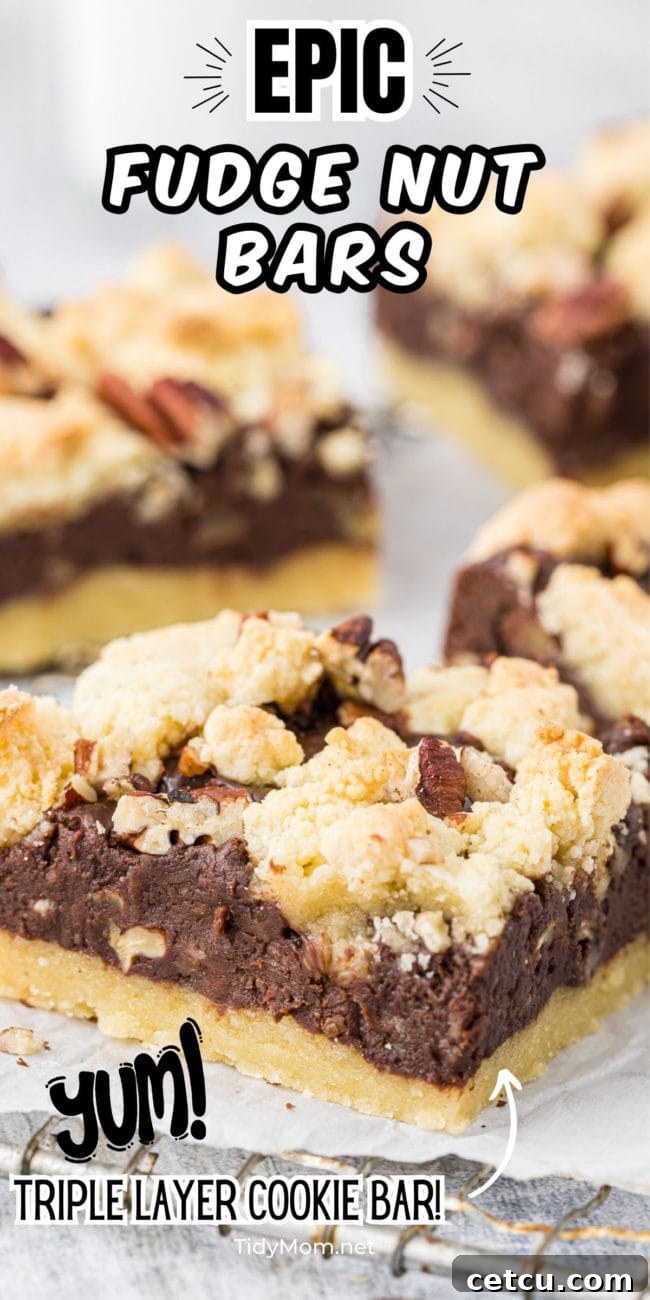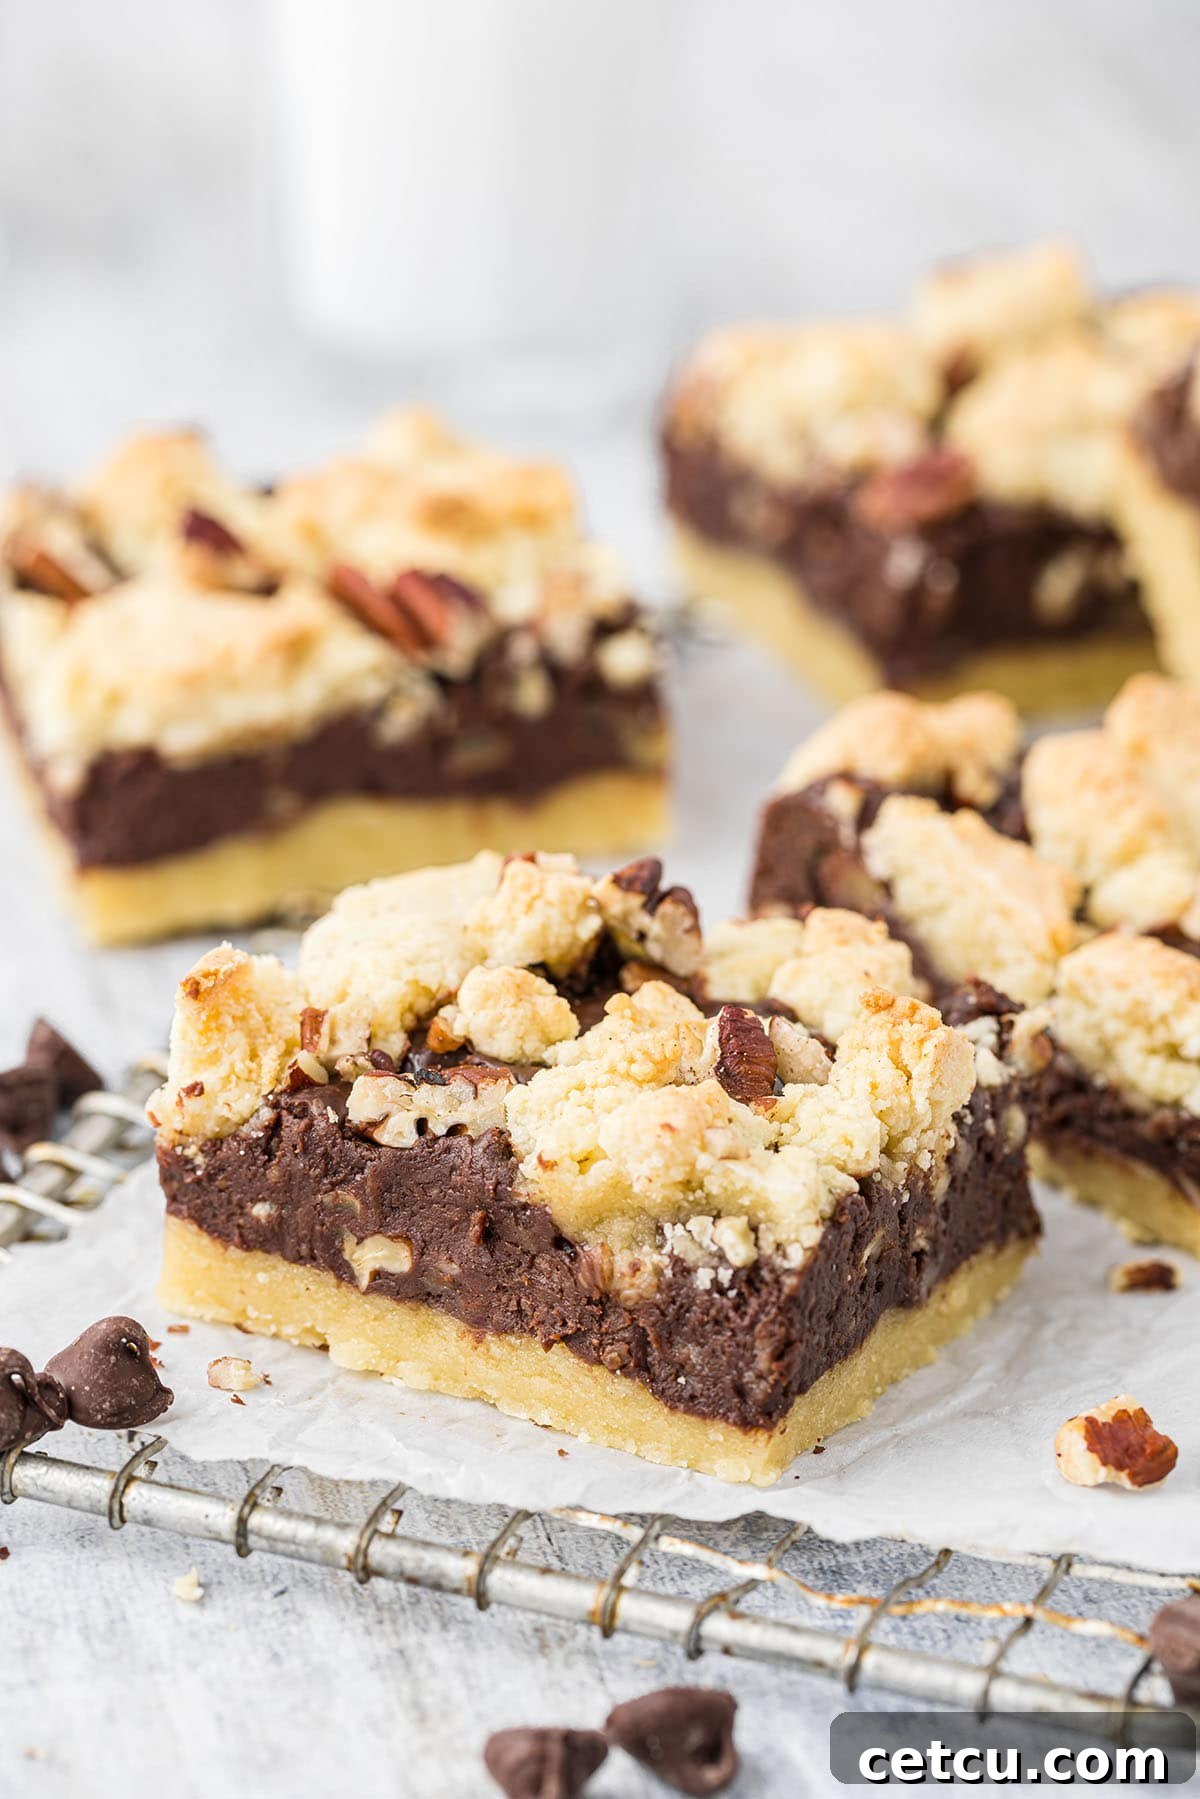
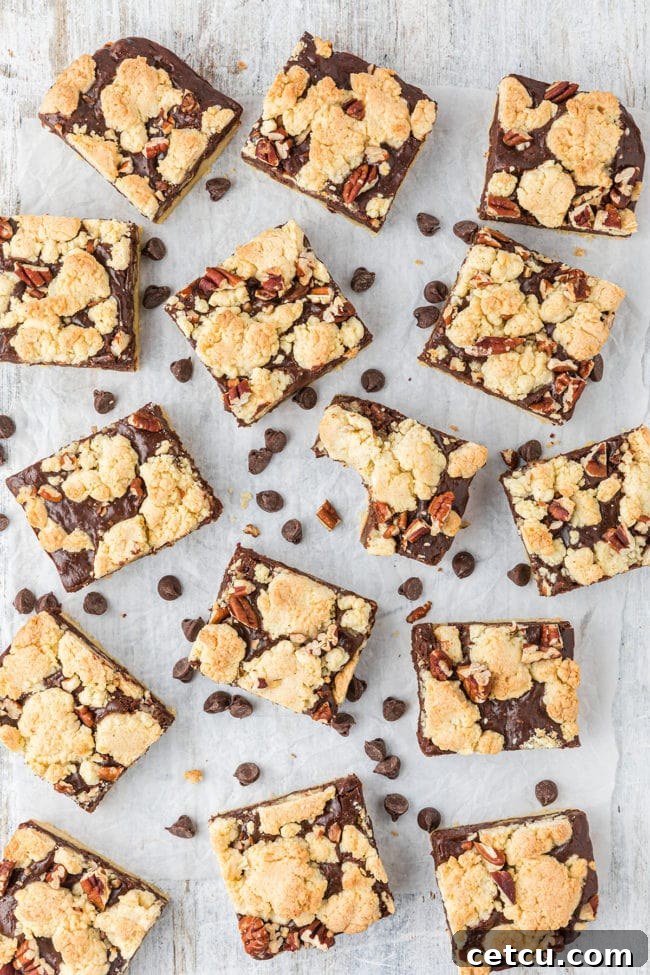
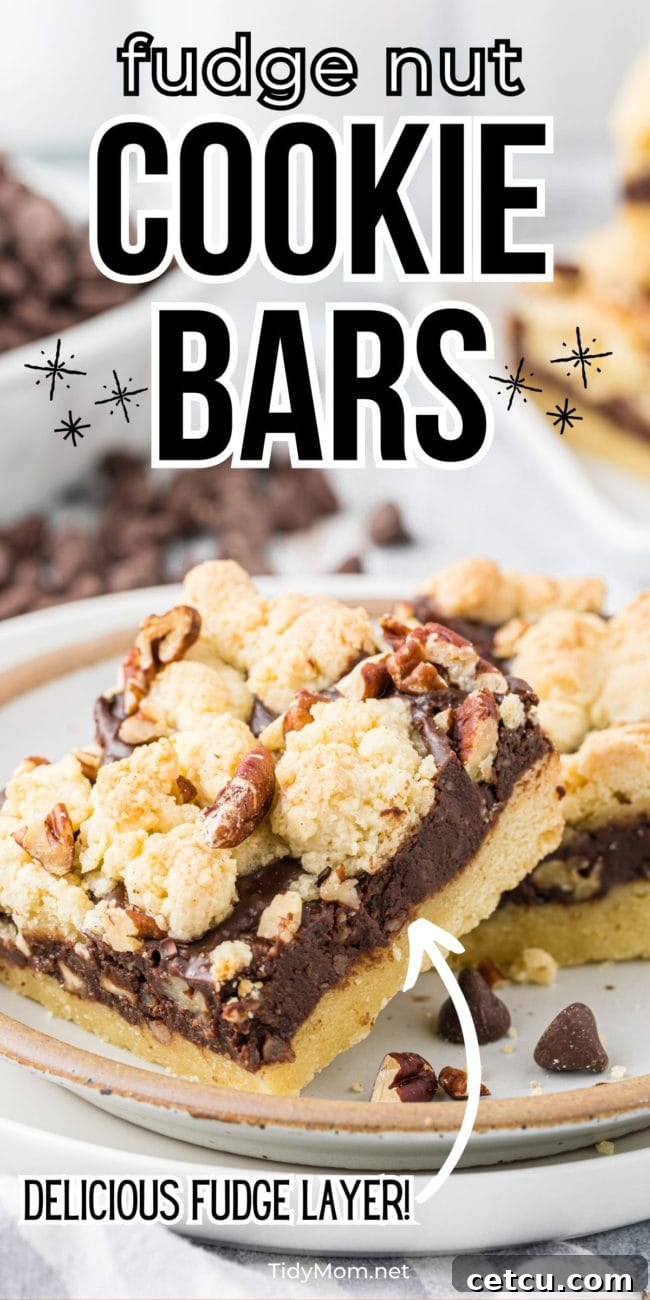
Craving a dessert that’s effortlessly indulgent yet impressive enough for any occasion? Look no further than these incredible **Fudge Nut Bars**! Picture this: a tender, buttery cookie crust providing the perfect foundation, topped with a rich, creamy pecan fudge layer that simply melts in your mouth, and then crowned with a delightful crumble of more cookie goodness and crunchy toasted pecans. This isn’t just a dessert bar; it’s a symphony of textures and flavors, an easy-bake masterpiece ready to satisfy your deepest sweet cravings. Get ready to bake, because epic taste awaits!
If you’re a connoisseur of delightful dessert bars, you’ll love exploring these other irresistible creations: our bright and zesty Raspberry Lemonade Bars offer a refreshing tang, the sweet and dreamy Strawberries and Cream Magic Bars are an ideal summer treat, and for a taste of autumn, these spiced Gingerbread Pumpkin Bars bring cozy warmth to your table.
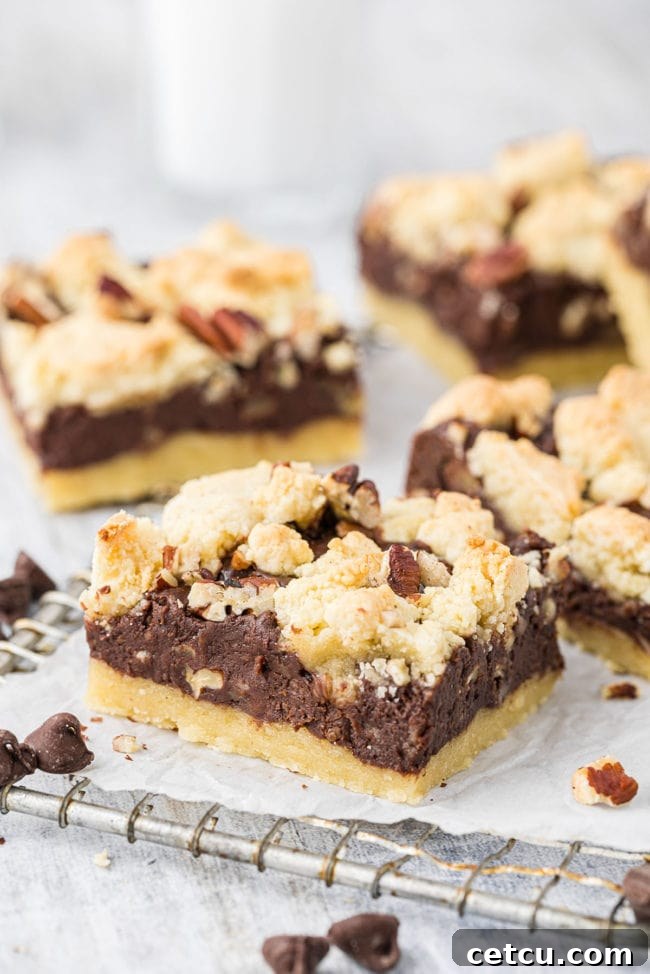
Table of Contents
Why These Fudge Nut Bars Are Truly Epic!
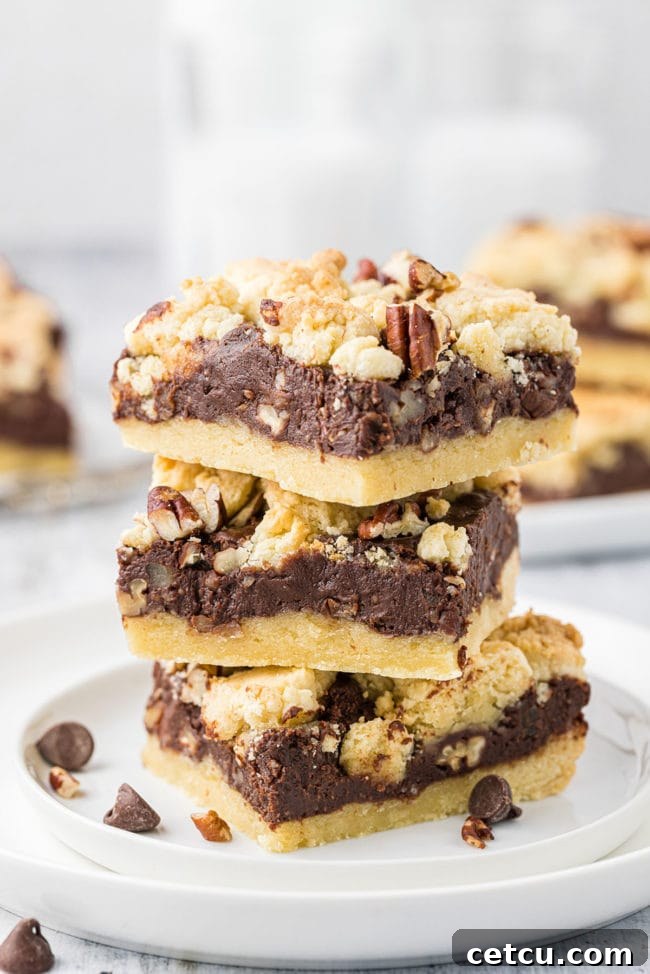
Prepare to be utterly captivated by the flawless harmony of flavors and textures in these extraordinary fudge nut cookie bars! Imagine a perfectly balanced dessert: rich and tangy cream cheese fudge, not overly sweet, encased within a wonderfully tender cookie crust. Elevate this indulgence with a generous sprinkle of crunchy, buttery toasted pecans, and you’ve achieved an epic-tasting cookie bar that’s destined to become a household favorite. This recipe isn’t just about making a dessert; it’s about creating a memorable experience for your taste buds.
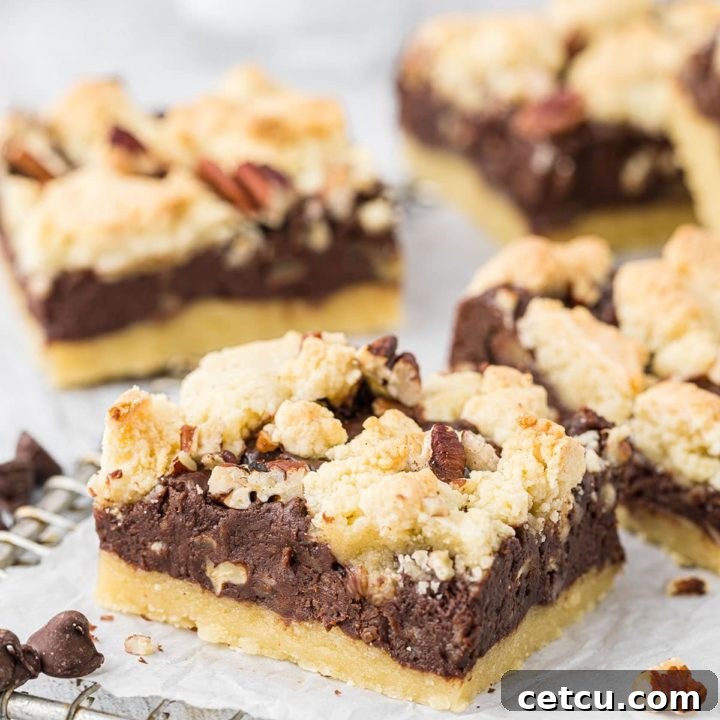
- A Magnificent Triple Treat: These fudge bars are a masterpiece of three distinct layers – a robust cookie foundation at the bottom, an intensely chocolatey and fudgy middle, and finally, a delightful crumble of more cookie on top, creating a complex yet cohesive bite every time.
- Quick, Convenient, and Utterly Delicious: From the moment you start to the first glorious bite, this treat comes together in approximately 40 minutes. It’s the ideal solution for those sudden sweet cravings or when you need an impressive dessert without spending hours in the kitchen.
- Designed For Sharing (or Not!): These bars are an absolute crowd-pleaser, disappearing faster than you can utter “pure deliciousness!” They’re perfect for potlucks, parties, family gatherings, or simply for treating yourself to a well-deserved moment of bliss.
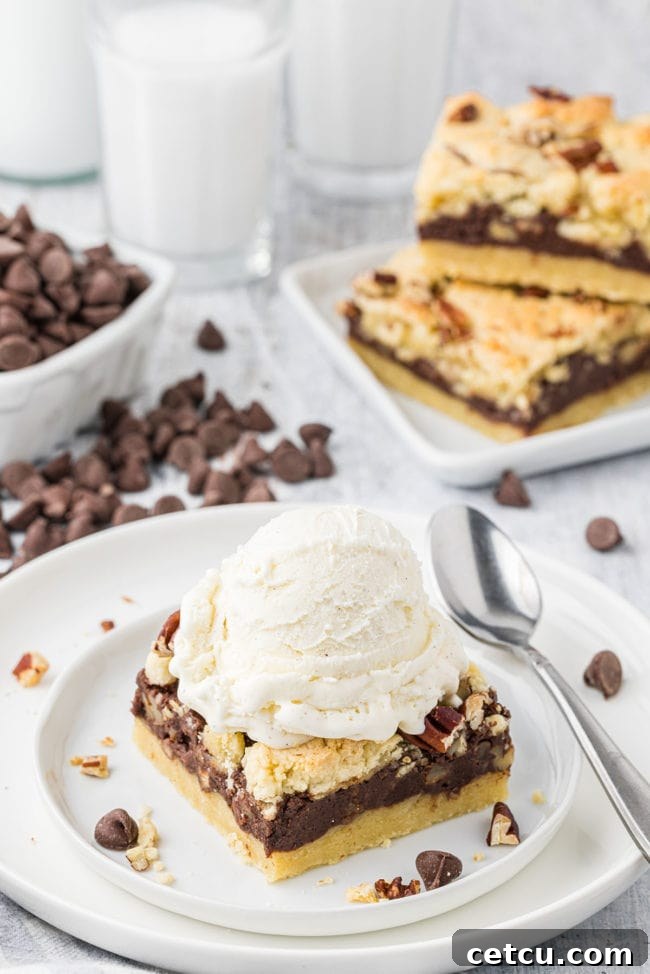
- Versatile for Any Season: While utterly comforting, their balance of rich chocolate and nutty crunch makes them suitable for any time of year. Serve them chilled in summer or at room temperature for a cozy winter treat.
- Simple Ingredients, Gourmet Results: Despite their luxurious taste and appearance, these fudge nut bars rely on readily available ingredients and straightforward techniques, ensuring success for bakers of all skill levels.
Ingredients You’ll Need
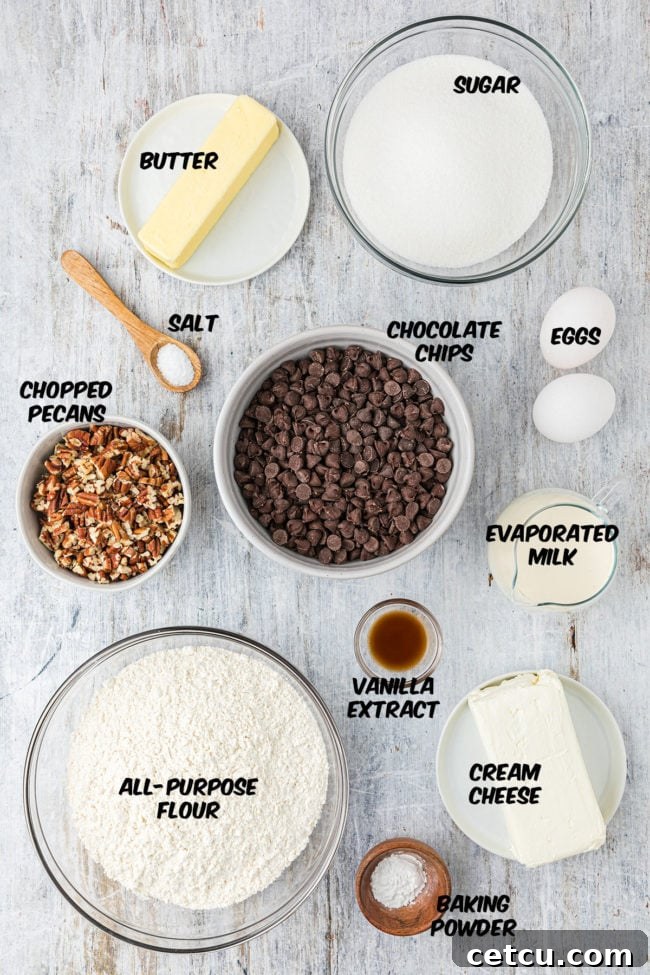
Crafting these mouthwatering Fudge Nut Bars requires no exotic ingredients or complicated culinary maneuvers. It’s all about bringing together simple, high-quality components to create a taste sensation that’s rich, satisfying, and utterly irresistible. Whether you’re looking to curb a serious sweet tooth, impress friends and family, or simply hoard every delicious crumb for yourself (we promise not to judge!), these ingredients are your ticket to dessert perfection.
For precise measurements and detailed instructions, please refer to the complete printable recipe card located at the very bottom of this post.
The Decadent Chocolate Pecan Fudge Layer:
- Semi-Sweet Chocolate Chips: These are crucial for balancing the sweetness of the cookie crust. They provide a deep, rich chocolate flavor without making the entire bar overly saccharine. High-quality semi-sweet chips will melt smoothly and contribute to a luxurious fudge texture.
- Cream Cheese: Ensure your cream cheese is brought to room temperature before use. This step is vital for achieving a silky-smooth fudge that melts beautifully and incorporates evenly, preventing any lumps. The cream cheese also introduces a delightful tanginess that cuts through the sweetness, adding complexity.
- Evaporated Milk: This is a key ingredient for the fudge’s creamy consistency. **It is absolutely critical to use evaporated milk and NOT sweetened condensed milk.** Sweetened condensed milk is loaded with sugar, which would make your fudge bars overwhelmingly sweet when combined with the cookie base. Evaporated milk provides the necessary moisture and richness without excessive sugar.
- Chopped Pecans: Nuts are indispensable for adding a wonderful textural contrast and a rich, earthy flavor to the fudge. They also serve as a beautiful, crunchy topping that gets lightly toasted during baking, enhancing their natural sweetness and aroma.
The Perfect Cookie Bar Base and Topping:
- Granulated Sugar: Standard white granulated sugar provides the primary sweetness for our buttery cookie layers, creating a classic bar cookie flavor.
- Unsalted Butter: Softened butter is essential for achieving a light and fluffy cookie dough. To test for proper softening, a slight indent should remain when you gently press it with your fingertip. Using unsalted butter allows you to control the overall salt content of the recipe.
- Large Eggs: Like the cream cheese, eggs should be at room temperature. This helps them emulsify better with the other ingredients, leading to a smoother, more uniform cookie batter and a lighter final texture.
- Pure Vanilla Extract: Don’t skimp on quality here! Pure vanilla extract imparts a warm, aromatic depth of flavor that elevates the entire cookie bar. Avoid imitation vanilla for the best taste.
- All-Purpose Flour: The foundation of our cookie layers. For the ideal texture, always measure your flour using the “fluff, spoon, and level” method rather than scooping directly from the bag (more on this below!). This prevents over-packing and ensures accurate measurement.
- Baking Powder: This leavening agent is responsible for creating a lighter, more tender crumb in the cookie layers. For optimal results, always ensure your baking powder is fresh and active.
- Salt: A small amount of salt is vital for enhancing all the other flavors in the cookie, balancing the sweetness, and preventing the bars from tasting flat.
This post may contain affiliate links. Please read my disclosure policy here.
How To Make Irresistible Triple-Layer Fudge Cookie Bars
These Fudge Nut Bars are not only incredibly satisfying to bite into but are also surprisingly simple to assemble! You’ll be amazed at how quickly this delightful dessert comes together. In less than ten minutes of active prep, this yummy fudge treat will be in the oven, filling your home with the most heavenly aroma. Gather your ingredients, prepare your tools, and let’s preheat that oven to baking perfection!
For exact quantities and the full recipe, please refer to the detailed recipe card at the bottom of this page.
Tools You’ll Need:
- 9×13” Baking Pan: The ideal size for a generous batch of bars.
- Non-Stick Spray*: To ensure easy removal of your delicious bars.
- Medium Saucepan: For gently melting and combining the fudge ingredients.
- Large Mixing Bowl: For preparing the cookie dough.
- Electric Mixer: Handheld or stand mixer to cream butter and sugar efficiently.
- *Optional: Parchment Paper: For even easier lifting and cleaner cuts.
Mastering Proper Flour Measurement: Did you know that the way you measure flour can significantly impact the outcome of your baking? The most precise method is by weight, using a digital kitchen scale, where 1 cup of all-purpose flour typically weighs between 125 to 130 grams. If you don’t own a scale, measure your flour accurately by first fluffing it up in its container, then gently spooning it into your measuring cup until it overflows. Finally, level off the excess with the back of a knife or a straight edge. **Never use your measuring cup as a scoop directly into the flour bag,** as this compacts the flour and can result in using significantly more than the recipe calls for, leading to dry and dense baked goods.
Step-by-Step Fudge Nut Bar Directions:
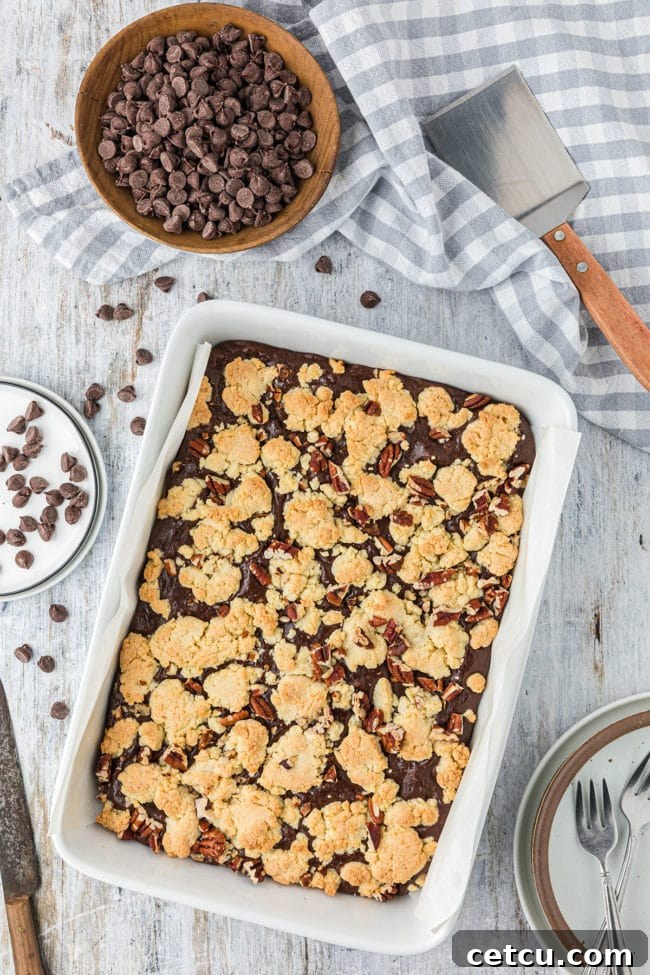
- Prepare Your Pan: Begin by preheating your oven to 375°F (190°C). Lightly spray a 9×13 inch baking pan with non-stick spray, or for easier removal and cleaner cuts, line it with parchment paper, leaving an overhang on the sides. Set the prepared pan aside.
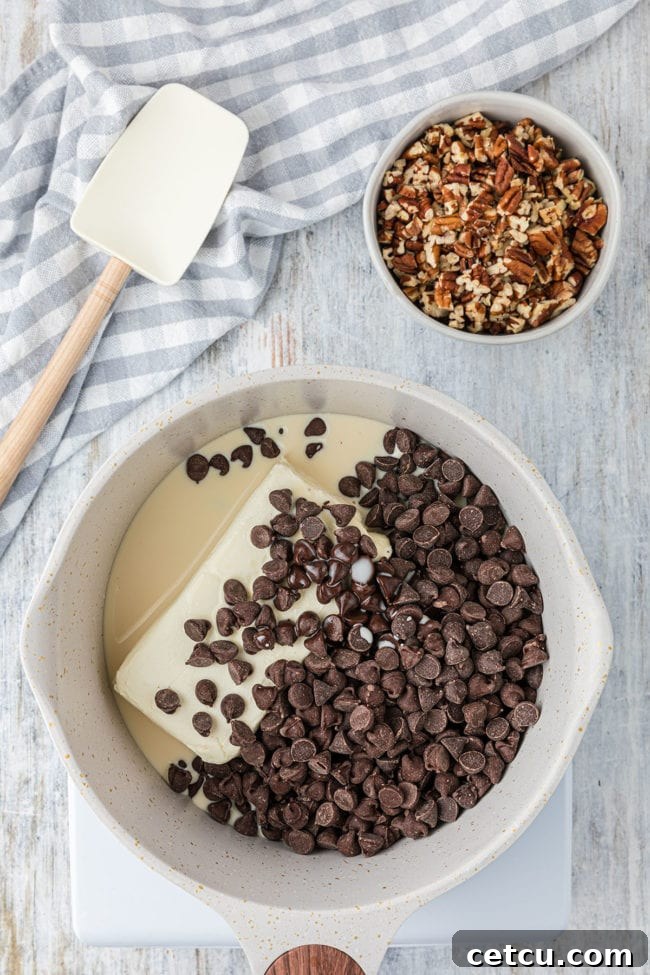
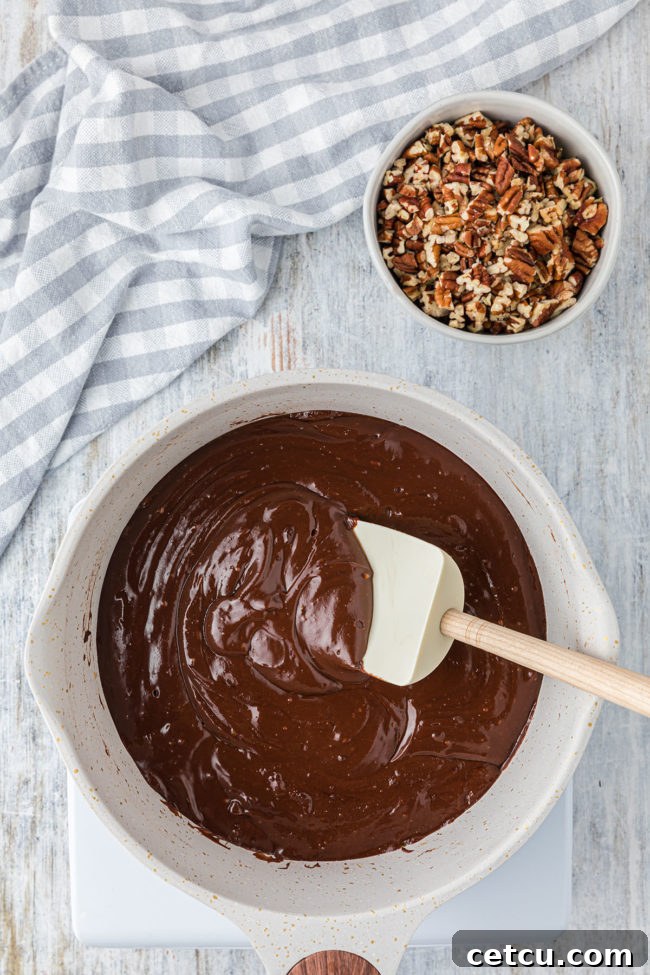
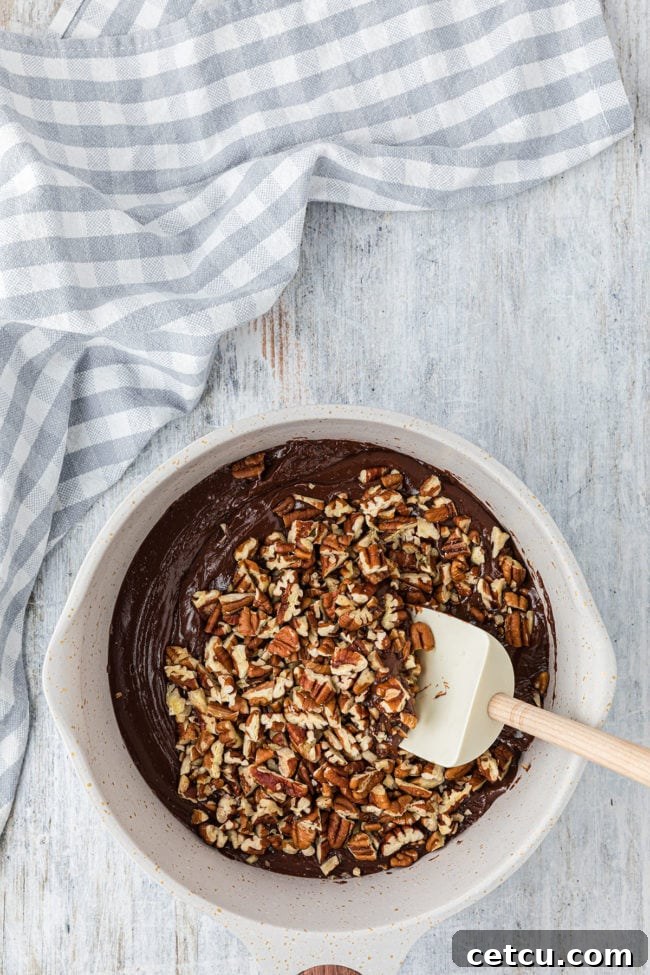
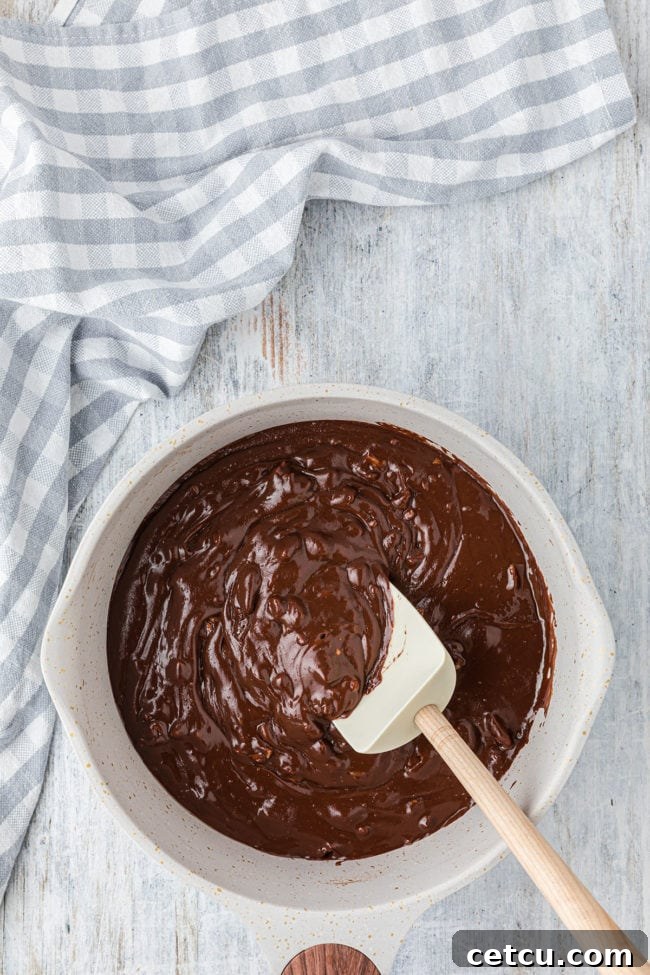
- Craft the Fudge Layer: In a medium-sized saucepan, combine the semi-sweet chocolate chips, room temperature cream cheese, and evaporated milk. Stir these ingredients continuously over low heat until the mixture is completely melted and beautifully smooth. Remove from heat, then stir in ¾ cup of the chopped pecans. Set this rich fudge filling aside.
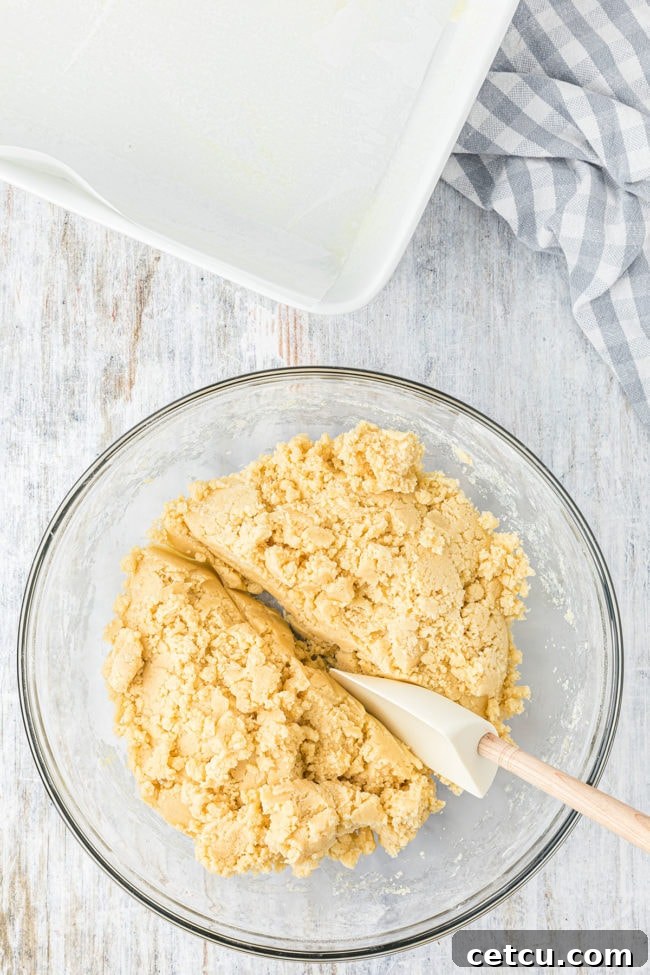
- Whip Up the Cookie Layers: In a large mixing bowl, using an electric mixer on medium speed, cream together the granulated sugar and softened butter until the mixture is light and fluffy. Beat in the room temperature eggs one at a time, followed by the vanilla extract, continuing to mix until everything is well incorporated. Gradually add the all-purpose flour, baking powder, and salt, mixing on low speed just until the ingredients are combined. The cookie mixture will appear crumbly, but don’t worry—it will come together perfectly when pressed into the pan.
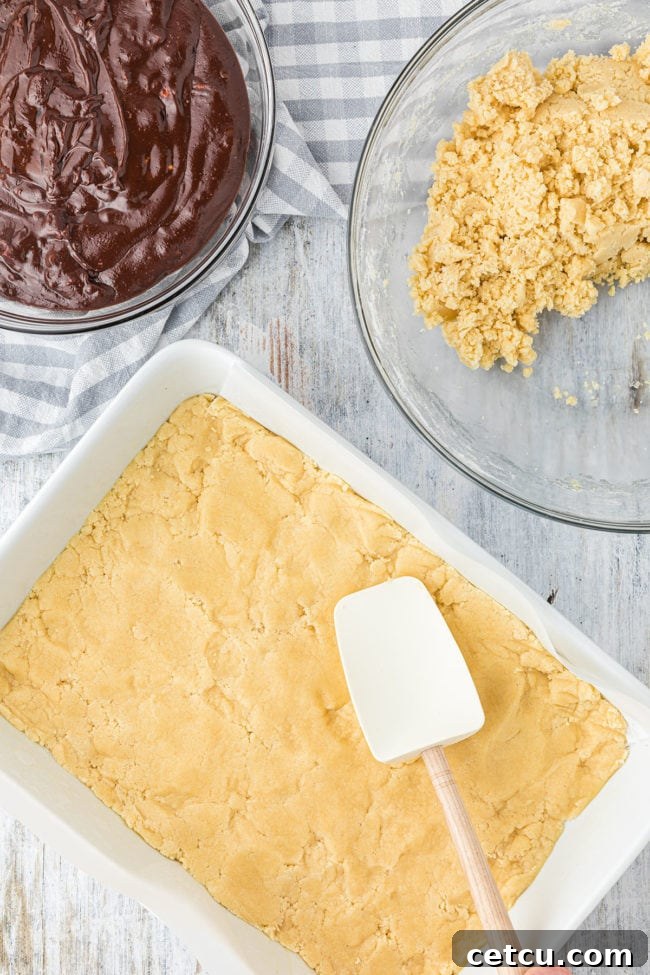
- Form the Base: Divide the cookie mixture into two equal halves. Press one half firmly and evenly into the bottom of your prepared 9×13 inch pan to form the base crust.
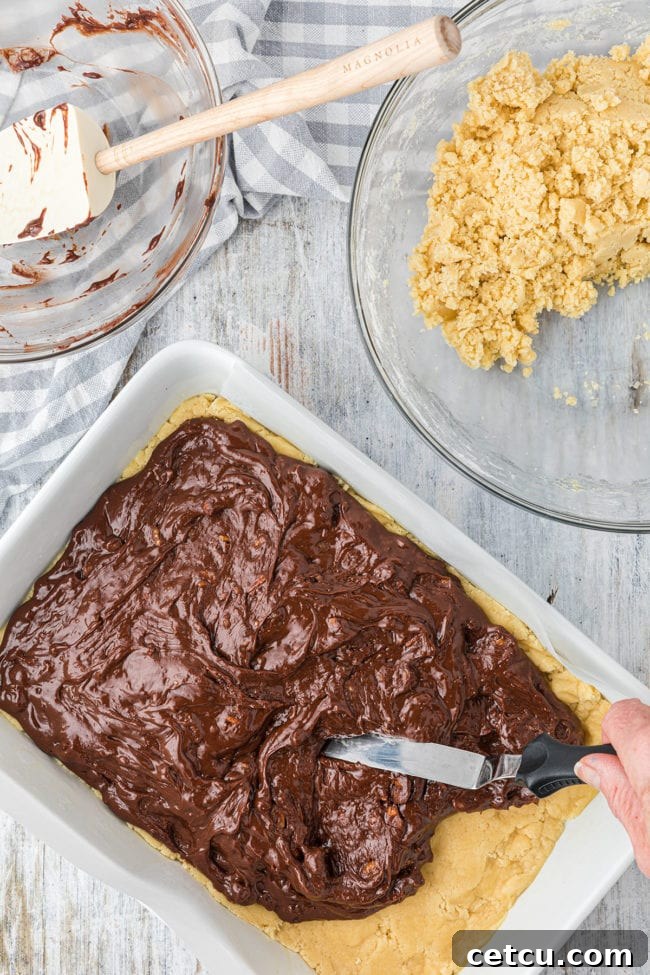
- Add the Fudge: Carefully spread the warm chocolate pecan fudge mixture evenly over the pressed cookie base using a spatula. Ensure it reaches all edges for a consistent layer.
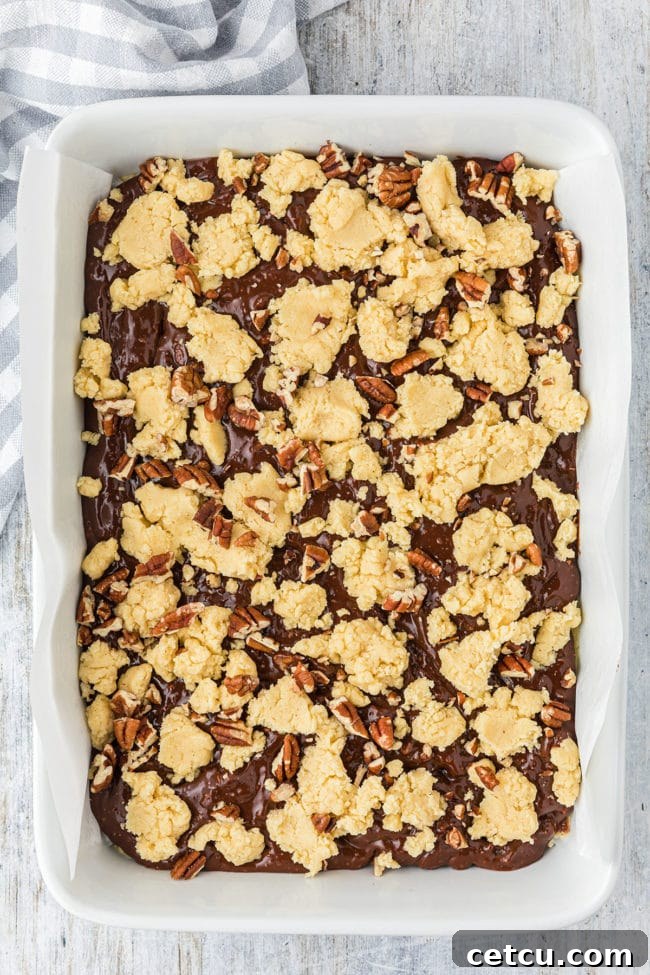
- Layer the Top: Gently spread the remaining cookie mixture over the fudge filling. If the cookie dough is too thick to spread easily with a spatula, use your hands to place small dollops over the fudge layer and then gently pat them down to form an even top crust. Sprinkle the remaining ¼ cup of chopped pecans evenly over the top layer.
- Bake to Golden Perfection: Place the pan in your preheated oven and bake for approximately 30 minutes, or until the top cookie crust achieves a beautiful light to medium golden brown color. The edges should look set, and the center might still be slightly soft.
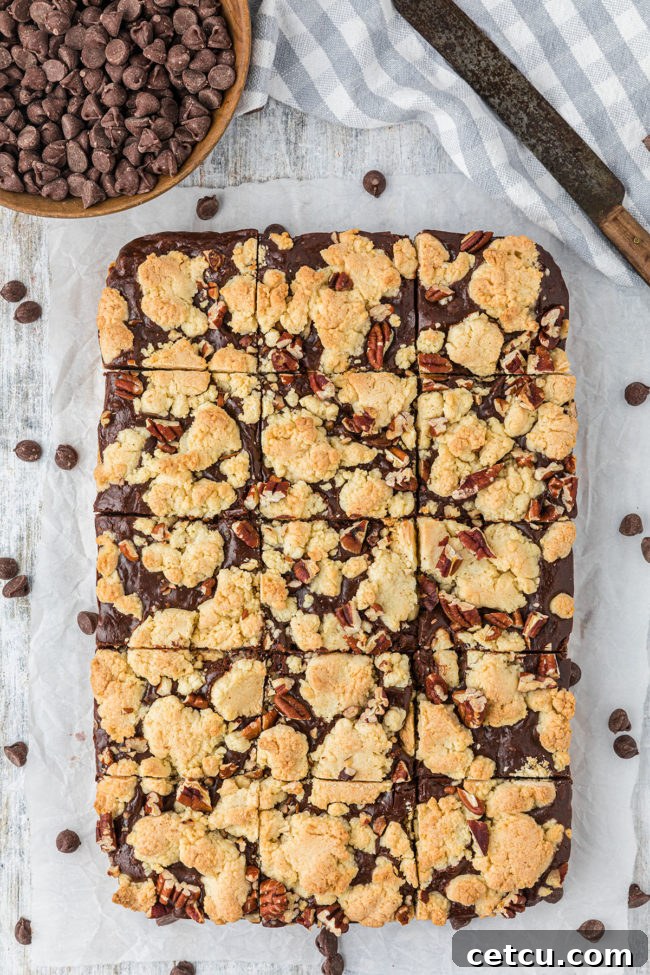
- Cool Completely: This step is crucial for perfect bars! Allow the fudge nut bars to cool completely in the pan on a wire rack before attempting to cut them. Rushing this step will result in a messy fudge layer. For even neater slices, you can chill the cooled bars in the refrigerator for at least 30 minutes before cutting.
*If the cookie mixture is too thick to spread easily with a spatula, use your hands to place dollops of the cookie mixture over the fudge filling, then gently pat down to form the top layer.
Expert Recipe Notes And Baking Tips
Achieving bakery-quality Fudge Nut Bars is simpler than you think with these helpful insights:
- Cube Cream Cheese for Quick Melting: For the fudge layer, cutting your chilled cream cheese into small cubes before adding it to the saucepan will significantly speed up its softening and melting process, ensuring a smooth, lump-free chocolate mixture.
- Stovetop is Best for Fudge: Always stick to the stovetop for making silky-smooth cream cheese fudge. Microwaves tend to create inconsistent hot spots, which can easily scorch your chocolate or cause the fudge to become grainy and seize up. Low and slow heat on the stove allows for better temperature control and a consistently creamy result.
- Don’t Over-Mix the Cookie Dough: When combining the dry ingredients with the wet ingredients for the cookie crust, mix only until just combined. Over-mixing can develop the gluten in the flour, leading to tough rather than tender cookie layers. The dough will appear crumbly, which is perfectly normal; it will come together when pressed into the pan.
- Toasted Pecans for Enhanced Flavor: For an extra layer of depth and crunch in your fudge filling, consider lightly toasting the pecans before incorporating them. This simple step brings out their natural nutty flavor and aroma. (Don’t worry about toasting the pecans for the topping, as they will toast beautifully while the bars bake in the oven).
- Parchment Paper for Easy Removal and Clean Cuts: For professional-looking, smooth-edged bars that lift out effortlessly, line your baking pan with parchment paper, allowing some overhang on the sides. Once the bars are completely cooled, you can use these “handles” to lift the entire slab out of the pan before cutting.
- Chill for Precision Slicing: To achieve ultra-neat and precise slices, once your fudge nut triple-layer bars have cooled completely at room temperature, transfer them to the refrigerator for at least 30 minutes. The chilled fudge filling will firm up, making it much easier to cut clean, sharp lines without any gooey mess.
- Customize Your Nuts: While pecans are classic, feel free to experiment with other nuts like walnuts, almonds, or even a mix for a different flavor profile.
- Chocolate Variations: If semi-sweet isn’t your preference, you can experiment with milk chocolate or dark chocolate chips. Just be mindful that using sweeter chocolates might require adjusting the sugar in the cookie layer slightly to maintain balance.
Pro Hacks For Room Temperature Baking Ingredients
Any seasoned baker will tell you that when a recipe specifies “room temperature” for an ingredient, there’s a good scientific reason behind it. Room temperature ingredients (especially fats like butter and cream cheese, and eggs) emulsify more effectively, creating a smoother, more uniform batter or dough. This leads to better texture, consistent rising, and a superior final product. However, we don’t always have the luxury of planning hours ahead when a sudden craving for delicious baked goods strikes!
That’s where these tried-and-true hacks come in handy, helping you get your ingredients to the perfect temperature quickly so you can bake on the fly!
Quick Method To Soften Butter:
My favorite trick for softening butter quickly involves a tall glass or jar. Fill it with very hot water, let it sit for a minute to heat up, then drain it completely. Invert the warm glass over a vertically standing stick of butter on a plate. The residual heat from the glass will gently soften the butter in just a few minutes, creating perfectly pliable butter. Another fantastic quick hack is to grate cold butter using a cheese grater or shave it with a mandolin; the smaller pieces will come to room temperature much faster.
Did You Know? It is generally safe to keep butter at room temperature for a day or two, especially if your kitchen isn’t overly warm. This makes it readily available for your baking needs.
How To Soften Cream Cheese Fast:
To soften cold cream cheese in a pinch, cut it into small cubes and spread them out on a plate. Lightly cover the plate with plastic wrap and place it in an oven with just the light on (no heat!) for about 10-15 minutes, checking halfway through. The gentle warmth from the oven light is usually enough. Alternatively, for an even quicker method, place the unopened cream cheese box inside a zip-top bag, seal it tightly, and submerge it in a bowl of warm (not hot!) water. Change the water once or twice as it cools down, and your cream cheese will be soft in no time.
Speedy Way To Get Eggs To Room Temperature:
Achieving room temperature eggs quickly is simple. Place your cold eggs in a single layer in a bowl of warm (not hot!) water. Gently roll them around in the water. The water will cool quickly, so you might need to repeat this process once or twice. Let them sit for about five minutes. **Crucially, never use hot water,** as this can partially cook the eggs, rendering them useless for most baking recipes.
*Important Note on Eggs: You should not leave eggs out at room temperature for longer than 2 hours before using them, especially if they were previously refrigerated. Also, before soaking them in warm water, it’s a good practice to quickly rinse and wipe your eggs with a paper towel for hygiene.
Storage and Freezing Tips
Ensuring your delicious Fudge Nut Bars stay fresh and delightful for as long as possible is key. Here are answers to the most common questions regarding the storage of these creamy pecan fudge bars:
How long do cream cheese fudge bars stay fresh, and what are the best storage methods?
Due to the cream cheese in the fudge layer, these bars should be stored in the refrigerator to maintain their freshness and texture. Once cooled and cut, place them in an airtight container. For best results, layer the bars between sheets of parchment paper to prevent sticking. When stored properly in the fridge, these delectable cookie bars will stay fresh and enjoyable for up to three weeks. Bringing them to room temperature for about 15-20 minutes before serving can enhance their flavor and texture.
Do fudge bars freeze well for later enjoyment?
Absolutely, fudge bars freeze exceptionally well, making them perfect for meal prepping desserts or saving some for a future craving! To freeze, ensure the cookie bars are completely cooled. Wrap each individual bar tightly in plastic wrap, then place the wrapped bars in an airtight freezer-safe container or a heavy-duty freezer bag. This double layer of protection helps prevent freezer burn. Thaw the frozen cookie bars in the refrigerator for several hours or overnight. For the best taste and texture, consume them within a 90-day storage window.
Frequently Asked Questions About Fudge Nut Bars
While both evaporated and sweetened condensed milk are dairy products from which about 60% of the water has been removed to create a thicker, creamier consistency, their sugar content is the crucial differentiator. Evaporated milk is unsweetened and has a thinner consistency, making it ideal for savory dishes and balancing sweetness in desserts like our fudge. Sweetened condensed milk, on the other hand, contains a significant amount of added sugar, resulting in a much thicker, very sweet product often used in specific dessert recipes where its high sugar content is desired.
Although microwaves are convenient for melting chocolate, I generally do not recommend using one for making cream cheese nut fudge in this recipe. Achieving the perfectly smooth, creamy, and uniform texture that is ideal for these triple-layer cookie bars can be quite challenging in a microwave. Microwaves often create “hot spots,” which can lead to overheating, scorching the chocolate, or causing the fudge to become grainy or seize. The stovetop method, using low and controlled heat, offers superior temperature management and consistently yields a silky-smooth, perfectly blended fudge.
Absolutely! These fudge bars are an excellent make-ahead dessert and freeze beautifully. The key is to ensure they are completely cooled to room temperature before freezing. Once cooled, you can wrap them individually in plastic wrap and then store them in an airtight container or a heavy-duty freezer bag. When you’re ready to enjoy them, simply thaw the bars in the refrigerator overnight or for several hours. This method ensures the best texture upon thawing.
For the cleanest cuts, ensure the bars are completely cooled. Chilling them in the refrigerator for at least 30 minutes after cooling further firms up the fudge layer, making slicing much easier. Use a large, sharp knife, warming the blade slightly under hot water and wiping it dry between each cut. This helps glide through the layers without dragging.
Share Your Fudge Nut Bar Experience!
We’d absolutely love to hear about your baking success! Once you’ve tried this recipe, please leave a review below and let us know how much you enjoyed these decadent Fudge Nut Bars. Your feedback helps other bakers too!
Fudge Nut Bars Recipe
24 servings
15 minutes
30 minutes
45 minutes
Print Recipe
These Fudge Nut Bars are a delightful triple-layer dessert, featuring a rich, creamy chocolate pecan fudge filling nestled between two tender, buttery cookie layers. They are incredibly easy to make, yet provide an indulgent experience perfect for any occasion!
Ingredients
For the Chocolate Pecan Fudge Layer:
- 12 ounces semi-sweet chocolate chips
- 8 ounces cream cheese, softened to room temperature
- ⅔ cup evaporated milk (not sweetened condensed milk)
- 1 cup chopped pecans, divided (¾ cup for fudge, ¼ cup for topping)
For the Cookie Base and Topping:
- 1 ½ cups granulated sugar
- ½ cup unsalted butter, softened
- 2 large eggs, at room temperature
- ½ teaspoon pure vanilla extract
- 3 cups all-purpose flour
- 1 teaspoon baking powder
- ½ teaspoon salt
Instructions
- Preheat oven to 375° F (190°C). Spray a 13×9 inch baking pan with nonstick spray or line it with parchment paper, leaving an overhang on the sides. Set aside.
- Prepare Fudge Layer: In a medium saucepan, combine chocolate chips, cream cheese, and evaporated milk. Stir continuously over low heat until completely melted and smooth. Remove from heat and stir in ¾ cup of the chopped pecans. Set aside.
- Prepare Cookie Layer: In a large mixing bowl, using an electric mixer on medium speed, cream together the sugar and softened butter until light and fluffy. Beat in the eggs one at a time, followed by the vanilla extract, until well incorporated. Gradually add the all-purpose flour, baking powder, and salt, mixing on low speed just until combined. The mixture will be crumbly but will come together when pressed.
- Divide the cookie mixture in half. Press one half firmly and evenly into the prepared pan to form the bottom crust.
- Using a spatula, carefully spread the chocolate pecan fudge mixture evenly over the base cookie layer.
- Gently spread the remaining cookie mixture on top of the fudge layer. If the dough is too thick to spread, use your hands to place small dollops over the fudge, then gently pat them down to form an even top. Sprinkle the remaining ¼ cup of chopped pecans evenly over the top.
- Bake in the preheated oven for 30 minutes, or until the top crust is a light to medium golden brown.
- Allow the bars to cool completely in the pan on a wire rack before cutting into squares. For neater slices, chill the cooled bars in the refrigerator for 30 minutes before cutting.
Notes
NOTE: *If the cookie mixture is too thick to spread, use your hands to place dollops of the cookie mixture over the chocolate layer, then gently press to form an even top crust.
STORAGE:
Store fudge bars made with cream cheese in an airtight container, layered between parchment paper, **in the refrigerator**. These cookie bars will stay fresh for up to three weeks.
Fudge bars **freeze** exceptionally well. Wrap individual bars tightly in plastic wrap, then store in an airtight container or freezer bag. Thaw cookie bars in the fridge for several hours or overnight. For optimal taste and texture, enjoy within a 90-day storage window.
Nutrition Information (Estimated):
Yield: 24
Serving Size: 1 bar
Approximate Amount Per Serving:
Calories: 287
Total Fat: 16g
Saturated Fat: 8g
Trans Fat: 0g
Unsaturated Fat: 7g
Cholesterol: 37mg
Sodium: 140mg
Carbohydrates: 35g
Fiber: 2g
Sugar: 22g
Protein: 4g
Nutrition information is estimated based on the ingredients and cooking instructions as described in each recipe and is intended for informational purposes only. Please note that nutrition details may vary based on methods of preparation, origin, and freshness of ingredients used, and are just estimates. We encourage, especially if these numbers are important to you, to calculate them independently for the most accurate results.
Did you make this recipe?
Please leave a comment on the blog or share a photo on Instagram