The Ultimate Guide to Perfectly Cooked Corn on the Cob in Your Microwave
There’s an undeniable joy that comes with summertime, and for many, that joy is perfectly embodied by the taste of fresh, sweet corn on the cob. It’s a quintessential seasonal delight, gracing picnic tables, backyard barbecues, and family dinners with its vibrant flavor and satisfying crunch. While traditional methods like boiling or grilling are beloved, they often come with their own set of challenges—be it heating up your kitchen on a scorching day or the extra effort of firing up the grill.
What if you could enjoy perfectly tender, juicy corn on the cob in mere minutes, without any fuss or mess? Get ready to unlock the secret to effortlessly delicious corn with the microwave method. This technique isn’t just fast; it’s a game-changer for preserving the corn’s natural sweetness and making the once-dreaded task of de-silking astonishingly simple. Prepare to bid farewell to stray silk strands and embrace pure, unadulterated corn perfection with minimal effort.
Why Microwave Corn on the Cob is Your New Favorite Method
You might be surprised by how effective and superior the microwave method is for cooking corn on the cob. By cooking the corn in its own husk, you create a natural steaming environment that yields incredible results. Here’s a deeper look into why this technique is rapidly gaining popularity:
- Unmatched Speed and Convenience: In our fast-paced lives, time is precious. The microwave method allows you to go from raw corn to perfectly cooked in a matter of minutes, making it an ideal choice for quick weeknight meals, unexpected guests, or when you need a speedy side dish for a larger gathering.
- Keeps Your Kitchen Cool: One of the biggest advantages during hot summer months is avoiding any additional heat in your home. Unlike boiling on a stovetop or using an oven, microwaving corn generates virtually no ambient heat, keeping your kitchen comfortable and cool.
- Locks in Natural Moisture and Flavor: The husk acts as a natural pressure cooker, trapping steam and moisture around the kernels. This steaming process ensures that the corn cooks evenly, retains its natural sugars, and emerges incredibly tender, juicy, and bursting with fresh, sweet flavor that’s hard to achieve with other methods.
- Effortless De-Silking: This is, without a doubt, the most celebrated benefit. The heat and steam from microwaving help to loosen the silk strands from the cob. After cooking, a simple cut and squeeze will allow the entire cob, along with all the pesky silk, to slide cleanly out of the husk. No more tedious picking and scrubbing!
- Minimal Cleanup: With no pots to scrub, no greasy grill grates to clean, and the husk containing any mess, cleanup is virtually nonexistent. This means more time enjoying your meal and less time at the sink.
- Nutrient Retention: Quick cooking methods like microwaving can help retain more heat-sensitive nutrients compared to longer boiling times, ensuring you get the most nutritional benefit from your fresh corn.
Your Step-by-Step Guide to Perfect Microwave Corn on the Cob
Ready to experience the magic? Follow these straightforward instructions to prepare succulent corn on the cob that will impress everyone.
What You’ll Need:
- Fresh corn on the cob, with the husks completely intact.
- A microwave-safe plate or your microwave’s rotating turntable.
- A sharp knife (for after cooking).
Detailed Instructions for Cooking Corn in the Microwave:
- Selecting the Best Corn: The foundation of delicious corn on the cob is fresh ingredients. When choosing corn, look for husks that are bright green, tightly wrapped around the cob, and slightly damp. The silk (tassel) at the top should be a light brown or golden color and feel slightly sticky. Avoid corn with dry, brittle, or black tassels, or husks that are yellowing or loose. Gently feel the kernels through the husk; they should feel plump and firm, without any gaps or soft spots.
- Prepare for Microwaving: Place your chosen ears of corn directly into the microwave. There’s no need to remove any husks, cut the ends, or add water. The husks are essential for creating the steaming effect. Arrange the cobs so they are not excessively overlapping, especially if your microwave does not have a rotating plate, to ensure more even cooking. For microwaves with turntables, simply place them in a circle or in parallel.
-
Microwave on High Power: Cook the corn on your microwave’s high setting. Microwave wattages can vary (typically between 800-1200 watts), so you might need to slightly adjust these timing guidelines. Generally, these times work well for most standard microwaves:
- For 1 ear of corn: 1 minute 30 seconds to 2 minutes
- For 2 ears of corn: 3 to 4 minutes
- For 3 ears of corn: 5 to 6 minutes
- For 4 ears of corn: 7 to 8 minutes
- For more than 4 ears: It’s often best to cook them in batches to ensure even heating. If you must cook a larger quantity at once, consider adding an extra minute per additional ear and definitely rotate them halfway through the cooking process.
Expert Tip for Even Cooking: If your microwave does not feature a rotating turntable, make sure to pause the cooking halfway through the recommended time. Manually turn or rotate each cob over to ensure uniform heat distribution and prevent any undercooked or overcooked spots.
- Crucial Resting Period: Once the microwave timer goes off, carefully remove the corn. Be mindful that the cobs will be very hot. Place them on a plate or cutting board and allow them to rest for approximately 5 minutes. This resting phase is vital; it allows the internal temperature to stabilize, the cooking process to gently complete through residual heat, and the kernels to become perfectly tender. It also makes the corn much safer and easier to handle.
- Experience Effortless De-Silking: This is the moment you’ve been waiting for! Hold the cooked cob by the tassel (the thinner, leafy end). Using a sharp knife, carefully slice off about an inch from the bottom (stem end) of the cob. Then, while still holding the tassel end, gently but firmly squeeze the cob from the cut end. The entire cooked ear of corn, along with all the silk, should easily slide right out of the husk, leaving you with a perfectly clean, silk-free cob. You’ll be amazed at how simple and mess-free this is!
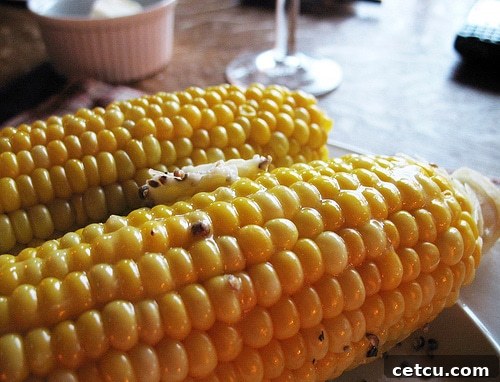
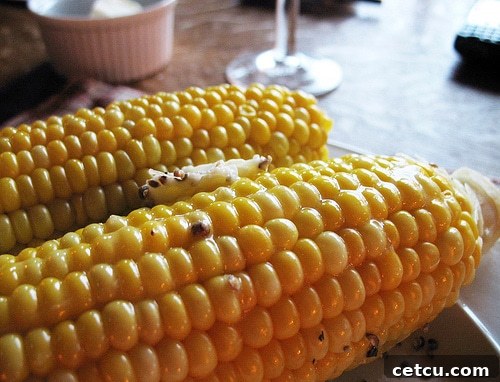
- Season and Savor: Your perfectly cooked, sweet, and tender corn on the cob is now ready for your enjoyment. Season it according to your preference and dig in!
Mastering Your Microwave Corn: Advanced Tips and Serving Ideas
While the basic method is simple, these additional tips and creative seasoning ideas will help you elevate your microwave corn on the cob to gourmet status.
Advanced Tips for Best Results:
- Don’t Pierce the Husk: Resist the urge to poke holes or cut the husks before cooking. The intact husk is what creates the essential steaming environment.
- Test for Doneness: If you’re unsure if the corn is cooked, gently peel back a small section of the husk after the resting period (be careful of steam). The kernels should be plump and tender. If they’re still a bit firm, microwave for another 30 seconds to 1 minute.
- Batch Cooking for Crowds: For larger gatherings, cook corn in batches. Keep cooked cobs warm by wrapping them in foil or placing them in a cooler while you finish the rest.
Creative Seasoning and Serving Suggestions:
While a simple pat of butter and a dash of salt and pepper are timeless, don’t be afraid to experiment with other flavors:
- The Classics: Melted butter (dairy or plant-based), a sprinkle of sea salt, and freshly ground black pepper.
- Spicy Kick: A dusting of chili powder, smoked paprika, cayenne pepper, or a drizzle of your favorite hot sauce.
- Herbal Freshness: Enhance with finely chopped fresh herbs like cilantro, parsley, chives, dill, or basil.
- Cheesy Indulgence: Grated Parmesan, crumbled feta, or cotija cheese, often paired with a squeeze of fresh lime juice.
- Elote-Inspired (Mexican Street Corn): A delectable blend of mayonnaise or Mexican crema, crumbled cotija cheese, a dash of chili powder, and a generous squeeze of fresh lime.
- Garlic Lover’s Dream: Brush with melted butter infused with minced garlic and a pinch of salt.
- Sweet & Savory: A drizzle of honey or maple syrup with a pinch of salt and black pepper.
Storage Solutions for Fresh and Cooked Corn:
- Storing Uncooked Corn: Keep unhusked corn in its natural state and store it in the refrigerator. It’s best used within 1-2 days of purchase for peak sweetness, as the sugars in corn gradually convert to starch over time.
- Storing Cooked Corn: Leftover cooked corn on the cob can be stored in an airtight container in the refrigerator for up to 3-4 days. You can easily reheat it in the microwave or, for versatility, slice the kernels off the cob to incorporate into other dishes.
Beyond the Cob: Culinary Uses for Your Perfect Corn
Your perfectly microwave-cooked corn isn’t just for eating off the cob. The tender kernels are a fantastic addition to a variety of recipes:
- Vibrant Salads: Cut the kernels off the cob and toss them into green salads, pasta salads, quinoa bowls, or black bean and corn salads for a pop of sweetness and texture.
- Flavorful Salsas and Dips: Create a fresh corn salsa with bell peppers, red onion, cilantro, and lime juice—perfect with grilled proteins or as a dip with tortilla chips.
- Hearty Soups and Stews: Stir fresh corn kernels into chowders, chili, or summer vegetable soups for an extra layer of flavor and satisfying texture.
- Quick Stir-fries and Side Dishes: Lightly sauté the kernels with butter and herbs for a simple yet delicious side, or integrate them into your favorite stir-fry recipes.
- Baking Adventures: Add corn kernels to cornbread, muffins, or even savory pancakes for a unique twist.
Conclusion: Embrace the Simplicity of Microwave Corn
The microwave method for cooking corn on the cob truly is a culinary revelation. It offers unparalleled convenience, speed, and consistently delicious results, all while keeping your kitchen cool and cleanup to an absolute minimum. No more struggling with stubborn silk or enduring a sweltering kitchen just for a taste of summer’s bounty. Whether you’re a seasoned home cook or just starting your culinary journey, this incredibly simple technique will undoubtedly transform your summer corn experience.
So, the next time you bring home those beautiful, fresh ears of corn, bypass the traditional cooking methods and head straight for your microwave. You’ll be astonished by how easy it is to achieve perfectly tender, juicy, and intensely flavorful corn on the cob every single time. It’s truly the ideal way to savor this beloved summer treat, bringing more joy and less hassle to your seasonal dining.