

Greetings, wonderful readers! As the incredible Cheryl, the creative force behind Tidymom, enjoys a well-deserved trip to The Windy City with her daughters, I’m absolutely thrilled and deeply honored to step in and host this week’s “I’m Lovin’ It” party!
So, while Cheryl is no doubt Lovin’ Chicago, exploring its vibrant streets and soaking in all the city has to offer, I’m here to share what I’m currently Lovin’ with all of you. Get ready for some creative inspiration! (And honestly, I’m already dreaming of those delightful treats Cheryl often whips up; I swear I caught a glimpse of a cupcake with MY name on it further down the page… a girl can dream, right?)
It’s truly a privilege to spend time on Tidymom’s beautiful blog today. Her space always feels so pristine and inviting, a stark contrast to my own sometimes chaotic corner of the internet. I often imagine her kitchen, perpetually filled with the comforting aromas of fresh cupcakes, wholesome frozen fruit roll-ups, and decadent slices of Gooey Upside Down German Chocolate Cake. Um, yes please to all of it!
But back to why we’re all here! Since it’s Friday, and that means it’s time for I’m Lovin’ It, I wanted to share a passion of mine that brings me immense joy: the art of transforming what some might see as ‘trash’ into truly unique ‘treasures’. It’s about seeing potential where others might see only discards, and it’s a philosophy that has saved me a considerable amount of money while allowing my creativity to flourish.
As many of you know, I run a small baking blog, and for the longest time, I struggled with how to beautifully photograph my creations – the intricate cakes, the perfectly baked cookies, and those charming cupcakes. Presentation is everything, especially in food photography, and while elegant cake stands are undeniably gorgeous, they can be incredibly expensive. Constantly buying new ones to match different themes or simply to have a variety of heights and styles just wasn’t sustainable for my budget.
Then, one serendipitous day at my local thrift store, an idea sparked. I spotted a solitary candlestick – sturdy, classic, and priced at less than a dollar. In that moment, a lightbulb went off: I could make my own! The thrill of the find, combined with the prospect of crafting something beautiful and functional from something so inexpensive, was incredibly exciting. Since then, I’ve become quite adept at this little craft. I’ve probably made about twenty cake stands to date, almost all of them in various shades of white. While I adore the crisp, clean look of white, I recently found myself craving something different, something with a bit more edge and sophistication.
My latest treasure hunt led me to these charming pieces at the thrift store, just waiting for a new purpose:
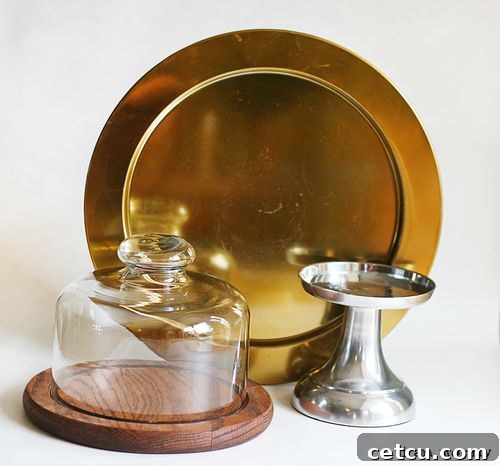
On their own, they were… okay. They had a certain charm, but they certainly weren’t as pretty or as functional as I envisioned for my baking displays. While I’m usually drawn to all things shiny, these reflective surfaces posed a real challenge for photography. Who wants to see my camera and me reflected in the backdrop of a scrumptious dessert? Definitely not ideal for showcasing a beautifully frosted cake or a delicate pastry. So, the decision was made: a dramatic makeover was in order!
I decided to give these pieces a sleek, sophisticated transformation using black spray paint. Typically, I gravitate towards a satin finish for most of my projects, as it offers a soft sheen without being too reflective. However, this time, I was inexplicably drawn to a semi-gloss finish, hoping it would add a subtle depth and elegance that would complement baked goods beautifully. The process was wonderfully quick; with the summer heat, the paint dried in a mere 15 minutes, allowing me to move swiftly from one coat to the next. For anyone embarking on a similar spray-painting adventure, remember the key is thin, even coats, applied in a well-ventilated area, and always protect your workspace with drop cloths.
Now, are you ready to see how these humble thrift store finds were completely transformed? Get ready for the big reveal! (If only I could insert a dramatic drum roll sound effect here. Perhaps someone out there knows the HTML code for that? Send it my way!)
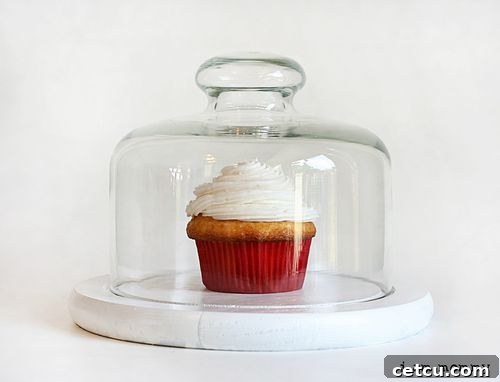
First up, this elegant piece features a base painted in a crisp white. It’s absolutely perfect for those extra special cupcakes, making them pop against the pristine backdrop. The clean lines and classic color ensure that the focus remains entirely on the delicious treat it holds.
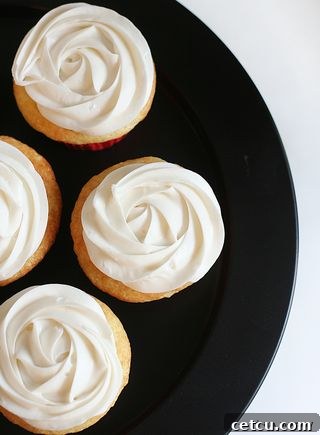
The black plate turned out even more beautifully than I had imagined, if I do say so myself. The semi-gloss finish truly gives it a sophisticated sheen, making it an ideal backdrop for vibrant desserts. It’s amazing how a simple coat of paint can elevate an ordinary item into something so striking.

And I’m absolutely smitten with my little cupcake stand! It’s the perfect size for individual servings or a small cluster of treats, adding a touch of charm to any dessert table or photography setup.
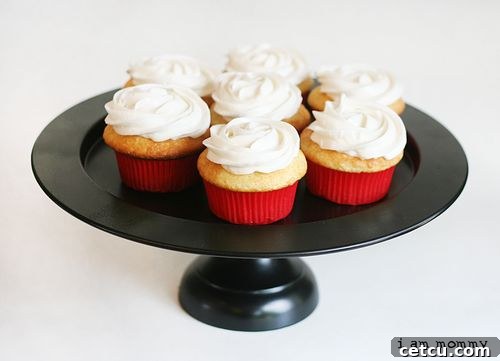
But my absolute favorite transformation is how the black plate and the small cupcake stand can be combined to create a multi-tiered cake pedestal! This versatility is key for a baking blogger, allowing for dynamic and varied dessert displays without needing to purchase multiple expensive props. It’s a game-changer for my food photography, offering different heights and angles to capture the beauty of my baked goods.
Now, a very important note regarding these DIY cake stands. Since they are simply spray-painted, I wouldn’t actually serve food directly off of them, especially not unpackaged items. These creations are primarily for decorative purposes or as photography props. If you absolutely wish to use them for direct food service, you would need to purchase a special, food-safe sealant or top coat, readily available at home improvement and craft stores. This product effectively seals the paint and ensures it’s safe for contact with edibles. Alternatively, for peace of mind, you can always place a doily, a piece of parchment paper, or even a smaller food-safe plate on top before adding your delicious treats. Safety first!
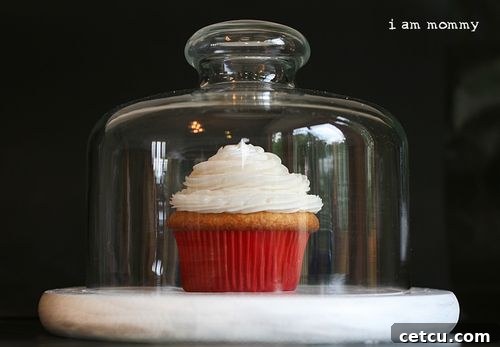
So there you have it! A wonderful example of something that I’m Lovin’ this week – the joy of upcycling and creating beautiful, functional items on a budget. This project perfectly embodies the “trash to treasure” philosophy, proving that with a little creativity and a touch of paint, you can transform everyday items into stunning pieces that enhance your home and your hobbies. I encourage all of you to explore your local thrift stores with a fresh eye; you never know what hidden gems you might uncover!
Thank you SO much, Cheryl, for having me over to share a slice of my creative world with your amazing community. It’s been an absolute blast! Next time you’re back, let’s definitely sit down and sample some of your refreshing Strawberry Lemonade drinks – it’s been quite warm out there, and I hear yours are the best! Until then, keep creating and finding beauty in unexpected places.