Lifestyle & DIY
How to Make a Girl’s Emergency Clutch
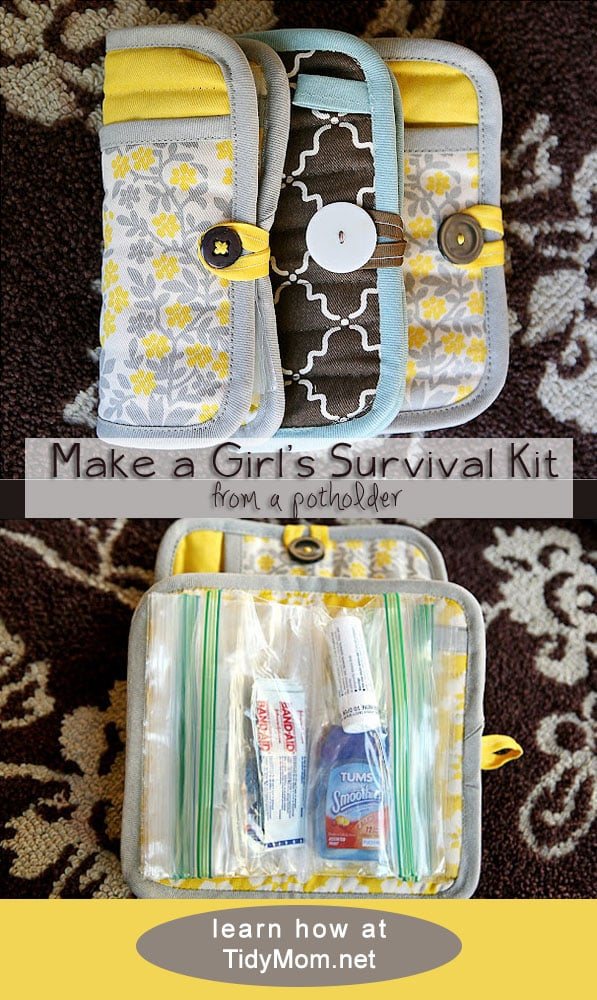
Make a girl’s emergency clutch! Grab a cute potholder and turn it into a survival kit every girl needs at cetcu.com!
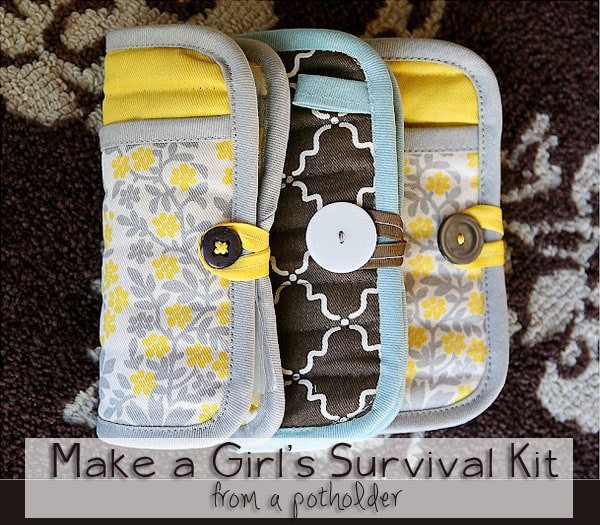
Boy do I have a treat for you today! The craftalicious girls over at eighteen25 are here show us how to make a Survial Kit. I can only imagine all fun I could have making these for my self and for all my girl friends!! Just think, bridesmaid gifts, Mother’s Day, birthday, Christmas! So cute!
Take it away ladies……………………
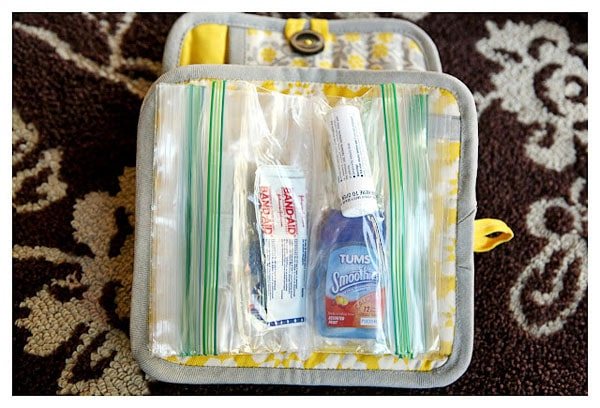 It’s perfect for your car or purse or boat or camper…..
so, let’s get started!
here’s what you’re going to need:
(just a few things really)
1. a square potholder (ours are from Target…the Dwell line)
2. a large button
3. about. 6″ grosgrain coordinating ribbon
4. 10 snack size zip lock baggies
5. tape
6. coordinating embroidery floss
7. sewing machine
It’s perfect for your car or purse or boat or camper…..
so, let’s get started!
here’s what you’re going to need:
(just a few things really)
1. a square potholder (ours are from Target…the Dwell line)
2. a large button
3. about. 6″ grosgrain coordinating ribbon
4. 10 snack size zip lock baggies
5. tape
6. coordinating embroidery floss
7. sewing machine
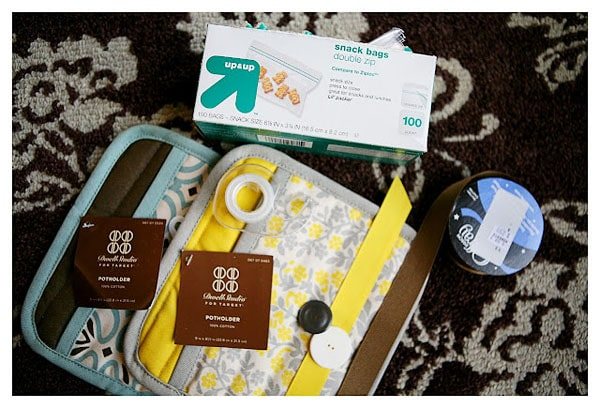 step 1: lay your potholder inside up (make sure your pocket is at the top, either on the inside of the wallet or the outside). place one zip lock on the right side (zipper toward the right edge) and place a piece of tape on the top and bottom (to keep the baggies from moving). place another zip lock on the left side overlapping the first (with the zipper toward the left edge) and tape the top and bottom. continue alternating sides and overlapping the bottoms of all ten baggies (5 on each side).
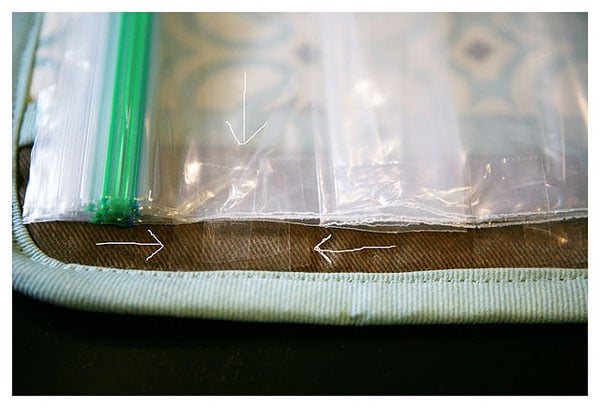 step 2: now that the baggies are securely taped in place, sew a zig zag stitch all the way down the middle of the potholder (which should also be down the middle of the overlapped baggies).
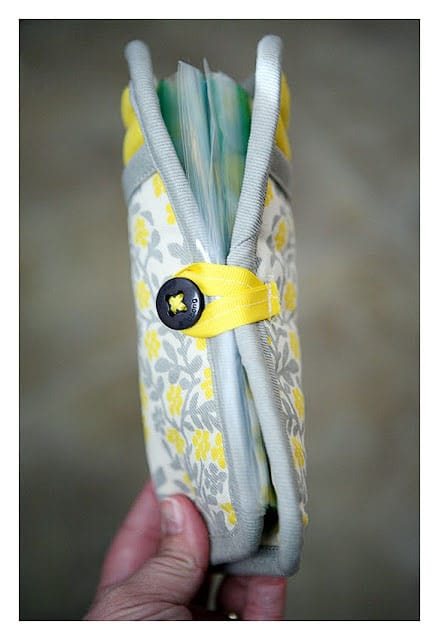
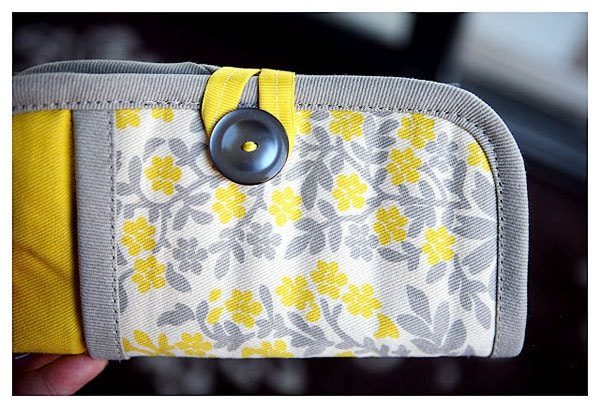
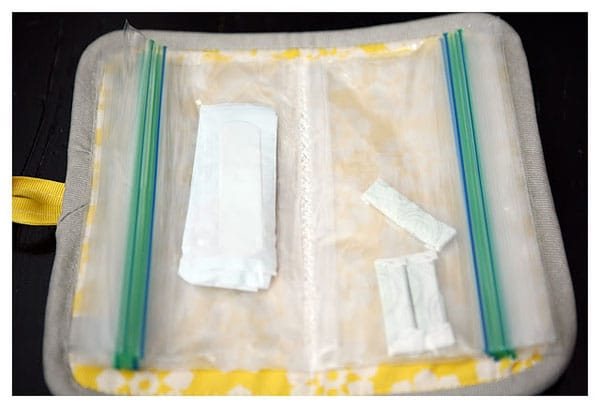 step 3: fold your potholder in half to make your wallet and find your middle to sew on your button. we used yellow embroidery floss…just to make a statement.
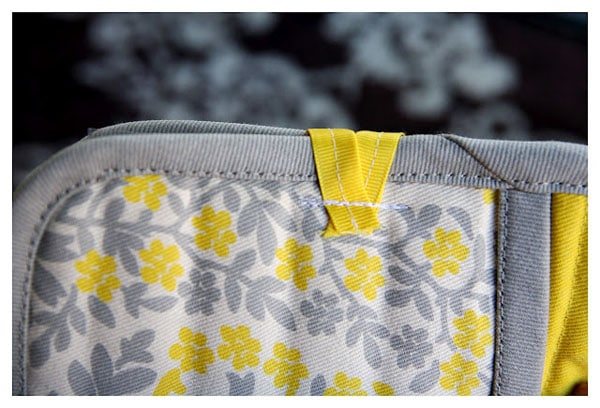
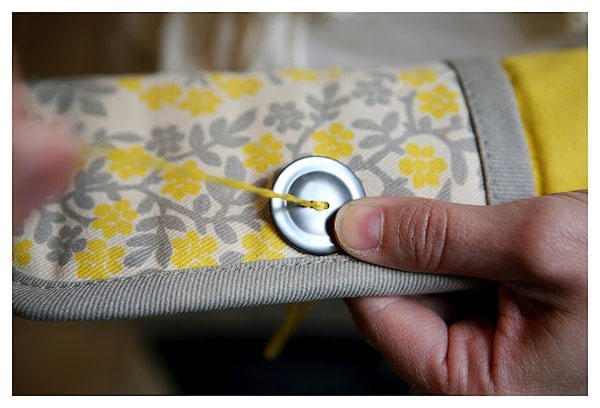 step 4: using your 6″ piece of grosgrain ribbon, fold in half lengthwise and sew all the way down. (you can use a thinner ribbon or even a hair elastic…this is just what we had on hand). then, on the backside of your wallet, make a loop with your ribbon large enough to fit over your button and sew down.
and…there you have it!
step 4: using your 6″ piece of grosgrain ribbon, fold in half lengthwise and sew all the way down. (you can use a thinner ribbon or even a hair elastic…this is just what we had on hand). then, on the backside of your wallet, make a loop with your ribbon large enough to fit over your button and sew down.
and…there you have it!
 Thanks so much for having us Cheryl!!
Hi there Cetcu friends!!
we are Jennifer, Jamie and Jodie, the sisters from eighteen25 . We are big fans of Cheryl’s and the Cetcu blog so we are very excited to be here today!! We don’t know about you but there are lots of days when we feel like we live in the car. from morning till dinner time….it’s go, go, go.If you can relate, go grab yourself a potholder.
you need one of these babies! it’s a girl’s emergency clutch! (cute potholder turned emergency wallet)Survival Kit

It’s perfect for your car or purse or boat or camper…..
so, let’s get started!
here’s what you’re going to need:
(just a few things really)
1. a square potholder (ours are from Target…the Dwell line)
2. a large button
3. about. 6″ grosgrain coordinating ribbon
4. 10 snack size zip lock baggies
5. tape
6. coordinating embroidery floss
7. sewing machine
step 1: lay your potholder inside up (make sure your pocket is at the top, either on the inside of the wallet or the outside). place one zip lock on the right side (zipper toward the right edge) and place a piece of tape on the top and bottom (to keep the baggies from moving). place another zip lock on the left side overlapping the first (with the zipper toward the left edge) and tape the top and bottom. continue alternating sides and overlapping the bottoms of all ten baggies (5 on each side).
step 2: now that the baggies are securely taped in place, sew a zig zag stitch all the way down the middle of the potholder (which should also be down the middle of the overlapped baggies).
step 3: fold your potholder in half to make your wallet and find your middle to sew on your button. we used yellow embroidery floss…just to make a statement.
step 4: using your 6″ piece of grosgrain ribbon, fold in half lengthwise and sew all the way down. (you can use a thinner ribbon or even a hair elastic…this is just what we had on hand). then, on the backside of your wallet, make a loop with your ribbon large enough to fit over your button and sew down.
and…there you have it!
Thanks so much for having us Cheryl!!
About the Author:

born + raised in vegas. These three sisters grew up in a little brick house on the east side of town. The number hammered onto their mailbox was 1825.
Visit eighteen25 for three fun, crafty sisters who love to create, share fun tutorials and free printables.
Blog
Like us on Facebook
Craving more? Sign up for the Cetcu newsletter to stay on top of what’s new right to your inbox! And stay in touch on Facebook, Twitter, and Pinterest for all of the latest updates